Creating a Jack-O’Lantern Carving with Layer Styles
Written By Mike Hoffman – Mike On Twitter – On The Web
With Halloween imminent, here’s a quick way to create spooky, scary or silly Jack O’Lanterns starting with a simple image of a pumpkin, and a cutout shape of the face you want to use. We’ll create the carving, and then add a few lighting effects to give it that extra pop, and you’ll be ready to add it to your holiday project!
Without further ado, then, let’s get started:
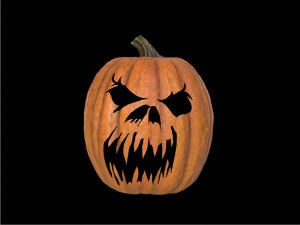
STEP ONE: I’m starting with this image of a pumpkin from iStockPhoto. I’ve extracted the pumpkin from its background, and placed it on its own layer, called “Pumpkin.” I’ve added a new solid black background below the Pumpkin layer.
STEP TWO: Now, create a new layer, called “Face.” On this layer, we will place our spooky face shape – eyes, nose and mouth, or whatever you like. I’ve drawn this with the pen tool and filled with black color, but you can draw it with the brush, use clip art, the sky is the limit. Just make sure you have the face on its own layer, and it is filled with a solid color.
STEP THREE: Duplicate the Face layer two more times, to create “Face copy” and “Face copy 2.” Turn both these new layers off, we will use them later.
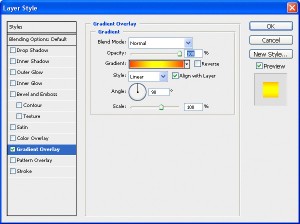
STEP FOUR: Working on the “Face” layer, click the “Add a layer style” icon at the bottom of the Layers panel, and select “Gradient Overlay.” From the gradient picker, choose the “Orange-Yellow-Orange” gradient, and make sure all your settings are just as shown below. DO NOT close the Layer Styles dialog yet.
STEP FIVE: Click on “Bevel and Emboss” to add this style. Set the parameters to Style: Inner Bevel, Technique: Chisel Hard, Direction: Down, Size: 8 (or more – adjust to taste), and change the highlight mode Opacity to 13%. DO NOT close the Layer Styles dialog yet.
STEP SIX: Click on “Contour,” and ensure the settings are as shown below. DO NOT close the Layer Styles dialog yet.
STEP SEVEN: Click on “Inner Shadow,” and adjust the parameters if necessary to the defaults shown below. DO NOT close the Layer Styles dialog yet.
STEP EIGHT: Click on “Inner Glow,” and ensure the settings are as shown below.
STEP NINE: NOW you can go ahead and click “OK” to exit the Layer Styles dialog box. Your Jack O’Lantern should look like the image below.
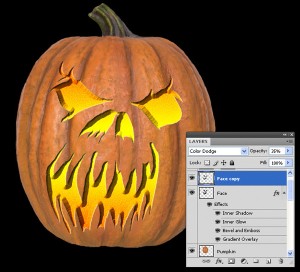
STEP TEN: Now turn on the visibility for “Face copy.” The image and layer stack should be as shown below:
STEP ELEVEN: Choose Filter > Sketch > Reticulation. Adjust the settings as shown below.
STEP TWELVE: Change the Blend Mode for “Face Copy” to “Color Dodge,” and set the Opacity to 35%.
Nice! You can leave it as is, or continue on to add a bit of lighting for that extra impact:
STEP THIRTEEN: Let’s turn on “Face Copy 2” and Press Ctrl-U (Cmd-U on a Mac) to bring up Hue/Sat. Make the adjustments shown below to change the color from Black to pale yellow.
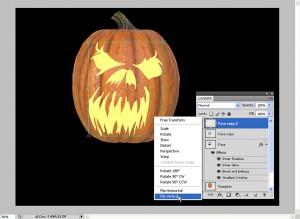
STEP FOURTEEN: Press Ctrl-T (Cmd-T on a Mac), right click in the transform boundary, and choose “Flip Vertical.” Drag the upside down face below the pumpkin to the black area.
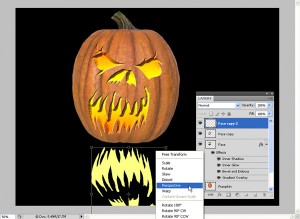
STEP FIFTEEN: Right click again in the transform boundary, and choose “Perspective.” Drag the lower handles apart to add the effect of the light coming towards you. When you’re satisfied, hit Enter to accept the transformation.
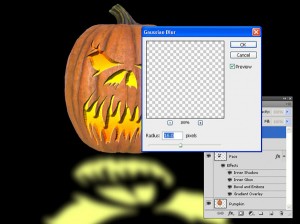
STEP SIXTEEN: Select Filter > Blur > Gaussian Blur and to soften the light. I used a setting of 16 pixels.
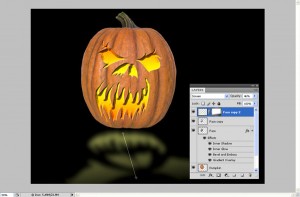
STEP SEVENTEEN: Add a layer mask, and with a White-to-Black gradient, drag as shown to provide a bit of a fade effect to the light. If you don’t get it right, you can drag a new gradient repeatedly until it looks right.
STEP EIGHTEEN: Your Jack O’Lantern is ready! You can continue adding other lighting effects, scary props, and other Halloween fun images as desired!








Leave a comment