Beauty in Decay – Repairing a Photo with Photoshop
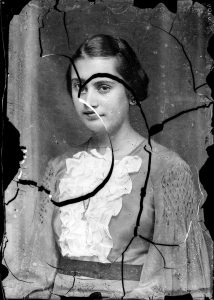
 I love the website Mashable. I have it in my Facebook feed so I can see what fun little stories they post. The other day, I saw an article about old photos called Beauty in Decay – you know that grabbed my attention, right? The photos in question were badly damaged (even better for me!), which they felt made them “creepy”. I really didn’t care about that perception and, frankly didn’t even read it; I was interested in the pictures!
It’s a funny thing about me; if I see a damaged picture, sometimes I just really, really want to fix it. It’s almost like my fingers start tingling for the Wacom pen so I can get started. It doesn’t happen every, single time, but when it does good things usually happen. So, I decided to take a little time and fix one of them…
About 6 (working) hours later, I was done with the first one I picked. It wasn’t one of the worst, but it sort of spoke to me.
To start the process, I made a duplicate copy. I then used the Quick Selection Tool; first remove the black areas in the cracks. Then, I separated the pieces of the photo and then used Ctrl (or Cmd) + J to put the pieces on their own layer.
Now the “grunt” work commenced. The stitching and sewing together so the cracks, breaks and lines are, hopefully, invisible to the viewer, and removing all the specks and spots. When you have this many specks and spots, give the Dust and Scratches filter a try (Filters > Noise > Dust and Scratches). You’d be surprised how well it can work… or not. Sometimes it does a great job at removing the crud, and sometimes not so well.
After the repairs were done, I made a new layer, encompassing all the work (Ctrl + Shift + Alt + E or Cmd + Shift + Opt + E) and used a medium Gaussian Blur over it. It’s okay to go as crazy as you want with the blur when you have it on its own layer like this because you can lower the opacity as much as you need to get the result you want. This step is to smooth the texture of the image, and the work. Because, really people, when you take this many specks and cracks out of an image, it’s not all going to be super smooth, or, in some cases, it will actually be smooth which looks odd with the texture in the rest of the image, so smoothing makes it more consistent.
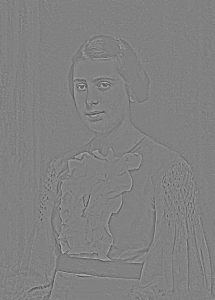
Conversely, after the blur, I went back and sharpened. The blur makes it a little too soft, so a little definition needs to be brought back in. The sharpening, in this case, was a two part process. First, I selected the last layer, the blur layer, and repeated the Ctrl + Shift + Alt + E or Cmd + Shift + Opt + E combination process. With the combo layer selected, I opened the Camera Raw Filter (Filter > Camera Raw Filter) and pushed the Clarity slider up. In this case, it was up to around 60%, but there’s no set number, it’s just by eye, mostly. Camera Raw Clarity probably won’t make something so soft into a nice, sharp image, but it will improve it to a point, especially as far as toning is concerned, but in this case it needed a little more. For that, I went to the good, old standby, the High Pass Filter.
Other than having to reconstruct a part of one eye, and most of the nose, there was nothing overwhelmingly difficult about repairing this image, despite its daunting initial appearance. The image, as I restored it, has taken on a slight painterly look. I don’t mind that; I know that old, damaged images won’t ever look new again, so sometimes you simply do the best with what you have.
There are many, many images like this in the public domain that are fantastic practice if you want to improve your restoration skills. You can find many at the Library of Congress online. They range from being in very good shape to incredibly damaged, so there’s something for every skill level. Just try to keep to what you really feel your skill level is, or just a little above that level when you’re looking to improve. Taking on too much of a challenge could result in your feeling discouraged.


Leave a comment