Photoshop Text for Design
I know its a bit late but I thought I’d show you a neat little way of making a Halloween poster…!
Step 1.
Download and install the font Thickhead from http://www.dafont.com/thickhead.font and the Spooky Trees Brush from http://littlephotoshopofhorrors.co.uk/brushes/
Step 2.
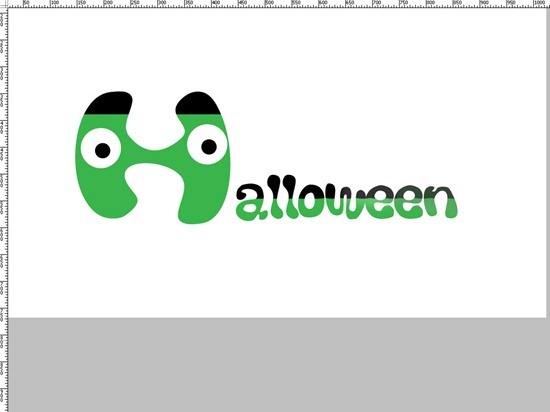
Open a new Photoshop document I used a 1024×768 sized one. Select the Text Tool, set the Font to Thickhead and set the size to 24 pixels. Type “Halloween”, we then highlight the H and change the font size to 72 pixels.
Step 3.
Make a new Layer and Clip it to the text layer using Control, Alt & G. Select the Brush Tool and set the foreground to #39b54a, next paint the bottom 3/4’s of the word Green.
Step 4.
Next we make some eyes, select the Ellipse Tool, set the option to Shape Layer and colour to white. Make a circle. Make a second smaller circle but change the colour to black, this will be the pupil. Place the pupil over the white to create the 1st eye. Place this over the left part of the letter H, repeat and place over the right hand side.
Step 5.
Make a new Layer below the eyes and name it eye shadow. Select the brush tool and select a soft edge brush, set the opacity to 10% and colour to black. Trace under the eyes to add depth to the face.
Step 6.
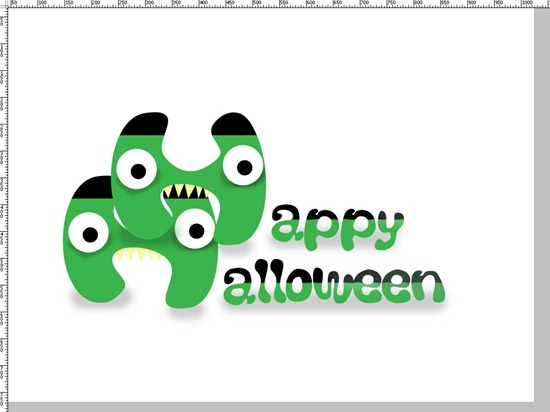
Select the pen tool and set the foreground colour to #fff799. On a new layer under the text Layer make a few jagged teeth. Make another new Layer under the Text and add a few shadows under the letters.
Step 7.
Group the layers we just made into a new folder by selecting all the layer (except the background layer) in the Layer Palette and pressing Control & G.
Duplicate the group by dragging it to the New Layer Icon in the Layer Palette. Move the new text above the original Text and change the Text to read “Happy” (just change the letters after the H). Also delete some of the shadow under the letters to reflect the shorter word.
Step 8.
Move the new Happy Group over the top of the Halloween group so it looks like the H from happy is trying to eat the H from Halloween.
Step 9.
Make a new Layer above the Background Layer and fill it with Black (Edit>Fill>Black) lower the opacity to 70% making it grey. Make another new Layer above the Layer we just created, set to foreground Colour to Black and using the Spooky Trees brush add a couple of trees.
Step 10.
Press D on your keyboard to set default colours, next add a new Layer then use Filter>Render>Clouds. Add a Layer mask to this Layer and use a Radial Gradient (white to Black gradient from the top of the Document) on the Layer Mask to remove some of the clouds.
Step 11.
Finally I made a Grave stone using the Pen Tool, the Moon using the Ellipse Tool and added some grass using a Dune Grass Brush.
That’s it hope you enjoyed it 🙂
I’m also doing Movember this year to raise money for Men’s Health – if you’d like to sponsor me (any amount will be gratefully received) and be in to win a Sock Monkey made by me then please visit my mo site here – http://mobro.co/simonrudd


Very good Halloween tutorial.
Nice post. thanks
WOW, excellent typo effect and design.
Helpful post thanks for sharing
Helpful tutorial thanks for sharing
Great tutorial thanks for sharing