Improve Quick Selections with Photoshop Refine Edge
The Refine Edge Command
Last month we took a look at the Quick Selection tool as a means of rapidly defining a selection, just region by brushing over it. Today we’ll examine how the Refine Edge command (also available as the “Mask Edge” command when working with layer masks in the Properties panel) can further improve our selections. While Quick Selection is fast and useful for selecting items that contrast strongly with surrounding elements in the frame, sometimes your subject may blend in with other elements.
For these cases we can use Quick Selection to make a reasonable first pass at creating the selection shape, then use the Refine Edge command to further perfect it. Last time we used a high contrast close-up of a flower. Everything contrasted: the brightness, the colors, the level of sharpness between foreground and background. This time let’s try a trickier subject. We’ll use a large boulder between two waterfalls as an example of an object whose edges are both contrasting and blending with different elements in the shot. It contrasts sharply with the bright water spray, but not with the rocks above it or in front of it.
The initial selection is shown below (click to see full size images).
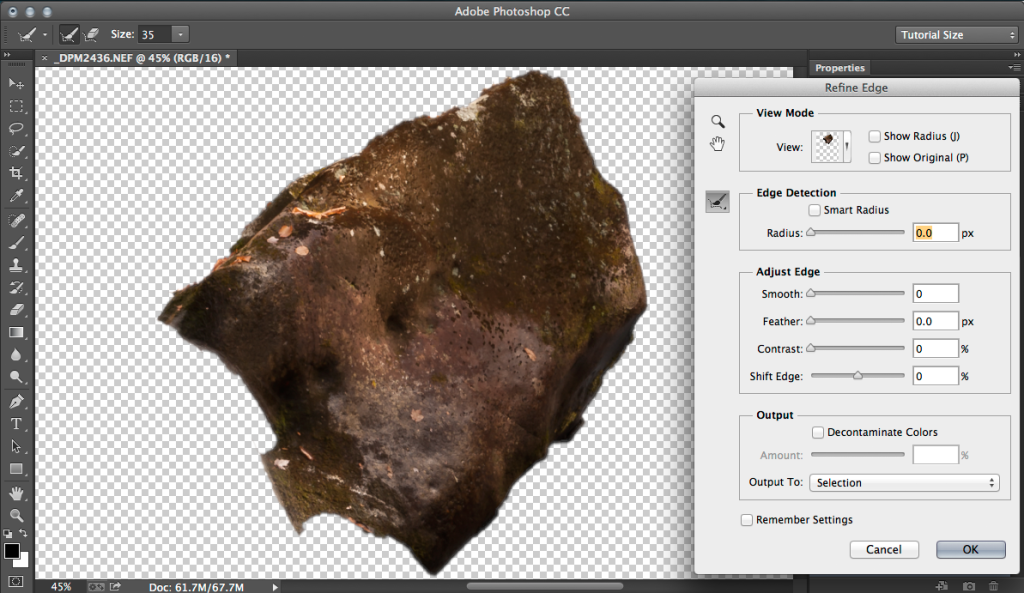
As you can see it sometimes can take 15 or 20 steps of adding (click) and subtracting (Option / Alt – click) small bits from the edges of the object, just to get to a point where the basic outline is correct. Now we’re ready to take the next step. Via the Options Bar click the Refine Edge button. It will open a dialog with several controls, while masking out items in your main preview which were not selected prior.
You can use the View pop-up menu in the View Mode area (top) to select what type of mask preview you get. “On White” (shortcut W) is the default, and “On Black” (shortcut B) is another commonly used option. But here, since we have nearly white details on one side of the rock (waterfalls) and nearly black on another (shadows), I’ll choose “On Layers” (shortcut L) to show unselected pixels as transparency.
The first step to getting a better selection is to check the Smart Radius option, then drag the Radius slider out until the pixel value is approximately the distance between your selected edge, and other objects next to it that might be partially selected (and which should not be). Usually a value of 5 to 15 pixels works well if you’ve been precise in your initial selection and removed the obvious problem areas. Here I settled right in the middle, at 7.5 pixels.
From this point you should be able to see the entire edge or perimeter you’re trying to select, with some faint “stragglers” or extra pixels that are partially selected / visible along the periphery of the object. What you do next will depend on each case. If you find that there aren’t any obvious areas you need to remove or add with the Refine Radius Tools (see the pop-up menu just to the left of the “Edge Detection” settings — just brush along the edges where you see selection errors and wait for a second or two afterward), you may be able to get a near-perfect selection with just a couple extra steps!
First, bump out the Contrast slider about half way and see what happens. If most or all of the semi-transparent edge pixels disappear and you’re left with the outline of your subject, you’re almost done! If it doesn’t change much or you’ve still got some stragglers, you may need to use the Refine Radius tools a few times to get the right result (especially with things like hair or clothes with a fuzzy texture instead of smooth one — patience is sometimes required). Here the initial Contrast adjustment worked well, so I just bumped it back to 40 pixels. It helps to experiment; there is no “magic value” that works equally well on most images.
The final step is to use the Smooth setting to make sure you don’t have any jagged edges. You may want to zoom in to at least 50% to make this judgement, especially when working with higher resolution images. You can zoom in and out freely in the Refine Edge “mode” using standard Photoshop keyboard shortcuts. Here I used a Smooth value of roughly 20. Be aware that using too high a Smooth value can “clip” small details along the edge (rounding it off too much and giving it an unnatural appearance).
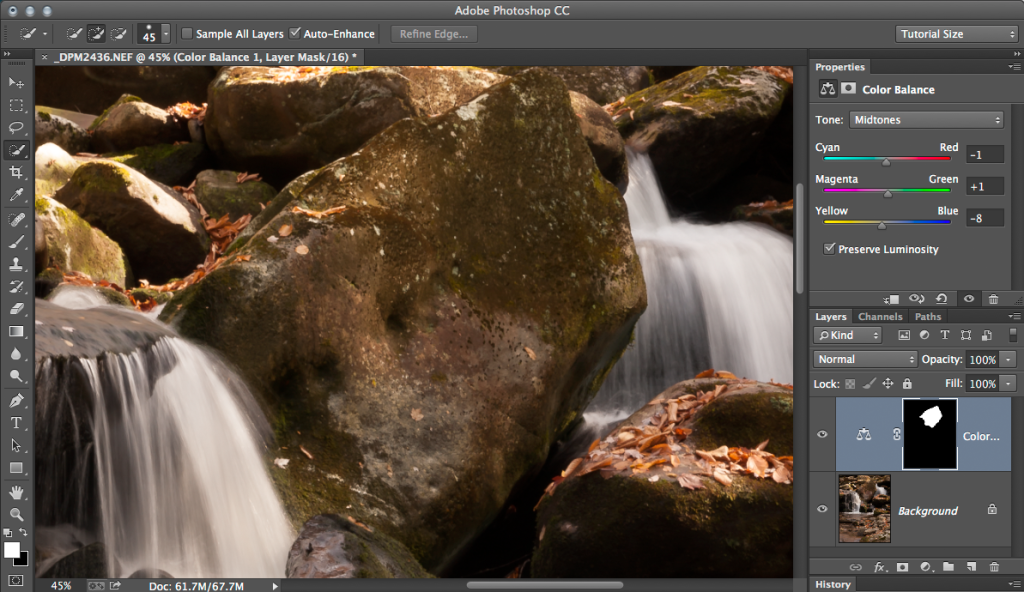
When you’re finished, click OK and you’ll be taken back to view your finaliz selection. This then can easily be turned into a layer mask, when opening an Image Adjustment (as long as the selection remains active when you choose the adjustment, it’s automatic!). Here I wanted to take some red tinge off the rock and make it more of a yellow glow, so I used the Color Balance adjustment layer to make that happen. Notice the layer mask in the Properties panel.
Hopefully this provides a sense for how easy it can be to create a selection that truly follows every nook and corner on your subject, while maintaining a smooth contour, all of which can make the process of retouching or adjusting certain details a lot easier. Give it a go; if you haven’t used it much or discovered it yet, you’ll find Refine Edge to be one of Photoshop’s most powerful tools.


Leave a comment