
Photoshop Photo Restoration Assistance, Adam
There was a post on the G+ Photoshop and Lightroom Users group last week, from member Adam Holloway, along with this before and after photo restoration:
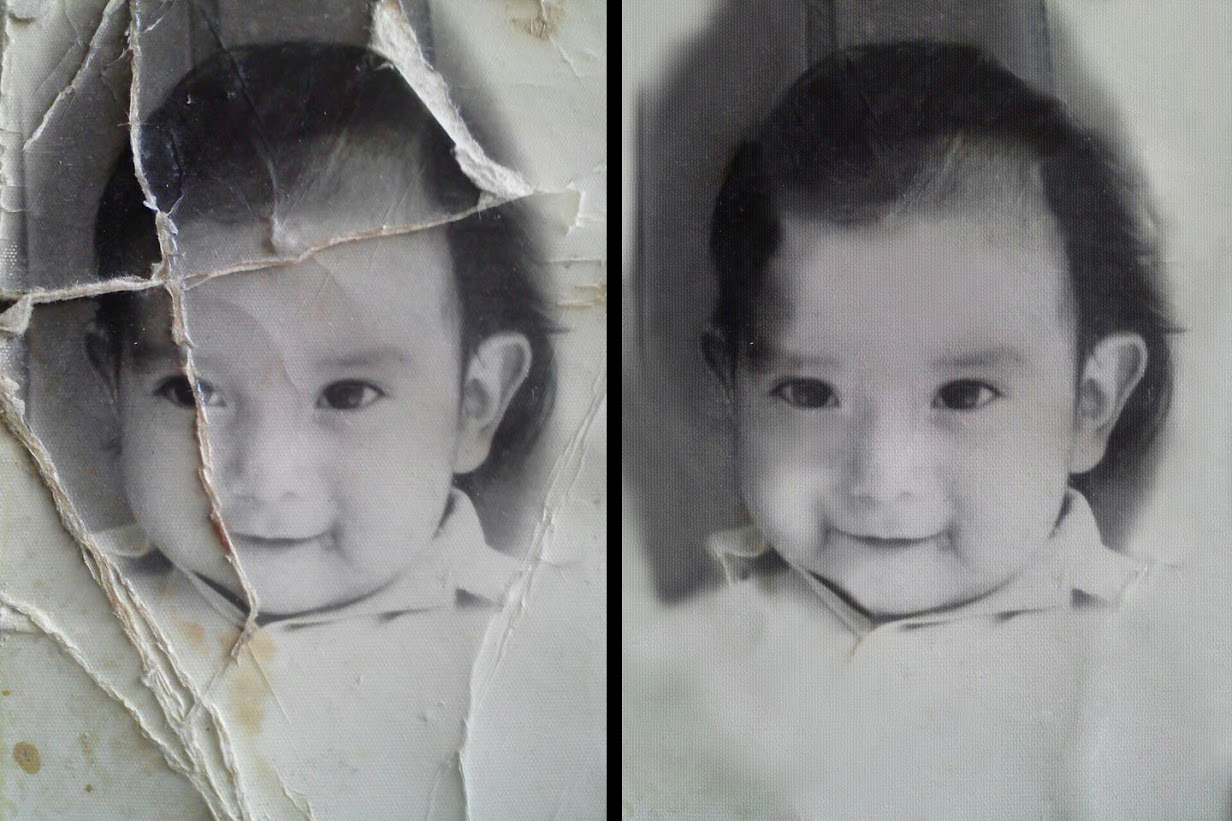
He wrote that this was his “first real attempt” at digital photo restoration, and asked for tips on how to make it better. My first thought upon looking at it in depth was “Great job, Adam!” Especially since, unbeknownst to him, he’d actually made it even harder on himself, the way he’d done the work! More on that, later, though. I don’t often give suggestions on how to improve on a restoration unless I’m very sure the person asking really wants to know. I’ve been in the situation too many times when someone asks for feedback, but all they really want is for someone to say “great work!” without any constructive criticism. Ultimately that’s not helpful and, in my opinion, prevents a person’s skill improvement. Adam genuinely seemed to want to hear input, though, so here are my suggestions, and the areas, circled:
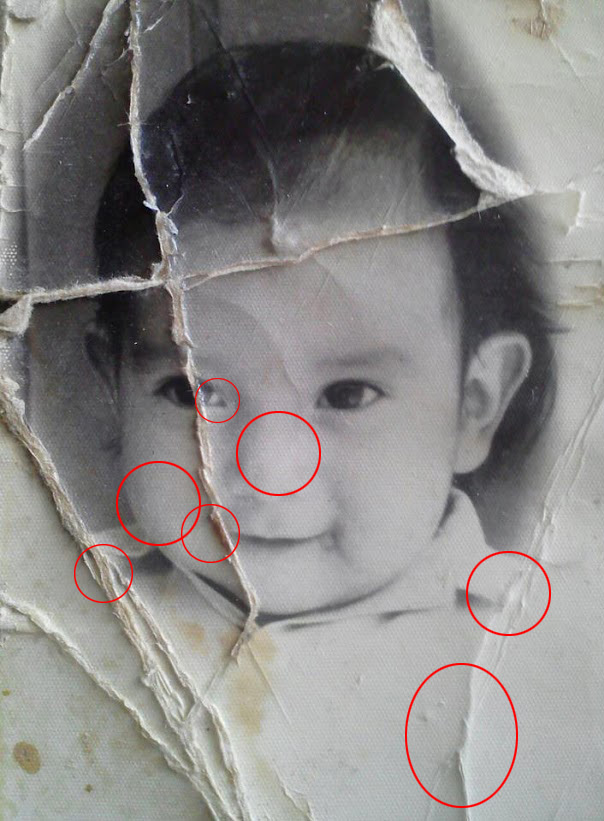
First and foremost, stay true to the original. Don’t add to or take from anything that’s visible if you can possibly help it. That’s most important. That being said, let’s first look at the eye. If you’ll look at the original, you’ll notice there’s a bit more of a brighter, whiter area on the part of the sclera, or white of the left eye (our left, the child’s right) near the nose. Leave that original area intact and make it a little whiter. Also, when the pupil is “borrowed” from one side to the other, a common mistake is not changing the “light” in the eye. The lights in the eyes are all coming from one source, so they need to match; if the light is on the lower right in one iris, it needs to be on the lower right of the other eye, as well.

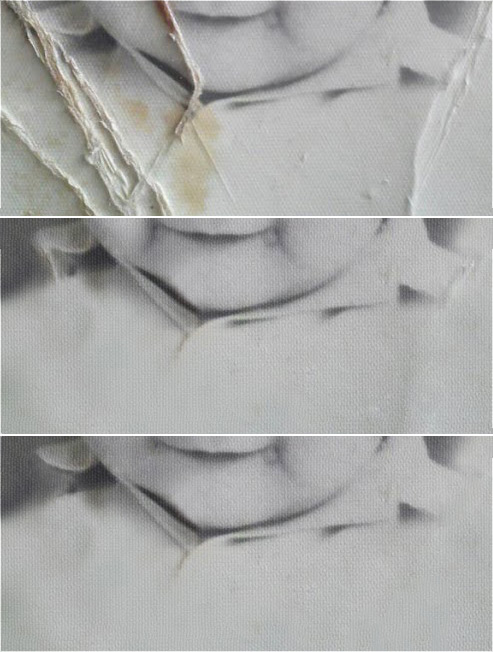
Now let’s move down to the corner of the mouth. I know there’s a big rip through that corner, but there’s no indication there was just deep lines on that side of the mouth. It’s natural to want to mimic the other side when doing reconstruction work like this, but faces are rarely symmetrical and copying one side to the other more often just looks odd. My suggestion in this instance would be to lighten the shadows on that side of the mouth to give a more natural appearance.

Moving up a bit to the cheek, again, look at the original. So much highlighting of the cheek on the left side makes it stand out more and changes the entire appearance of the child. Keep it more subdued, like in the original.

Now we’ll move to the three lower circles, which are all pieces of the same suggestion: Be careful to get all pieces of the repair. There are still some lumps and bumps left, even a couple remnants of the rips themselves. Take a good look at, for instance, at how a collar would actually fall. Look on Google for images matching the search “popped collar”, or something. Sometimes you have to think out of the box to get the research material you need!
And now for the last circle, the one I put over the nose. The original image is much smoother. The texture of the “after” image may have been added by sharpening, but there are distinctive marks on the after image, especially on the bridge of the nose, left by cloning, or repair. That’s something you have to always be watching for, because it’s easy to let happen.

One tip to help prevent this is to never work on a highly textured image. If the image is soft” to begin with, do all the repair work before you sharpen it. If it’s highly textured, soften it, either using Gaussian blur (lightly) or software such as Nik’s Dfine 2.0, before you do the work, then re-sharpen as much as you can, afterwards.

As I said in the beginning, this is a very good effort, especially being a “first real attempt”, Adam, and I know you’re only going to get better and better! I can’t wait to see more of your work in the future!


Very constructive, certainly helped me!
First of all thank you very much for the assistance and tips, I never gave any thought about the reflection in the pupil after I borrowed it from the other eye, that will defiantly be on my list of things to look out for. The collar I really didn’t know how to handle, from now on Google will be my friend. Looking at your final product vs mine I know I have a lot of practice to do before I get to your level. Thanks again for the tips.
Thanks Janine this is a very good effort. the final photo looks fantastic.
A little late to this article, but what a great tip about blur before editing and sharpening after, never heard of that before but makes such sense. Thank you.