
Working with Smart Objects and transformations in Photoshop CS6
Hello everyone.
This month I thought I’d highlight a feature of Smart Objects in Photoshop and, to an extent, Photoshop Elements that often gets overlooked. Aside from the ability to scale and distort layers without loss of quality and change the contents simultaneously across multiple copies, another useful trait is that they remember the previous distortion settings; image warp in particular. This is incredibly useful for designers, as it makes it far easier to experiment with idea or creating photo montages, where objects need to be placed into a scene in perspective.
Let’s begin with a simple perspective transform.

Figure 1 shows a box and balloon decal on separate layers. In figure 2 we’ve used Free Transform (Cmd+t/Ctrl+t) to distort the balloons to fit the side of the box in perspective (the distortion is highlighted in green for clarity). All good so far.

After committing the distortion we’ve gone back into Free Transform (figure 3). Although the balloons are in perspective, the transform bounding box is now squared off to match the new dimensions of the layer. If we try to change the balloons to fit the other side of the box (figure 4), the new perspective simply doesn’t work.
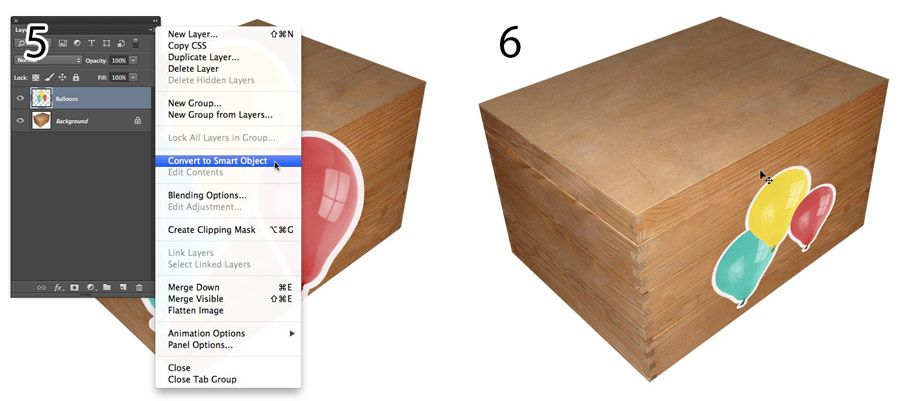
Let’s start again but this time convert the balloons layer to a Smart Object (figure 5). We’ll make the same transformation as before and commit the changes (figure 6).
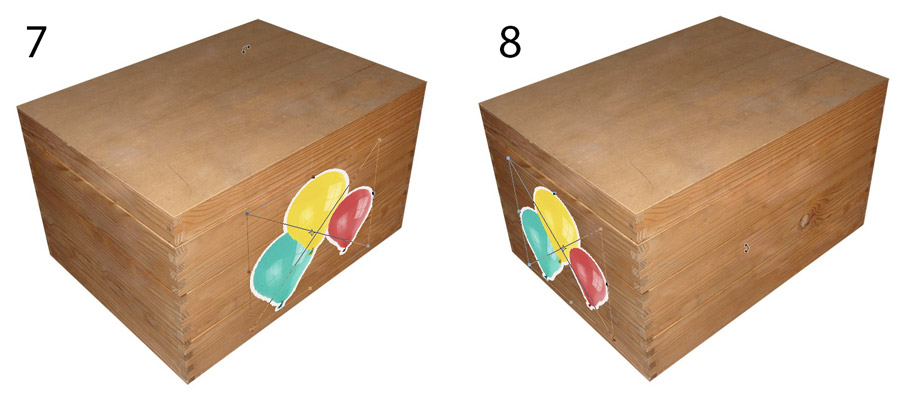
This time when we go back into Free Transform the bounding box remains exactly the same as when we committed the distortion (figure 7). We can easily alter the perspective to fit the other side of the box (figure 8).
In our second example we’ll demonstrate the benefits of using Smart Objects with image warp.

In figure 9 we’ve started by going into Free Transform on this image of an elephant; again, it’s a standard raster layer. In figure 10 we’ve switched to image warp by right-clicking inside the bounding box selecting its entry; we’ve applied the Fish preset from the menu in the Options bar.

After committing the changes (figure 11), we’ve gone back to image warp (figure 12). As we saw with the balloons, the bounding box now becomes squared off; no amount of editing will give our elephant its proper form again.
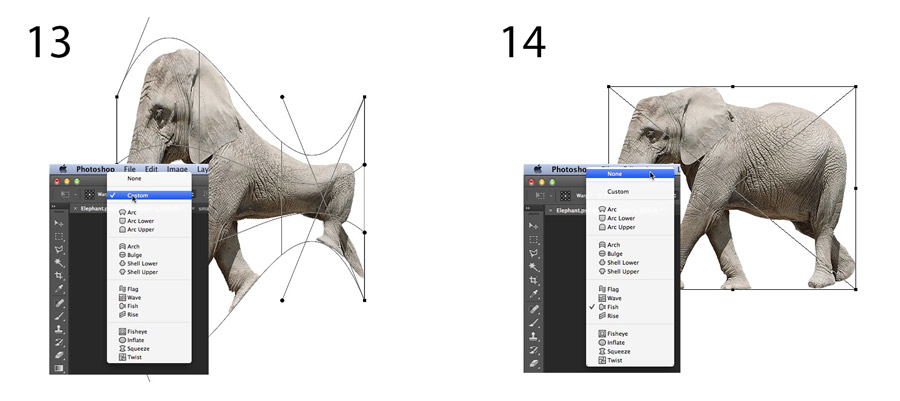 After going back and converting the elephant to a Smart Object, we applied the same warp as before and committed the changes. When we return to image warp, the boundary has retained its shape. If we go back to the presets, we can choose the Custom setting (figure 13); with a little bit of tweaking, we could return the elephant to its correct shape. Even easier, though, is to select None from the warp presets (figure 14); this instantly snaps the layer back to its original dimensions.
I hope you have found this useful.
Take care and see you all next month.
David


Un grand merci ces conseil me sont très utile et vos tutoriel son génial.
Dan