Creating a Marble Texture Effect in Photoshop and Photoshop Elements
In this tutorial we’re going to conjure a marble-style texture in Photoshop and Photoshop Elements. This can be used for anything from 3D textures to creating a fancy background for a web banner; as we have done here.
The effect hinges around the Clouds filter; yes, the highly versatile filter that’s great for creating anything other than clouds. By combining this with further filters, adjustments and layer blend modes, we can achieve a fairly realistic texture quickly and easily. Let’s get started.
1. We’ll begin by creating a new document: go to File > New, or use the keyboard shortcut Cmd+N (Mac) or Ctrl+N (PC). We’ve set the dimensions to 800×800 pixels in our example. Set the Background Contents to White. Click OK to create the document.
2. Create a new layer by choosing Layer > New > New Layer, or by clicking the New Layer icon in the Layers panel. We can also use the finger-twisting shortcut of Cmd+Opt+Shift+N or Ctrl+Alt+Shift+N.
3. Make sure the default black and white colour palette is selected by clicking the default palette icon in the toolbox or with the keyboard shortcut D. Now go to Filter > Render > Clouds. This gives us a random set of tones to work with.
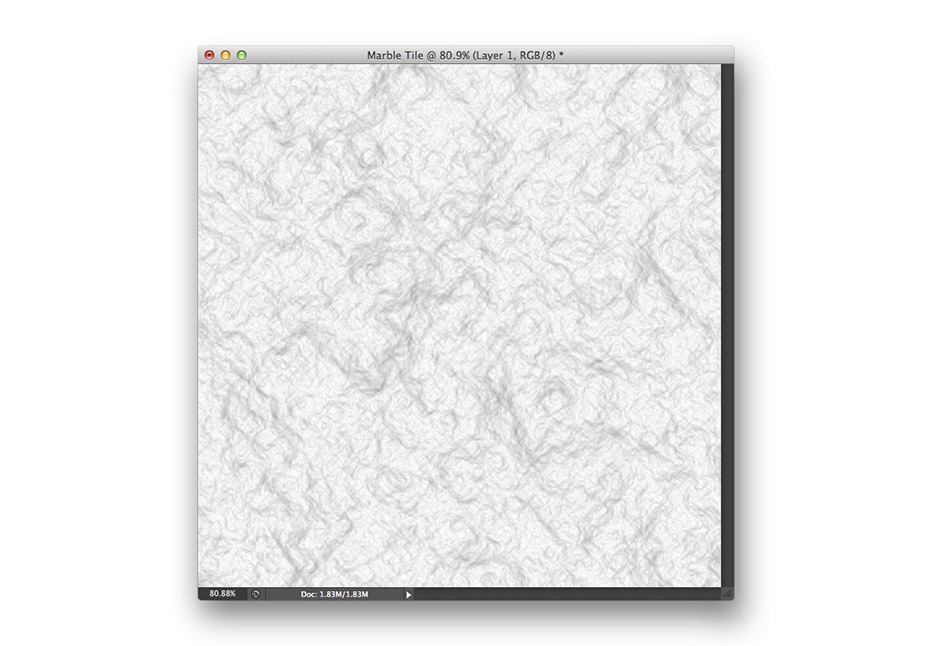
4. Next, select Filter > Stylize > Find Edges. This gives us network of light veiny lines based on the contrasting borders of the tones in our cloud texture.
5. The result is a little too feint. We’ll boost the darker areas. Go to Image > Adjustments > Levels. Drag the Shadows slider from the left to around the halfway point. This increases the contrast smoothly across the image.
6. We need to soften the effect to give us the cloudier variance that we find in real marble. Go to Filter > Blur > Gaussian Blur. Set the Radius to around 4-5 pixels.
7. Now we’ll add the more defined veins that typify the classic marble appearance. Create another layer at the top of the stack. Run the Clouds filter again. Now go to Filter > Render > Difference Clouds. We end up with a blotchy effect with black divisions.
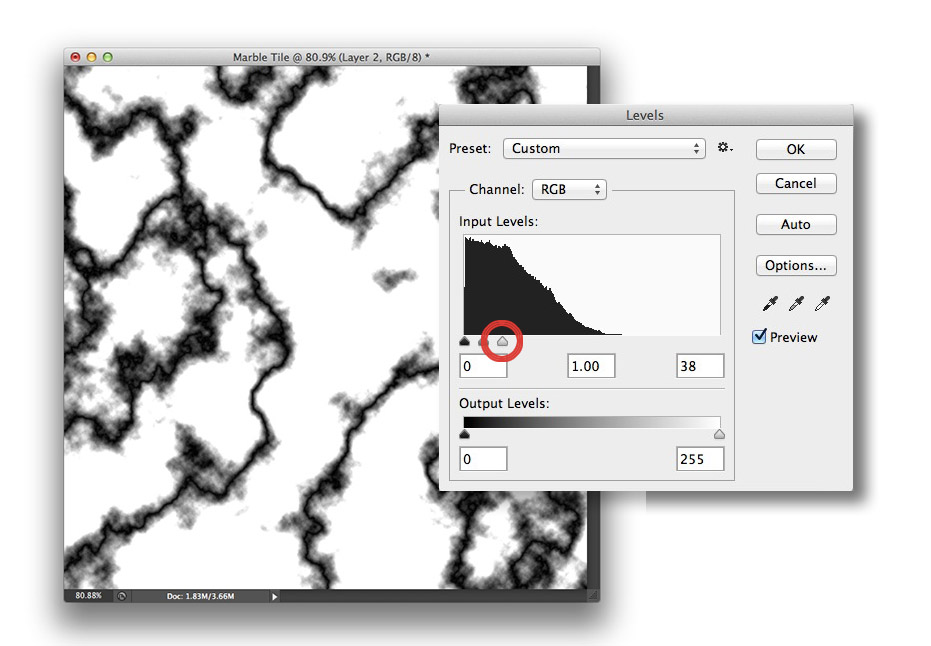
8. Open the Levels adjustment again. This time drag the Highlights slider from the right over to the left. This bleaches out most of the lighter areas, leaving the darker veins far more contrasted.
9. At the moment we can’t see the softer texture beneath. Set the layer blend mode to Vivid Light. This has the effect of sharpening up the veins but we can also start to see the layer below. Lower the opacity to around 30-40%. We now have a nice blend of the two textures.
10. We’ll soften the veins very slightly so they blend with the halos around them. Open Gaussian Blur again. This time set the radius to around 1-1.5px.
11. As a final step, we’ll create a merged copy of the effect. To do this, press Cmd+Opt+Shift+E or Ctrl+Alt+Shift+E. This allows us to work on it as a whole without losing our original layer structure.


Very clear, love it!
bonjour je vous remercie beaucoup pour se tutoriel très intéressant;
ps continuer vous êtes génial!
Dan
Hi David,
I thought the creation of the marble texture effect was very impressive, however, for me the realistic “sculptured” effect on the Trajan Pro font was even better. Try as I may, I have been unable to reproduce this in the Layer Styles menus. A pointer in the right direction would be very much appreciated.
Thank you
Wilmar
Very usefull! Thank you so much.
Very nice! Thank you!
How can I change the color? I tried blending a color layer but it doesn’t look good.
Thank you so much for this tutorial! I absolutely loved the outcome and can’t wait to use the marble image I created as wallpaper on my laptop 🙂
This is so helpful! I tried it with color and layered the images on top of each other with different opacity levels. Going for a geode effect and I got it, thank you!