Easy Movie Look in Photoshop With LUTs
Making images look like movie stills has always been a favourite of many, but with LUTs, or Look Up Tables, we can add a cinematic look in a click or two.
Step 1 :
With an image open, in this case #35090415 – Couple in sports car by Monkey Business at Fotolia, the first thing to do is crop it to a film ration of 16:9
Adding a Look Up Table is easy, select the Adjustments panel or choose Window > Adjustments if it isn’t already on the screen.
Step 3:
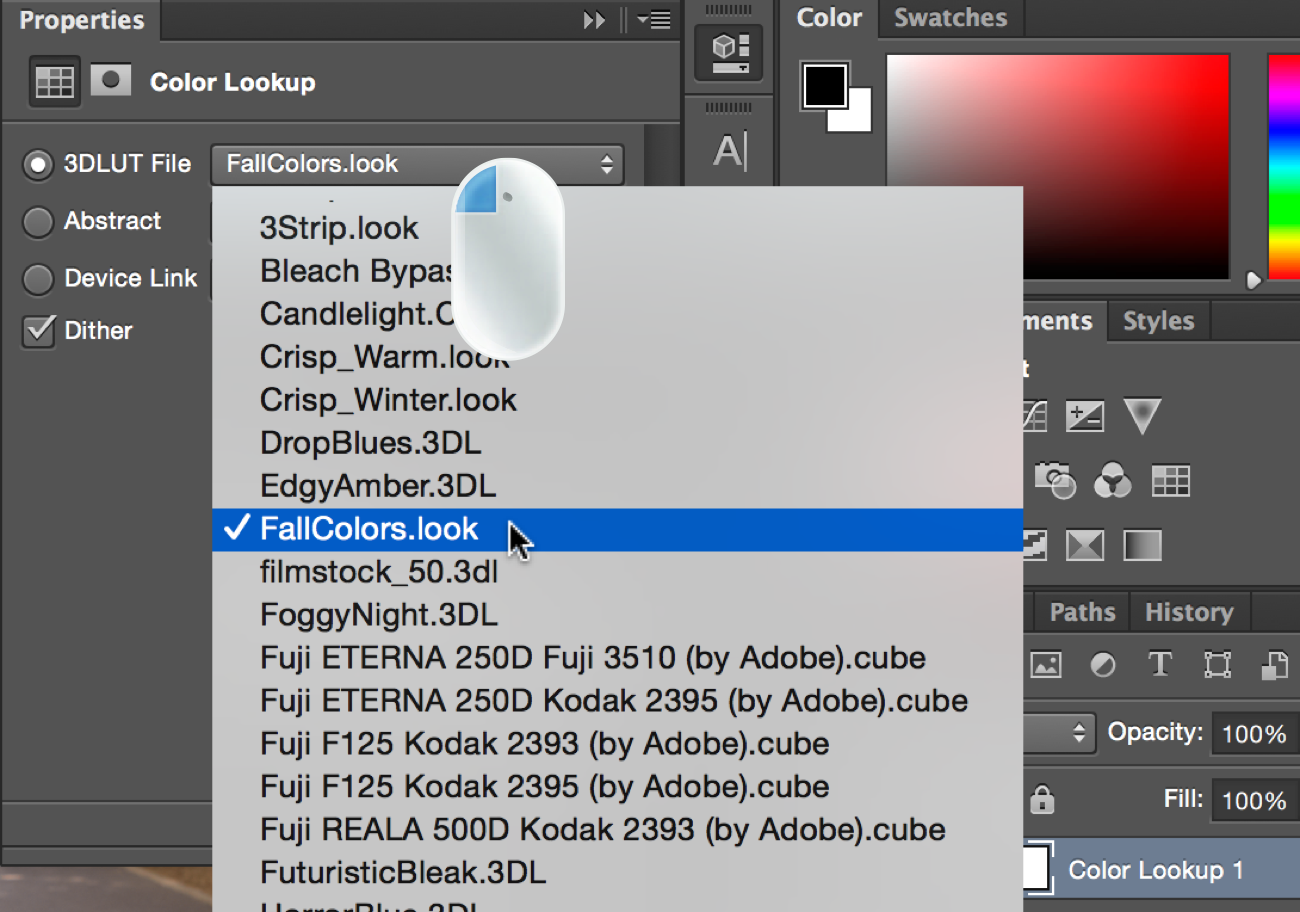
From the drop down menu choose an effect. Depending on your image some LUTs will work better than others so it’s worth giving a few a try;
Step 4:
Because this is an Adjustment Layer you can change finesse this further. Maybe with a Blending Mode;
Step 5:
And maybe reduce the Opacity if it’s a little strong;
Step 6:
With the top layer selected click the bottom layer and right click. Choose Convert to Smart Object;
Then choose Camera Raw Filter from the Filter menu
Step 7:
There’s lots of tweaks we can make here, for this image I’m adding a Vignette;
I’ll call it done … for now.


Your tutorial is awesome and very informative.. go ahead..!!