Restore a Sky Lost to Over-Exposure in Lightroom and Photoshop

Whilst on a recent travel photography task in Havana, Cuba I encountered a problem in balancing exposure. To overcome the loss of detail in the sky there are several things I could have done, including bracketing my shots or using a ND grad in the field, or using techniques in post processing. In this lesson I’ll show you a quick and easy way to restore the colour and detail in your blown skies using just one tool, the adjustment brush.
I use the adjustment brush a lot. It’s a go to tool for a lot of jobs and I feel that it’s under-used, so let me share this technique with you.
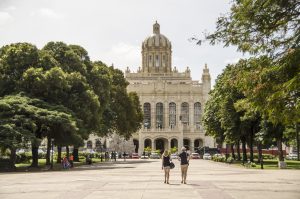
First off, when I load the photo into Adobe Camera RAW it needs some slider adjustment to bring it into line. The couple here are walking along a beautiful tree lined boulevard towards the Museo de la Revolucion. The harsh midday sun is shining brightly, casting a huge contrast on my scene. My eyes remember it all in intricate detail, but the sensor in the camera struggled so a little calculated manoeuvring of the sliders brings it all back to something more familiar. The sky, as a result, is just a grey/yellow mess with no detail and no sense of place. It leaves the top half of the image struggling with the beauty beneath. So let’s begin this simple process.
The adjustment brush sits on the tool bar at the top in Adobe Camera RAW. I’ve subtly demarcated it here for you…. When you select it your sliders on the right change and your actions from here on become selective.
The sliders will generally be wherever you left them last time. This is easy to remedy in just one click. Find a + or – symbol and click on it… this brings all the sliders back to the ‘zero’ except for the one you clicked, which is now just one side or the other. This can be used as the baseline for the retouch we’re doing now, so in this case click on the ‘highlights’ – symbol and bring it down to -25. The reason we’re attacking the highlights is because it’s these which are blown in our scene. Adobe has developed it’s clever algorithms and the highlights and shadows sliders have come on leaps and bounds with the Adobe CC update, so we’ll stick with this slider for now.
We can now paint over our sky with a reasonable sized brush, and it transforms back to the blue I remember from being there that day! The little pin that drops at the first point we start painting is a reference for that set of sliders. It stays there so we can refer back to and alter anything if we should choose to use a different adjustment brush elsewhere in the picture. Once we’ve painted a mask over our sky and watched it change we can fine tune it – in this case I’ve dropped the highlights further and tweaked the white balance to the cooler side. Here’s a screenshot of the brush going on, showing both the blown and the blue sides of the sky.


Leave a comment