
Photoshop Displacement Maps
When you want to add two or more images together quite often you’ll want to contort one to the shape of the other. This can be done with ease in Photoshop using the Displacement Map filter. Its been around for a long time and not a lots changed, but then, does it need to?

For this example I’ll be using two images from Fotolia;
Prepping the Map
Duplicate the Image
Displacement maps use a greyscale image to adjust the position of the pixels of a layer to give the impression that they wrap around another texture. In this example I want the illustration of the fist to look like its contorted on the wall.
I need a greyscale version of the wall as a displacement map. First I’ll duplicate the image by using the menu command Image > Duplicate

A new dialogue box appears;

First I’ll rename this, its not necessary but it keeps things tidy. I’ll call this Map (1). If the image has more than one layer I’d have the opportunity to merge them together for the new image here (2)
Click Ok (3) to continue
Make the Image Greyscale
There’s lots of ways to make the image greyscale, I like to use the black and white adjustment layer;
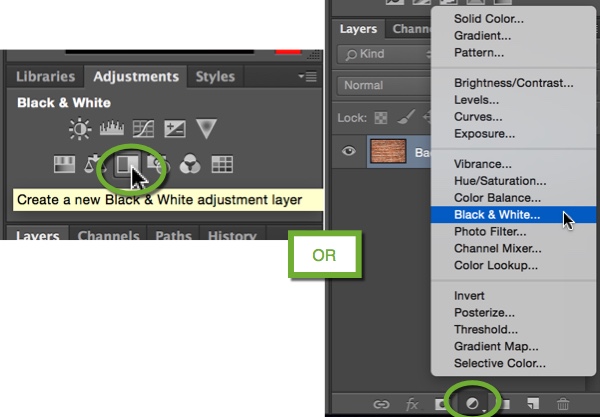
I can get this to this in the Adjustments panel or from the Adjustment Layer icon at the bottom of the Layers panel.
Thinking Ahead
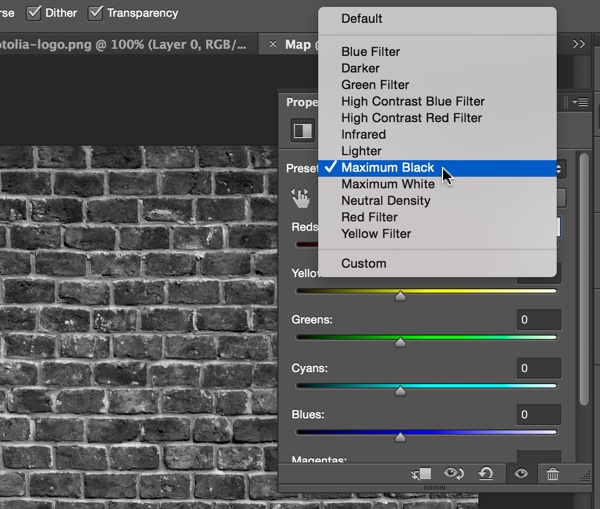
Photoshop is going to shift pixels depending on their luminance, how black, white or grey they are. For this image I want the displacement to be quite harsh, so I need the map to be have a high degree of contrast. This will change depending on your images and the way you want to manipulate the pixels.
As I’m using a separate document and adjustment layers I can always come back and change this later if I wish.
I could use the sliders to get what i want here, but going through the preset I find that ‘Maximum Black’ is about right, I’ll use that;
Save The Map
I’ll choose File > Save from the menu and save the image to the desktop. Once my image is done I won’t necessarily need to keep this map. If you think you’ll want to tinker with it in the future then save it in the same location as the image and perhaps give it a more specific name.
I’ll close this Map image for now.
The New Layer
Bring in the New Layer
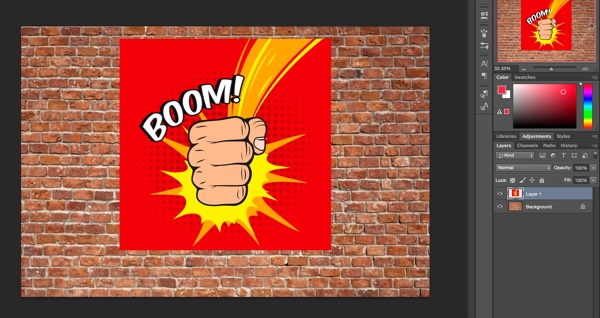
I’m adding an illustration to the wall image and I’ll bring it in as a separate layer. I resize it and position it where I want it.
Convert to a Smart Object
I want to make the layer as non destructive as I can. Displacement Maps have no preview so it could be there’s some trial and error here. I’ll choose Filter > Convert to Smart Object from the main menu;

Apply The Displacement Map
I’ll find the Displacement Map by going to the Filter menu and choosing, Filter > Distort > Displace…;

The three dots at the end of Displace… let me know there’s a dialogue box about to appear;

Horizontal and Vertical Scale has default values of 10 but my image is quite big and i really want to distort the illustration so I’ll up these to 20 for this image.
I’ll leave the other defaults as they are for now as the map is the same as the image.
I’ll click OK
Another dialogue box, this one just needs me to locate the displacement map image, in my case it’s called Map.psd and its on my desktop. When I choose the map it’ll apply it to the layer, distorting it;

Finishing Touches
Blending Modes
Its certainly shifted the pixels but it doesn’t look like it’s on the wall. I’ll try some Blending Modes to blend the images together;

I think Soft Light works well here.
I’ll zoom in to check the displacement;

Looking good!
Tweaking It
If it wasn’t displaced enough I could double click on the Displacement Map filter in the Layers Panel and change the values in the dialogue box;
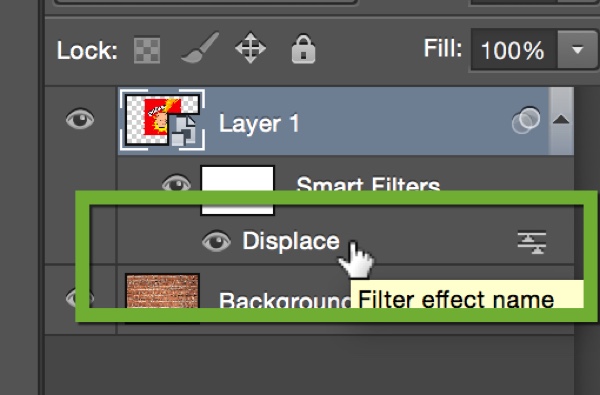
I’ll have to select the map again too, but its worth it to get it right.
I’ve added a Hue / Saturation layer to my image using Luminance mask to adjust the cement more than the brick parts of the illustration, just to help it blend in a little better.


Awesome tutorial ! thanks for posing.