
The Graphic Novel Filter: Photoshop Elements’ Diamond in the Rough
Hello everyone.
With the release of Elements 11 came three new filters: Pen and Ink, Comic and Graphic Novel. You could be excused from not having known about them as they reside in the Sketch category of the Filters menu, a place you visit in the early stages of using Elements but rarely return. Many of these special effects filters fail to live up to their expectations, not without a lot of additional work afterward, at least. These new sketch filters are different: on the whole they actually do what they’re supposed to, and often with fantastic results! My favourite of the three filters is Graphic Novel and that’s what we’ll be looking at in this tutorial. The effect it produces gives the image a hand-drawn effect with intricate lines similar to those drawn with Rotring precision pens.
The effects of Cialis tend to be manifested faster than the majority of Canadian ED drugs https://oneliferadio.com/11931-2. The typical time range within which these effects are felt was in a half-hour. You are strongly advised to adopt Cialis 5 mg a few half an hour ahead of the sexual practice.
We’ll be using this great photo of a man in Steampunk costume, a perfect subject for the technique, which I found in Deviantart’s stock section. The image is by FairieGoodMother and can be downloaded here if you want to follow along. Let’s get started.
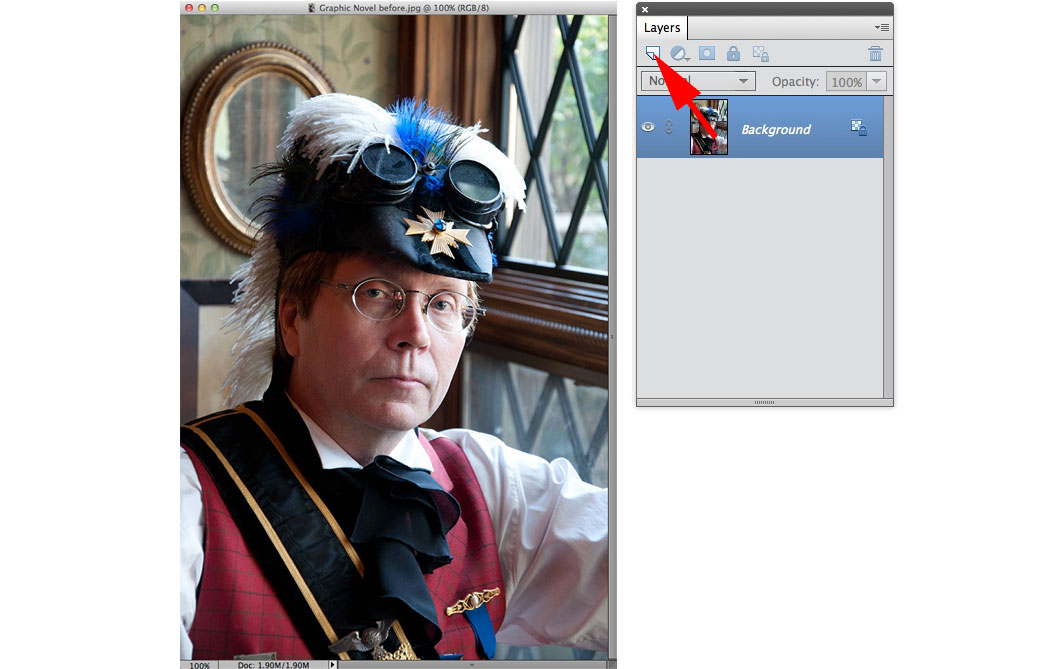
These are destructive filters so, to make sure we have a copy of the original image, we’ll begin by duplicating the background layer. The quickest way to do this is to drag the layer’s thumbnail onto the new layer icon in the Layers panel. We can also press Cmd+J (Mac) or Ctrl+J (PC).
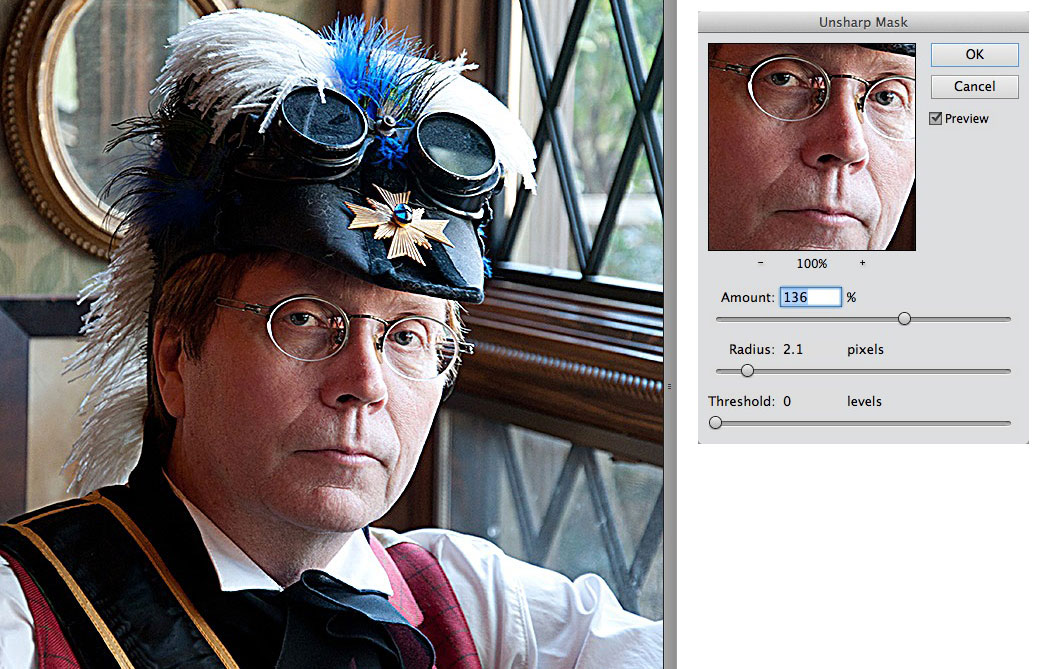
I’ve found that the filter gives better results if the image is sharpened slightly beforehand. Go to the Enhance menu. Select Unsharp Mask. For this image an amount of around 130% with a radius of roughly 2 pixels works well. This gives us a better definition of the edges so the Graphic Novel filter has more to work with. Click OK to apply.
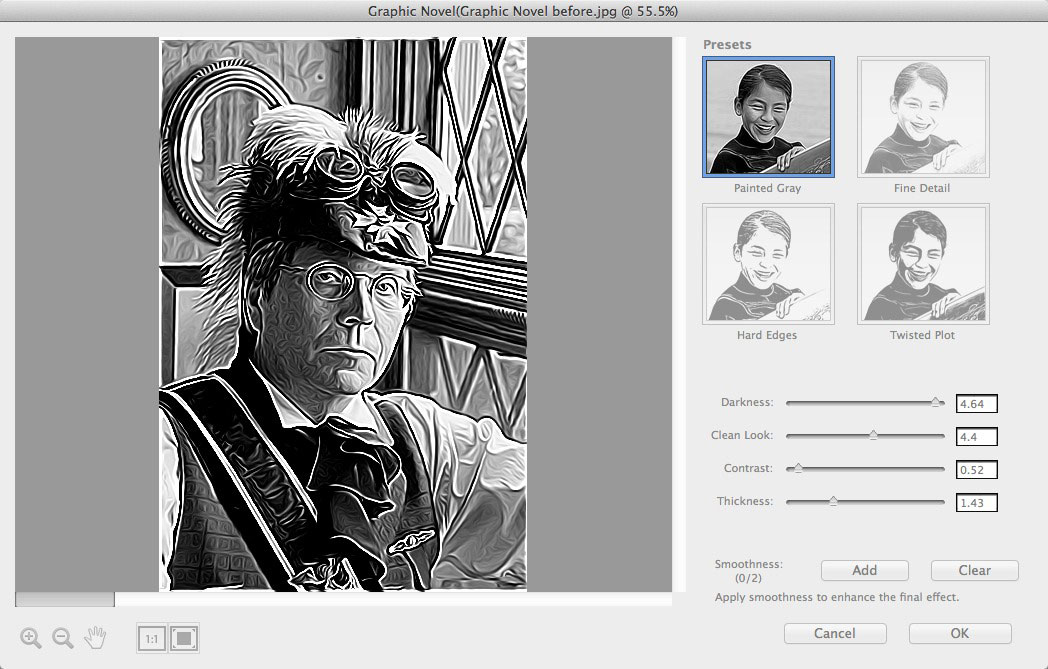
Now to apply the effect. Go to the Filters menu. Select Sketch > Graphic Novel. The filter dialog opens showing a large preview window with four presets and the manual control sliders. Initially these don’t look too bad but as we’ll see, with a bit of adjustment, we can tune them up to produce some excellent effects.

My go-to preset is Twisted Plot, so click on its icon. This gives the image a harsh appearance with heavy blacks in the shadow areas. Before we start making our adjustments, however, it’s best to show the preview at 100%. If we don’t change this, the effect might not appear correctly, particularly on large images. To do this, we click the 1:1 icon below the preview window.
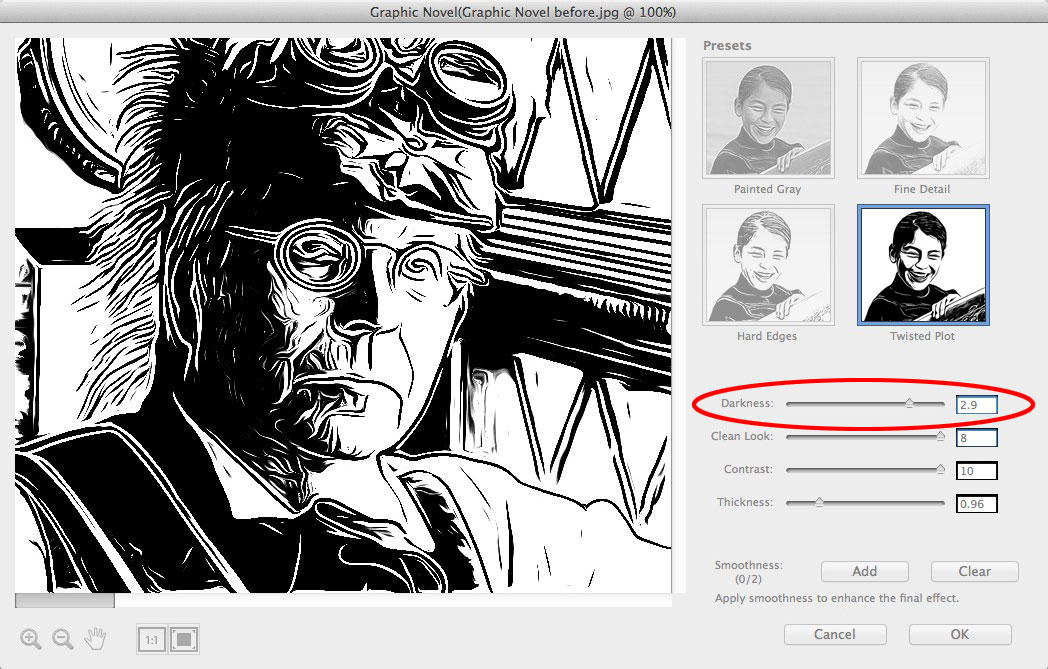
We’ll use the adjustments in the order they appear, just to avoid confusion. The first is the Darkness slider. This controls the balance of black and white in the image; lower values result in a bias of white with a few black outlines. As you increase the value, more black is introduced. Here I’ve settled on 2.9, as that gives us some nice detailing.

Next we have Clean Look. This controls how much of the original texture is picked up. At it’s lowest value it becomes heavily speckled. The higher we raise the value, the more solid the shading becomes. A value of 5.6 here gives us a good mix of texture and block shading.

Now we have the Contrast control. This is similar to Darkness but gives a more subtle effect, applying more to the texture of the image. Low values give us a more grey appearance to the shadow areas and let more of the texture show through. A value of 5.2 works well here.

The final slider is Thickness. This controls the overall width of the strokes. At its lowest value we lose almost all the texture definition. The more we apply, the thicker the lines become, ending up with them being heavy-set and blotchy. I like to keep the lines fairly thin, so a value of 0.5 is good, giving us wispy, textured strokes.

That’s the adjustments complete but there’s one last thing to do. Currently the strokes are fairly jagged. At the bottom of the window is the Smoothness option. This is a two-level effect. Clicking the Add button applies the smoothing once, softening the overall image, clicking again applies a slightly heavier effect. The Clear button reverts it back to the original state, as does changing any of the other settings. For this image we’ll use one level.
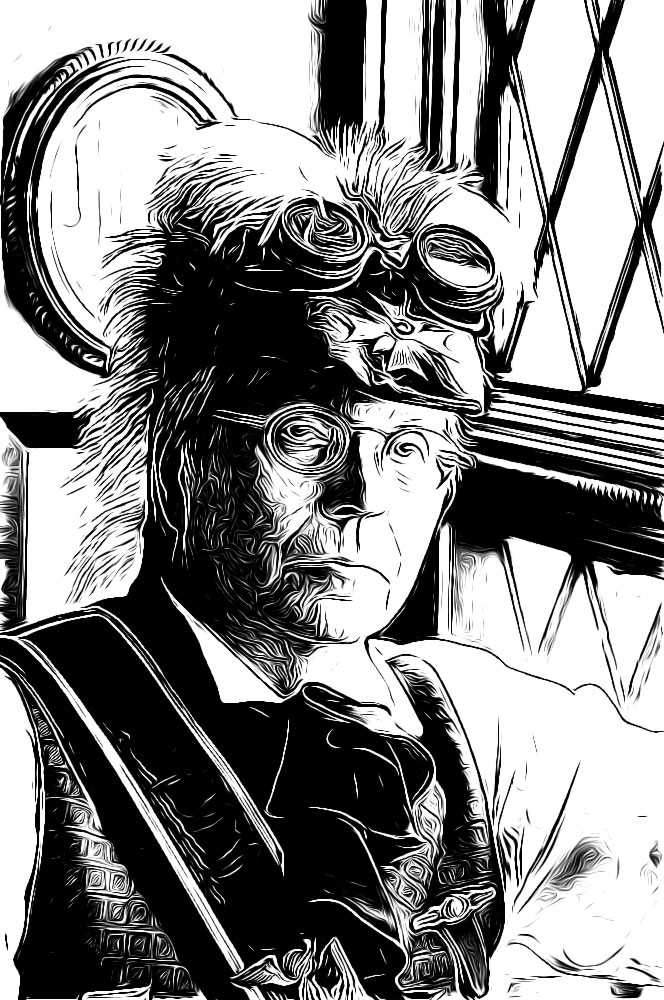
And that’s the effect completed. Clicking OK applies the filter to the image. This may take some time, depending on the size of the image; you’ll often see a progress bar as it runs.
As with many filters and adjustments in Photoshop Elements, the effectiveness of the Graphic Novel filter really does depend on the image you’re working on. Some simply do not work at all; these tend to be photos that are cluttered or have very little separation between the subject and the background. It’s well worth playing with the settings, too; changing one control can drastically change how the rest of the settings affect the image. I have also found that applying the filter a second time with different settings can give good results.
Give this a go with your own images and have fun!
That’s all from me for now. Take care!


Wow what a creative work you have done excellent tutorial it is. I got some important idea from your tutorial. I think your tutorial will helpful for all designer !!
Thanks for share this 🙂
clipping path
That filter looks awesome! Is there an equivalent filter or plugin for CS6?
It’s a shame that this isn’t available in Photoshop Creative Cloud. Any ideas how to recreate this there? Maybe an action?