Using Upright In Lightroom and Adobe Camera Raw
This post was first published at Fotolia
Often when we take images of structures we get this effect that makes it look like it’s falling backwards. In Lightroom 5 and later and Adobe Camera Raw (ACR) 8 and later there’s some settings that can really help.
For this explanation I’ll take a look at the settings in Lightroom CC, its exactly the same in ACR however.
This image is a good example of what can happen. If you’d like to follow along this is 64917240 – Modern Dining Room Interior by det-anan sunonethong.
Lightroom Develop Module
Lightroom has several Modules and the Upright function can be found in the Develop Module under Lens Correction.
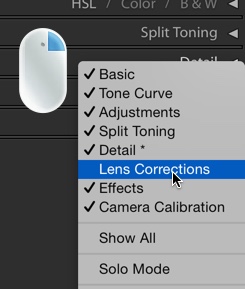
If you don’t have Lens Correction in the Develop Module, right click and choose it from the pop-up menu. You can use the same method to hide any parts you don’t use.
‘Twirl open’ the panel if you need to by clicking on the triangle next to Lens Correction
Lens Correction
Under the three check boxes are five buttons that will straighten and level the image. By default the Off button is selected.
Level
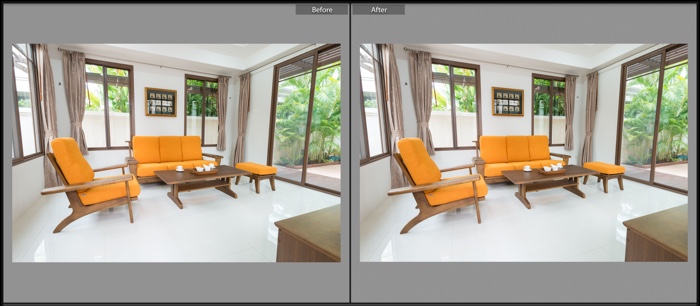
The Level correction will analyse the image and attempt to find any horizontal features. Lightroom doesn’t know that the image is a modern dining room, but it does recognise that there are some angles it can use.
In this image the difference is very slight
Vertical
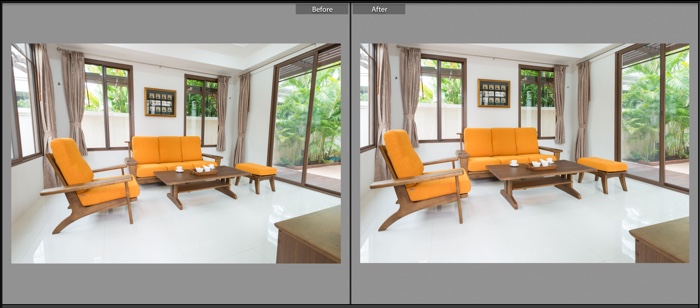
This works the in the same way as the Level setting, in this case Lightroom is looking for anything it thinks should be vertical.
This time the results are a little more favourable.
 Although the image is now straight on its vertical axis it has had to be skewed a little, this results in empty pixels. Lightroom, by default, will resize the image to crop these out.
In this example you can see that although the window is vertically straight I’ve lost the top of the image a little.
Full
This skewing becomes more apparent when I I invoke the Full Upright. In this case Lightroom does it’s best to correct both the horizontal and vertical perspectives.
You can see here that no cropping has taken place.
Auto
Like Full, Auto will analyse the image and correct the image. In this mode however Lightroom will correct perspective in a more balanced way and fill the image.
Although at first glance this may not look like it has been corrected, take a look at the verticals on either side of the image.
Choosing the Right Upright
In this image the verticals are the the best reference as the vertical should be at a slight angle, hence the odd look to the Full Upright above.
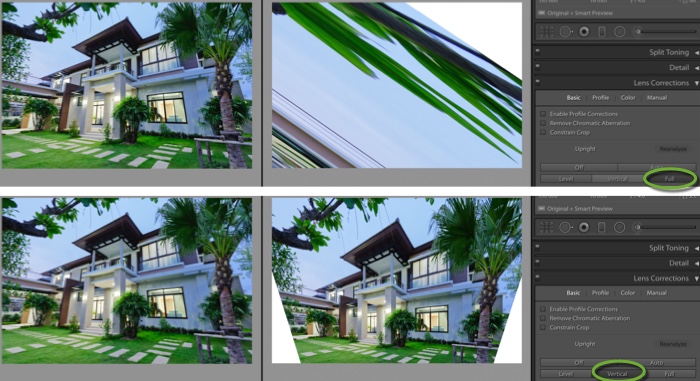
In this image, Full works better than Auto;
But in the following image something very odd happens in Full but works great in Vertical.
I guess what I’m saying is, if you want to correct the perspective of your images, try all the Upright buttons and see which one suite the image, and your needs best.
Upright In Adobe Camera Raw
You can do exactly the same thing in Adobe camera Raw when you open the image or from Photoshop as a Smart Filter. You’ll find it in the Lens Correction Tab under the Manual Tab.
 This time the different settings are represented by icons, but the software engine is identical to that in Lightroom.


it’s a very authentic post and very informative. It will help me.
Great post! Some top tips on this one! Love it!