
Moving Backgrounds to Fix Backgrounds in Photoshop
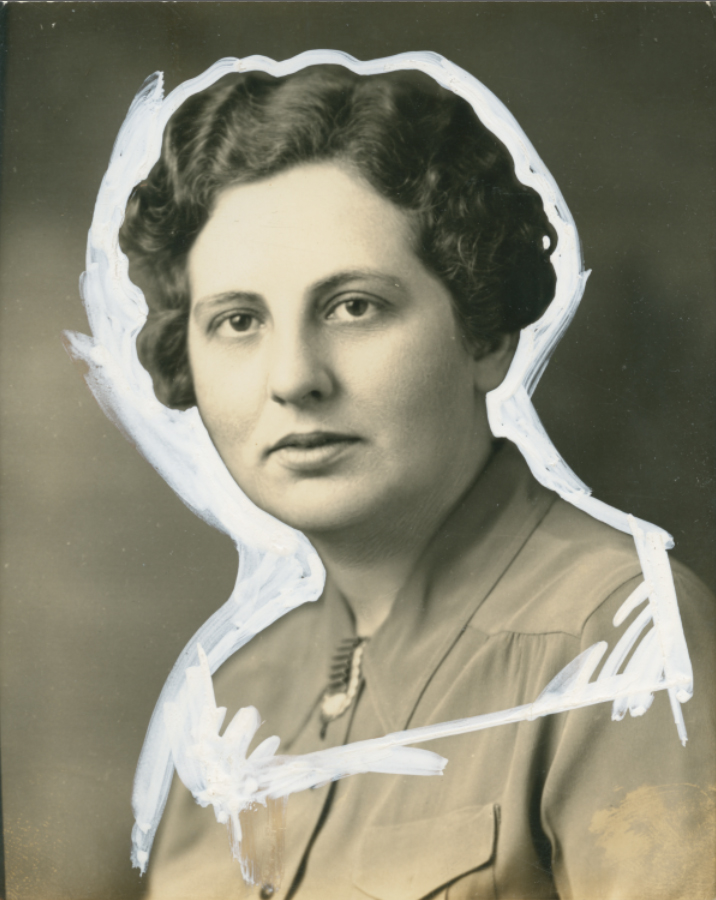
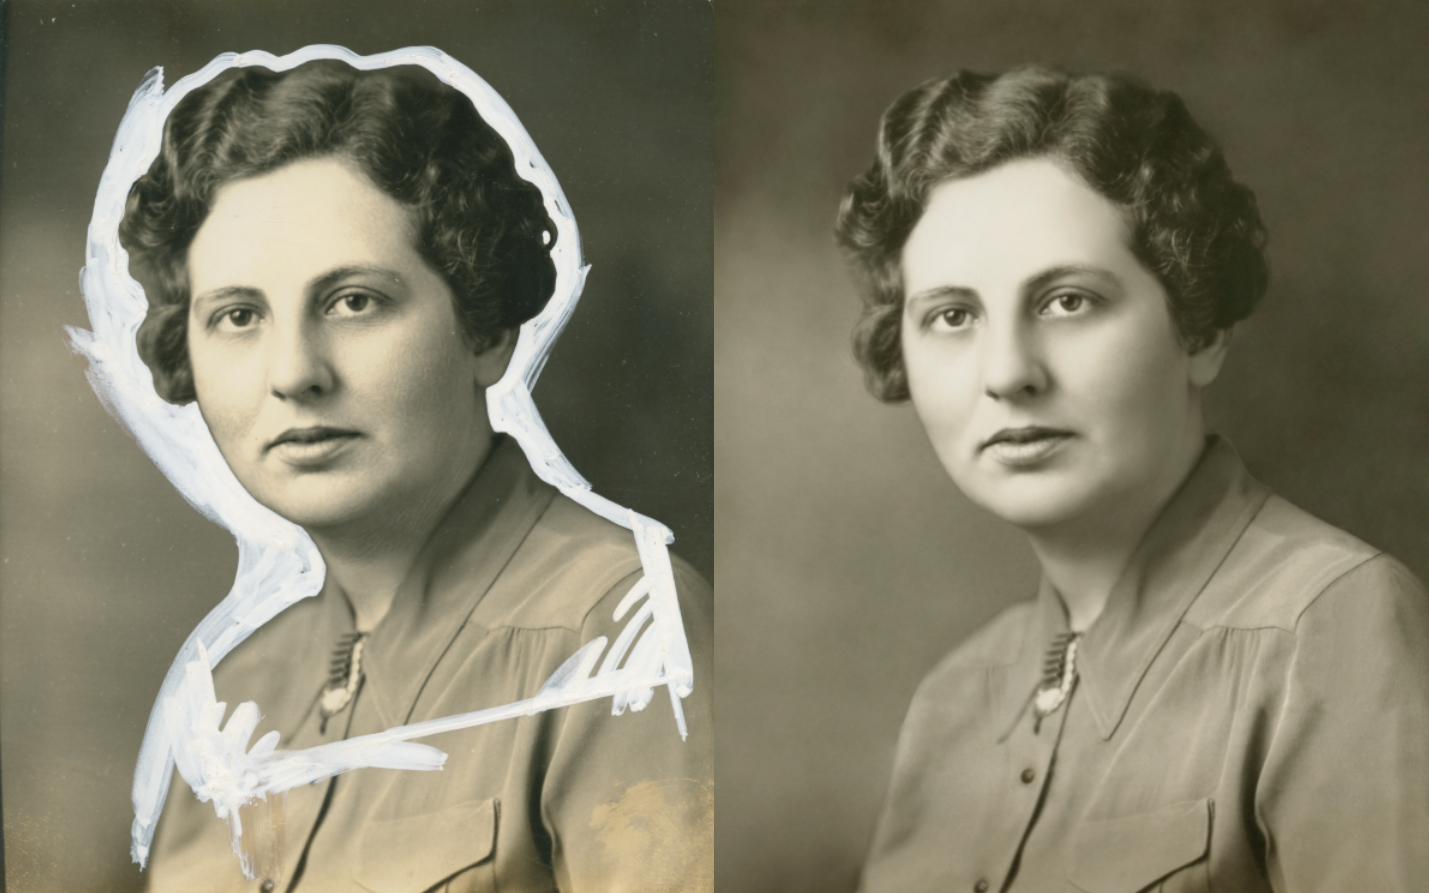 What you see, below, is an aberration, a crime committed against a helpless photograph. Yes, a real photograph was harmed in the making of this mess. Why it was done is beside the point; it was done many years ago and now this image remains as one of the few a daughter has of her mother. This may not be a situation that comes up for the majority of you, but in case it, or something like it comes up, there’s a fairly easy way to get the white out…out.
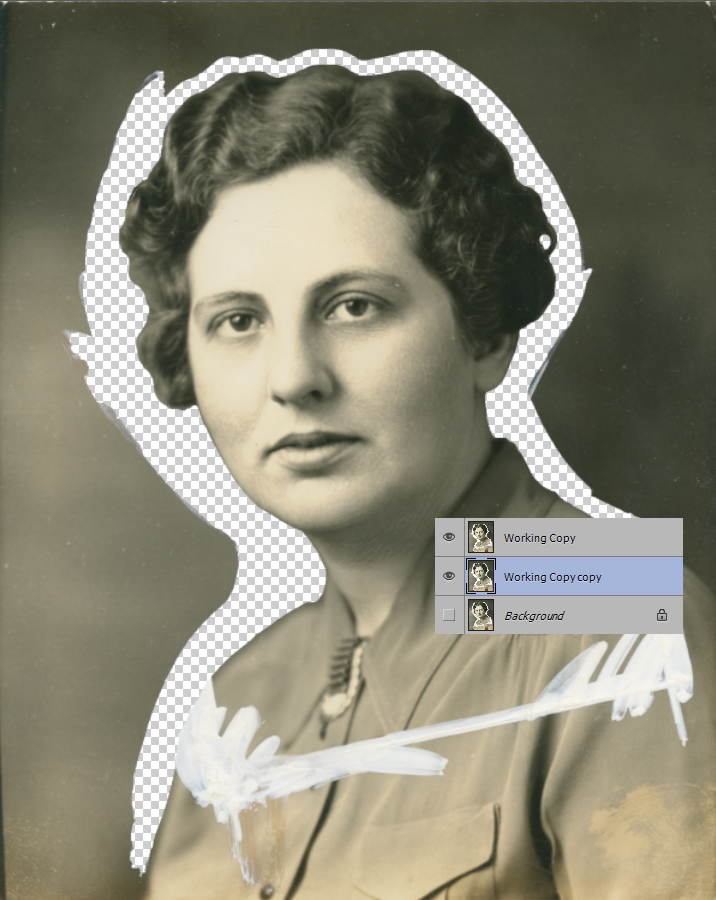
The first thing you want to do is duplicate the original layer. Believe me, in a case like this you’re going to want that untouched original to look back on and compare to your “new” photo! You can name your layer something, if you like. I’ve named mine Working Copy for better identification. With the duplicate layer, Working Copy, selected grab a selection tool from the tool palette; in Photoshop CS6 the Quick Selection tool will work wonderfully in a situation like this.

Go to the Select menu and chose Modify > Expand and change the modifier to 2 pixels, hit ok. I added a layer of black behind the image to show why I expanded the selection by 2 pixels; I want to be sure all the white is gone from the area closest to the subject.

Note that I’ve left the strip of white out across the body alone. Next we’ll duplicate Working Copy, and move the copy below it.
Select the Move tool from the Tool Menu and use the right facing arrow key to move Working Copy-copy until the background fills the area closest to the subject. When you’ve moved it over, cut the part of the image other than the background out, in this case, the hair.

Since the edges of backgrounds like these are usually different tones due to lighting make a level adjustment (Image > Adjustments > Levels) to bring the tones a little closer.

Make another copy of Working Copy, and move it below Working Copy-copy. Move it to the left to fill in the space to the right of the subject. Continue making copies of this layer to fill in any other larger spaces.

Now merge all the copies between Working Copy and the Original image so your Layer stack looks like this:

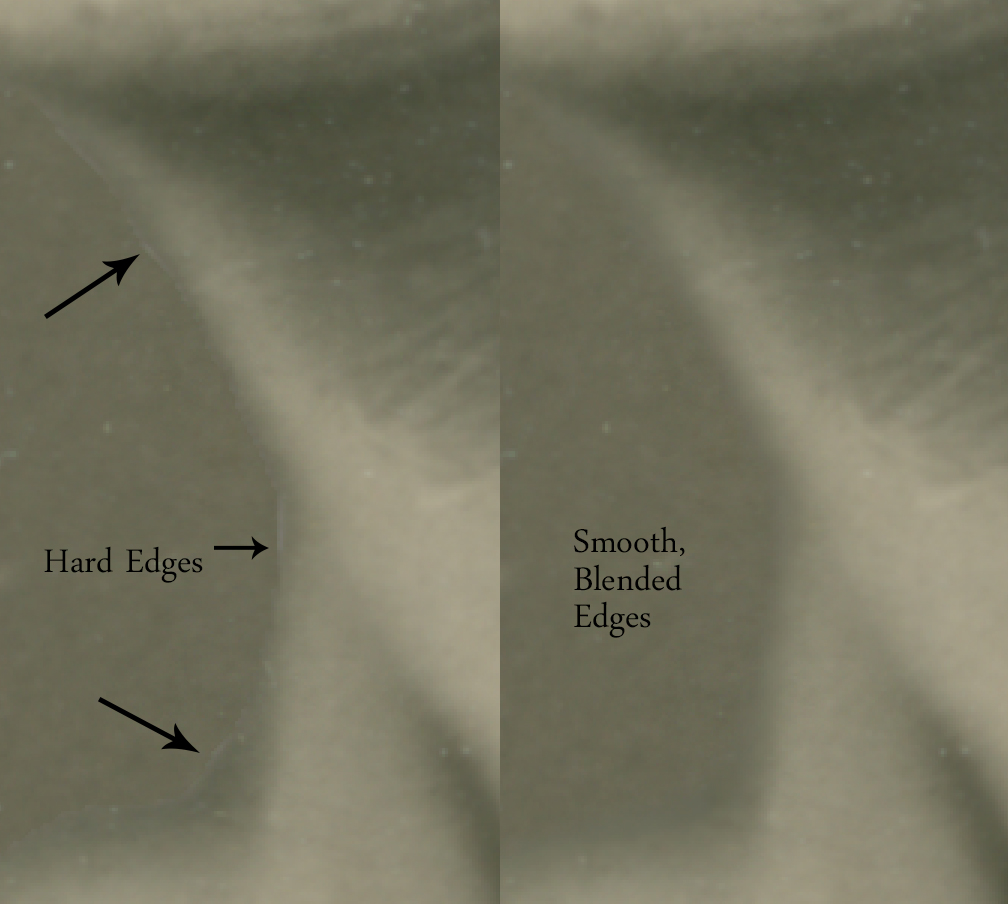
Go back to the top layer. This step is where so many people, even those who do photo restoration professionally, go wrong. You simply have to blend the area that was extracted next to the body and the hair or the finished result will never look more than mediocre. To blend, select the Blur Tool, 100% strength, and zoom the image in close, 200 to ]300%. Set the brush size to a good size for blurring just the edges. This will soften all the sharp edges from the extraction and blend old and new together. I see so many otherwise great restorations that are ruined because this one simple step is skipped. The goal with any restoration is that people never know anything has been done to the image if they don’t see the before image. Without blending, people, even those with an untrained eye, might not know exactly what looks off about the image, but they know something is. There’s more you can do, later, to blend the areas further, but this step is essential in my opinion.
Once all the sharp edges are softened combine the top two layers into one and grab the Patch tool. Zoom out to 100% and select small bits of the area that was extracted and refilled. Drag the Patch tool over to blend. It’s also a good time to patch some of the other specks and spots, if you’re so inclined.

On to the white out in the body, now; some of the smaller areas can be fixed using the Patch tool and Content Aware Fill. I did all this below with Patch and Content Aware Fill.

Another way is to do the same thing we did with the surrounding area, that is, select the area and cut it. I duplicated the layer twice and moved one up and one down, then merged the three layers into one before using the Patch and Content Aware Fill tools. I also used the Clone tool a little to help with the edge. Just make sure everything matches up and you continue bits that you can see, like creases and shadows.

One last thing, I told you before I’d tell you something else you can do to blend the edges in a situation like this, mainly the hair. What you want to do is add a stray hair or two (or more). You don’t need a special brush to do this, just a basic round brush, 100% hardness, size. Add a new, blank layer and just draw in some “hairs” around the edges where the hair is still too smooth, especially around the bottom and a few around the sides.

Go to Filter > Blur > Gaussian Blur and blur the hairs. Soften then quite a bit, but not so much that they disappear. On this image I used a setting of 3.5. Take the Opacity down to around 50%. If it’s not enough and you think the image could use more stray hairs, repeat the process on a new layer. Don’t go too crazy, though. Sometimes less really is more.

Here’s a side by side of what it looked like before and after I did all the other bits that needed to be done. Proof that even crimes against photos can fixed!

Great tips as ever Janine! When I was enlarging and faking backgrounds in portrait photography studios I also found a sawtooth/sine wave curve very helpful in seeing areas of discrepancy and blending together – the “make sure everything matches up” part of your description.
Thanks Dave! Interesting about the wave curve – I need to look into that! Thanks for the tip!
Very instructive lesson. Do you have this photo for download either here or at lynda.com to practice with? Thanks!
I hope you can find a use for it! Another really useful and simple setting we used is especially for faking hair – a friend was taught it at Vogue’s London offices and it worked a treat! With your very thin brush, change Shape Dynamics> Size Jitter > Control > Fade – then increase the value to around 400 in the little box that appears to the left of the drop down menu. The higher the value, the less of a fade (so the thicker the hair), the lower it is the thinner it gets. TBH, this is more useful for people working with a mouse rather than a tablet as you can get a similar control with setting Size Jitter to Pressure, though this method allows you to keep the lengths uniform. We found it best if creating a new layer behind the head so the stroke starts in an area already hidden by hair. Working on coloured photos a certain amount of brightness and saturation jitter in Colour Dynamics also worked a treat. The more you know and all that.. 😉 Best wishes!
whaouh. I would like overcome photoshop like this.