
Hello everyone.
My name’s Josephine, I’m a digital artist and photographer and I am proud to be the newest member of the TipSquirrel Nuts, alongside some other very talented people! My tutorials will be showing you how to use Adobe’s new mobile editing apps to create surreal and fantasy photo-montages.
Working with the Adobe mobile apps gives you the freedom to create images wherever you are, either in their entirety or for comping ideas and refining them later. Using Adobe’s Creative Sync enables you to transfer your work between your devices, both mobile and desktop, so you can start your project on the phone and add the finishing touches in Photoshop when you get home or to your studio!
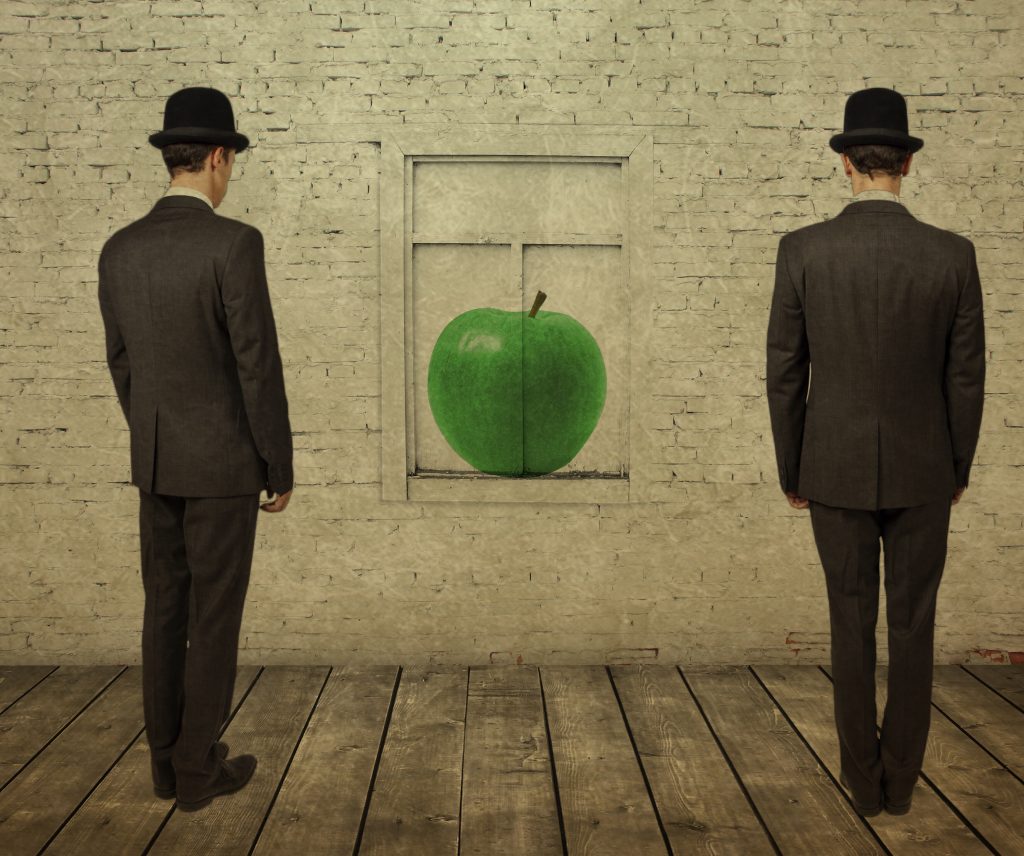
You and Me – The Image we’ll be creating in the tutorial
What we’ll be covering:
- Creating a new project in Photoshop Mix
- Opening source images
- Using layers
- Scaling and positioning elements of the scene
- Using blend modes to combine elements and apply texture
Let’s begin!
1: Starting your image project
Launch Photoshop Mix. If this is the first time you’ve used it, you’ll be asked to sign in to your
Creative Cloud account with your Adobe ID. If you don’t have an account, you can choose to create one from the same screen. Once you’ve done this, you’ll be taken to the project screen, this has some built-in tutorial projects and is where your own projects will be displayed as you create them. Tap the plus sign in the top-right of the screen to start a new project.

Starting a new image project in Adobe Photoshop Mix
2: The file import screen
Photoshop Mix gives us a choice of sources to import our first image. We can open an existing photo from the camera roll, take a new photo with the phone’s camera, or download one from Creative Cloud, one of our CC libraries, Facebook or Dropbox. Tapping on one of the options opens a thumbnail view of the contents. You can also navigate through any folders and collections you may have set up. I’m browsing my Dropbox account here.

Choose where to source your image files
3: Import the background image
Here’s the thumbnail view of my iPhone stock folder in Dropbox. I have chosen a white wall background image here, as I feel it lends itself to my creation with its strong texture and lines, as well as the natural focal point. Tap the chosen image to import it into the project. This may take a few moments if you’re using a cloud-based source.

Browsing a Dropbox folder for a photo
4: The Layer Panel
Here’s the background image in the editing section. You will notice that there are two boxes in the middle-right of the screen. This is the Layer Panel: component parts of your composite are displayed here (you can have up to 5 layers at the time of writing this). The layer highlighted blue is the current layer, which we’ve just imported. We’re not going to make any changes to the background, so let’s move on to the next step.
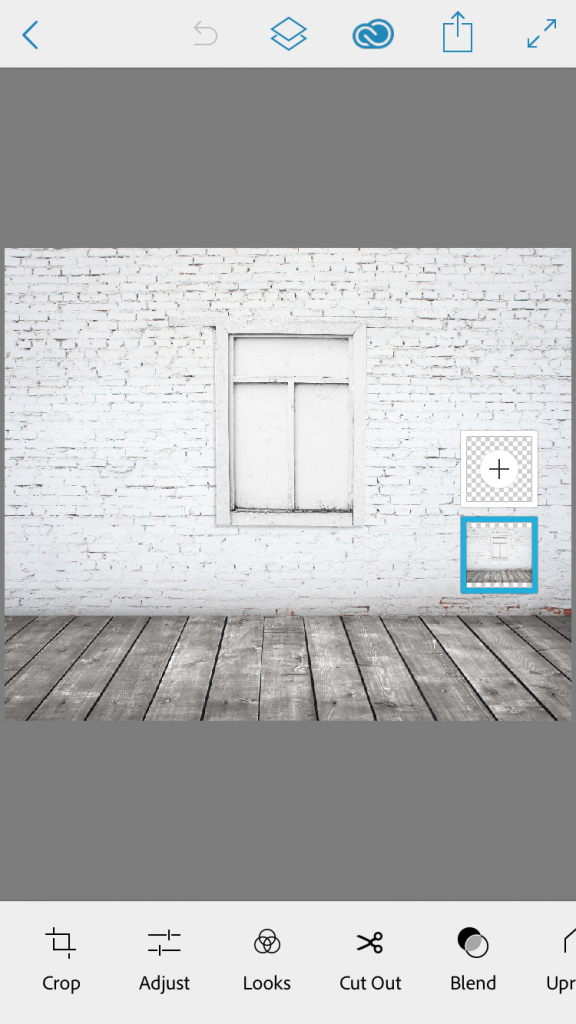
Our background image in Edit mode in Photoshop Mix
5: Add a second element to the scene.
Now we’ll import another image element to place in our scene. To do this, tap the plus sign on the empty layer square above the background layer in the Layer Panel. This will open up the file selection view as we saw before. Locate your second image file, a businessman in a bowler hat for this example. Tap to open/download it. The new image will appear centralised over the background. We can see an additional thumbnail has been added to the layer stack on the right.

Adding the first foreground element to the scene
6: Scale and position the man
To position the subject in the scene, tap and hold your fingertip on the screen, then drag with your finger still held down. To resize the subject, use two finger tips in a pinching motion to shrink it, or spread two fingertips to enlarge it. Here’s the businessman, scaled and positioned.

‘Pinching’ a layer to scale it down to size
6: Adding another layer
Tap on the plus sign on the empty layer thumbnail to go back to the file selection screen, where we can choose the next image for our composition. I’m using another of my businessman images here, this time he’s facing forward.
Adding another image element to the scene
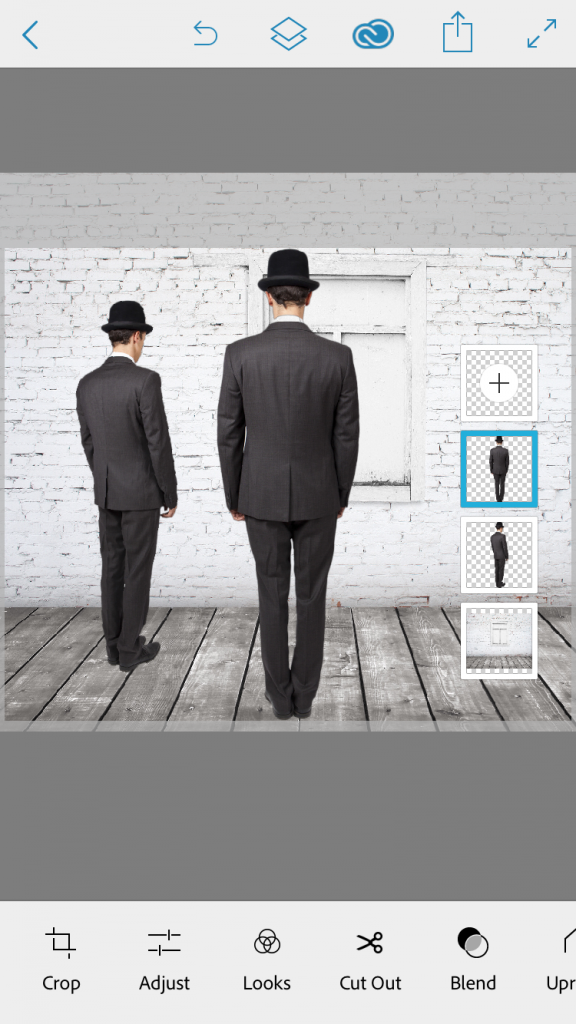
7: Hide the Layer Panel
If you find the Layer Panel is getting in the way of editing the image, you can hide it by tapping the Layers symbol in the toolbar at the top of the screen (highlighted below). Tapping the symbol again will restore the panel. We can scale the second man and place him on the right of the image in the same way as before.

Hiding the Layer Panel whilst positioning a layer
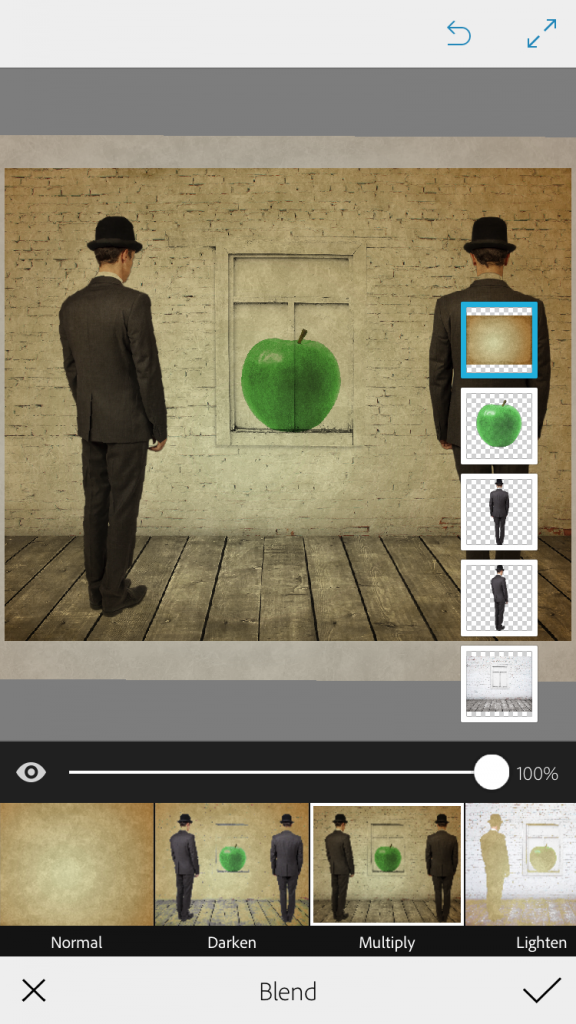
8: Blending an object into the scene
I’ve placed an apple, the final image element, into the scene, I now want it to have it blend into the background slightly. Tap the Blend icon at the bottom of the screen. Changing the blend mode to Multiply gives the appearance of the apple merging into the background. We can also lower the opacity slightly by pressing and dragging the slider to the left. Tapping the tick symbol on the right hand side allies the changes and returns to the main editing view.
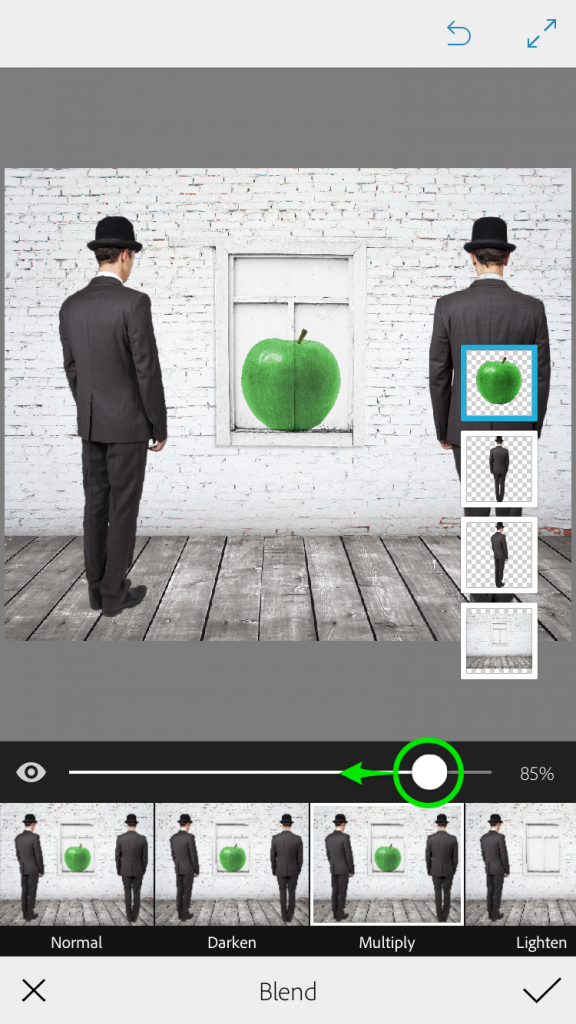
Combining an image with the background using layer blending
9: Add a texture overlay
The final part to this composite is to add a texture layer to the image. This gives the picture a more painterly appearance and also helps to gel all the components of the scene together. We’ll use a grungy texture here, downloaded from the Dropbox library as before. We can use the Multiply blend mode again to apply the texture, which gives us a sepia-like colour across the image, as well as enriching the tones of the scene. Tap the tick to apply the blending.
Applying a texture to the image using the Multiply Blend mode
That’s the image completed! All that remains is to tap the Back button in the top left corner to save your work to the Project Gallery. It’s a good idea to do this periodically during the creation process, too, just in case anything happens and you lose your progress. Once saved, it will be backed up to Creative Cloud ready to open at a later date on the phone or transferred to another device.

The project saved to the project gallery
I hope you’ve enjoyed the tutorial and you have been inspired to go and create your own photo-montages using Photoshop Mix.
I’ll be back next month with another mobile image editing tutorial, so stay tuned!
Josephine J x


Excellent. Very easy to follow.