How to Make a Cinemagraph in Photoshop

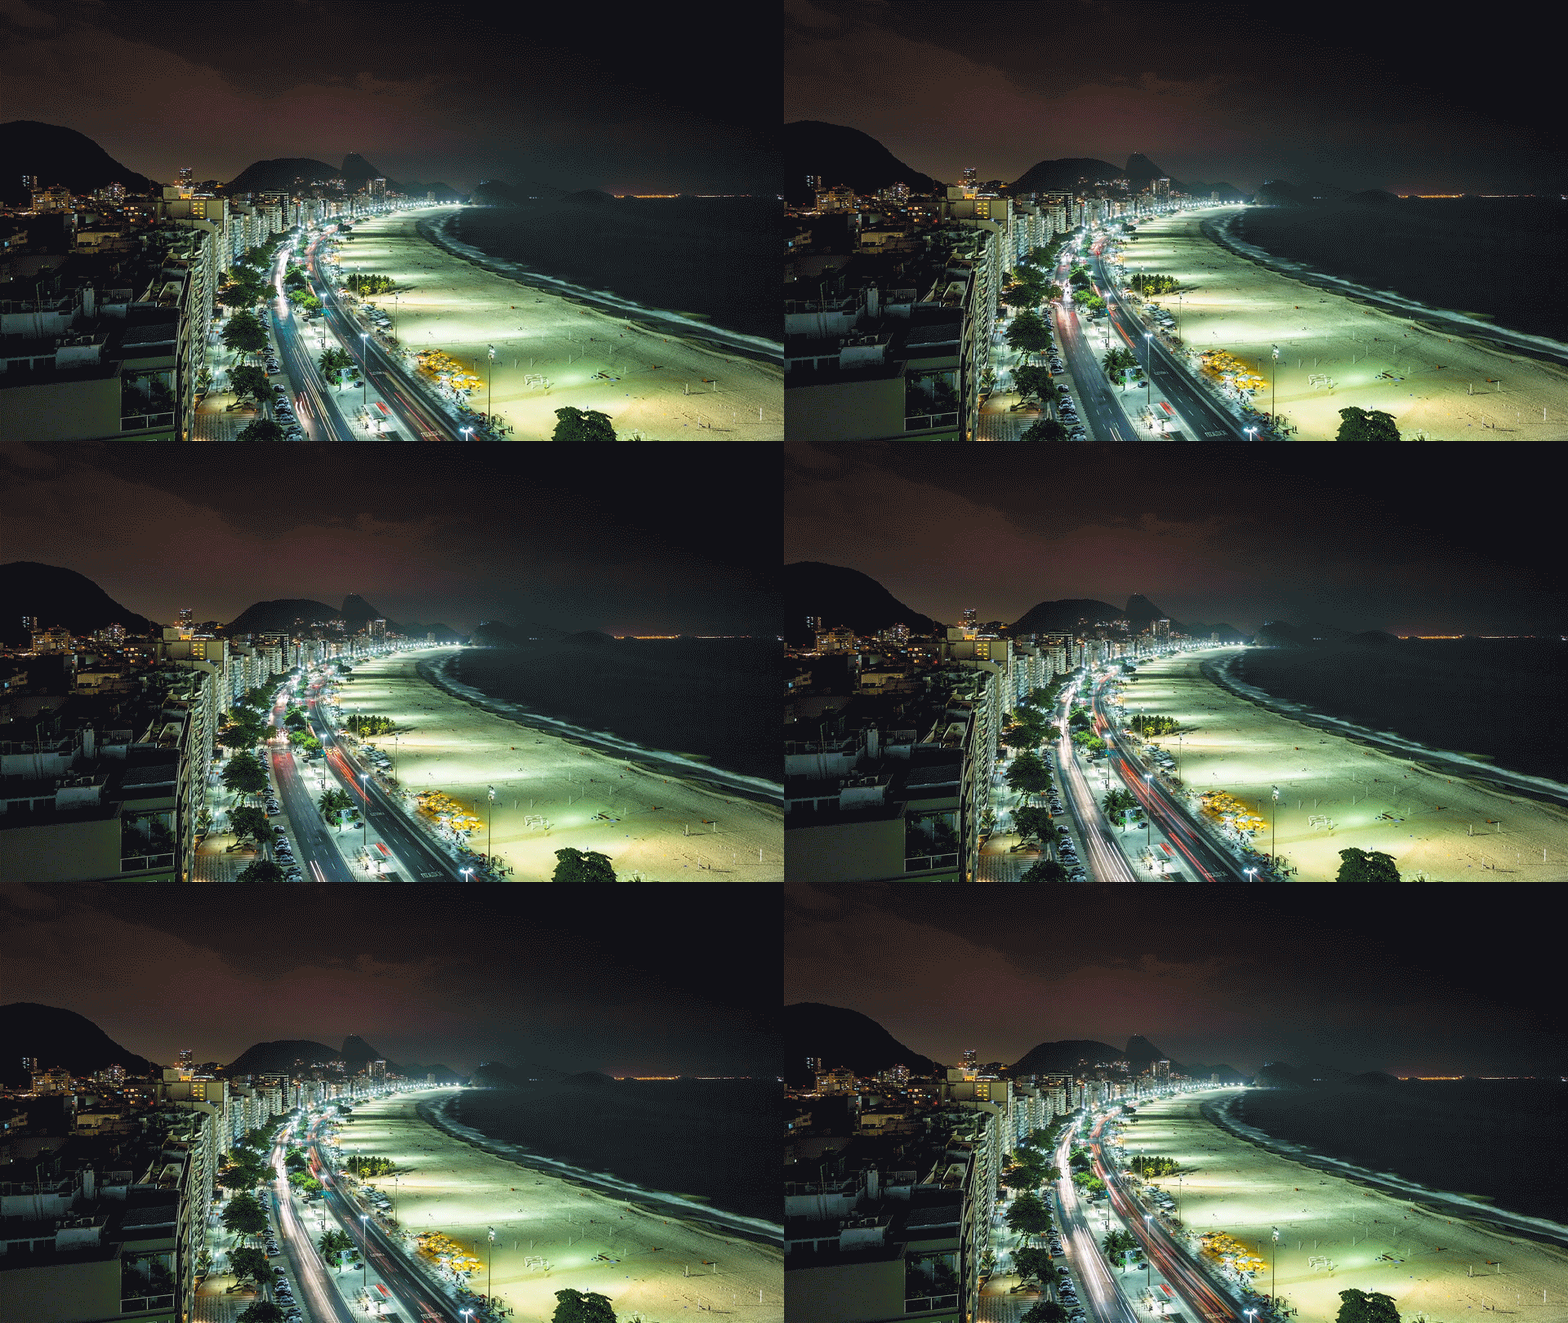
For this tutorial I’ll be using “Copacabana Beach Street Traffic at Night Time Lapse” by marchello74 at Adobe Stock. For more information on how to download from Adobe Stock see this post
Don’t forget you can download a free Preview file, this will have the Adobe Watermark on it but it’s good for practice!
What is a Cinemagraph?
A cinemagraph is a mix of still and moving image. The majority of the image is usually still while there’s one or more elements that have movement. Cinema graphs are very popular at the moment at are reasonably easy to complete inside Photoshop.
Create The Elements
Open the video in Photoshop by dragging it from the Libraries panel, using Open from the File menu if you downloaded to your desktop.
A couple of things will happen;
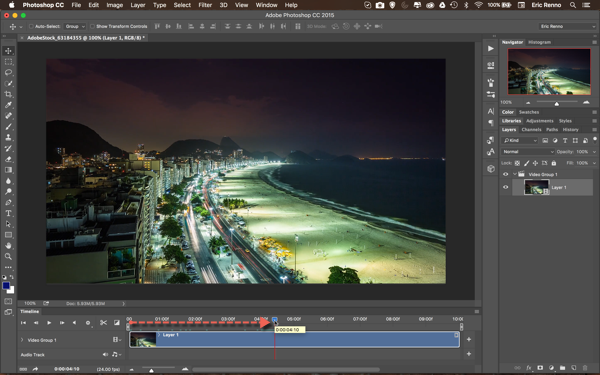
Photoshop creates a Video Group, this is all the footage on one track in the video timeline. (If you don’t see the timeline head to Window > Timeline and it’ll open at the bottom of the screen)
What I need first is a still image, using the playhead I’ll ‘srcub’ my way through the footage to find a frame I like;
I’ve chosen a frame where the waves are in and a plane isn’t visible in the sky.
Make The Still
To make a still from this frame I can just copy and paste. Using the keyboard shortcuts is the easiest way here, so I’ll press;
Ctrl+A (PC) or Cmd+A (Mac) to Select All, then Ctrl+C (PC) or Cmd+C (Mac) to Copy and finally Ctrl+V (PC) or Cmd+V (Mac) to Paste.
Depending on your zoom level in the Timeline it may not look like anything happened. What you should see is a new layer in the Layers Panel. Because it’s within the same Group Photoshop has included it on the same Track.
In short, the still is placed at the end of the video footage.
Using the mouse, I’ll click on the still layer in the Layer Panel (Layer 2) and drag it outside of the group;
This makes a new track for the still image;
And I can move it to the start of the track by clicking and dragging. Because it’s a still I can also make it longer by clicking on the end of the clip and dragging so that it’s the same length as the video footage;
Add a Mask
So that we can see the moving image below I need to add a mask. If you’re not familiar with Masks then check out this post at TipSquirrel to get you started; A Beginners Guide to Photoshop Masks
For this piece I’ll get away with quite a rough mask, more detailed images will of course take much longer and may require the use of Adobe After Effects to Rotoscope, but that’s for another day. Here I’m going to use the Polygonal Marquee Tool to outline the road;
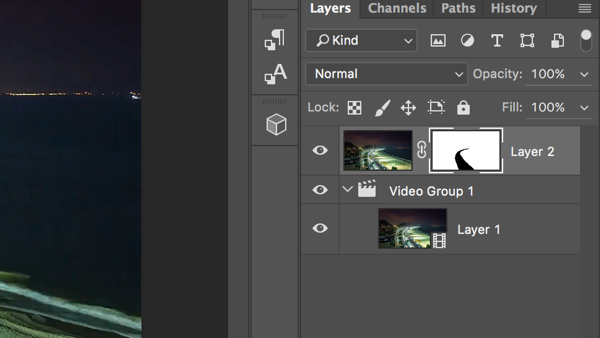
What I’ve done is selected what I want to mask away, so I’ll go to the menu and choose Layer > Layer Mask > Hide Selection. This reveals the video of the road below;
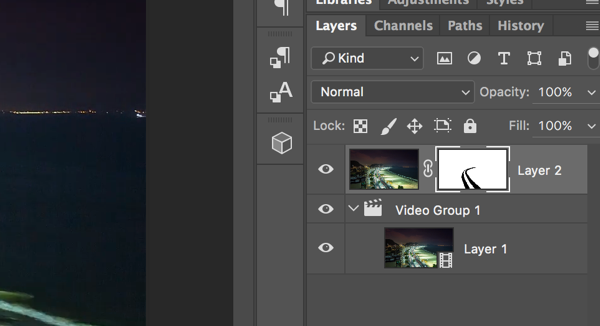
Watching it back I see that there’s some movement between the lanes in the road, so I’ll mask that out too. In this case I’ll make a selection with the Polygonal Lasso and with the mask selected fill the selection with white.
Loop The Video
As it stand if I run the video it plays through once and then stop, to get the most from a cinemegraph its always good to have a few loops. To loop the video I’ll select the video layer and press Ctl+ J (PC) or Cmd+J (Mac)
Because the new video layer is within the video group it gets added to the timeline after the original clip (2). I can press Ctl+ J (PC) or Cmd+J (Mac) a couple more times until I get the length of clip I’m after.
Then I’ll extend the still layer to the same length as the video;
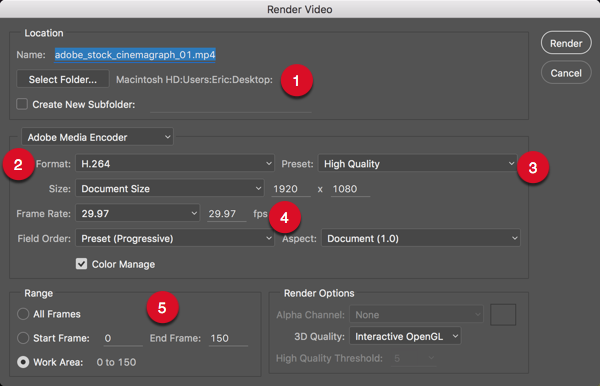
The dialogue box that appears can be a little intimidating, but here’s the main things to look out for;
- Choose where you want to save the video
- What format would you like it to take. H.264 is a safe bet but Quicktime is under this dropdown menu too.
- Once you choose the format then select a preset, under H.264 there’s quite a few to choose from and this will depend on where the video is destined for.
- Frame rate and Size. High Definition is 1920×1080 with a frame rate of 30 (29.97).
- How much of the video do you want to render? Generally I leave this to Work Area but be mindful that if there’s a still or part of a clip sitting at the 1 hour mark the video will render black until it reaches it.
Once you’re happy, click Render.
Saving The Video
If you’re planning of uploading the video to the web then it’s a good idea to reduce the frame rate. In my case I’m going to go for 15fps (frames per second);
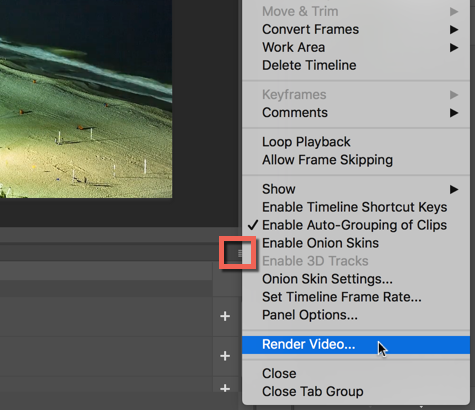
Click on the flout menu for the Timeline;
And choose Set Timeline and Framerate
Save as a GIF
From the menu choose File > Save For Web (Pre CC) or File > Export > Save For Web (Legacy)
In the dialogue box;
- Make sure you choose GIF from the drop down menu.
- Size the image. Size equals data, I don’t want this to be any bigger than I need to. As I’m heading over to Facebook 960 on it’s longest edge is a good size.
- Rather than add dimensions, I could just as easily choose 50% from this box to resize too.
- This dropdown allows me to choose how I want it to animate, for this i think playing through once and stop is ok, but I could have it looping or going back and forth indefinitely too.
I’ll hit Save and that’s it, I’m done!
Saving as a Video
Saving now will save the project as a .psb, a large Photoshop document. What I want to do though is to save it as a .mov.
In the Timeline panel click the fly-out menu and choose Render Video;
The dialogue box that appears can be a little intimidating, but here’s the main things to look out for;
- Choose where you want to save the video
- What format would you like it to take. H.264 is a safe bet but Quicktime is under this dropdown menu too.
- Once you choose the format then select a preset, under H.264 there’s quite a few to choose from and this will depend on where the video is destined for.
- Frame rate and Size. High Definition is 1920×1080 with a frame rate of 30 (29.97).
- How much of the video do you want to render? Generally I leave this to Work Area but be mindful that if there’s a still or part of a clip sitting at the 1 hour mark the video will render black until it reaches it.
Once you’re happy, click Render.










thanks for sharing a good post.
Amazing and creative tutorial, thanks for share your skill with us.
This is a fantastic tutorial. I really loved it.
WOW! It was an amazing tutorial.