How to Create an Abstract Silhouette Image with Adobe Photoshop MIx

In this month’s tutorial for the Adobe mobile apps, I’m going to show you how to create a Magritte-style surreal abstract image using a silhouette of a businessman with an umbrella. This is surprisingly easy to achieve using the available tools in Photoshop Mix.
Lets get started!
1: Starting your image project
Launch Photoshop Mix. If this is the first time you’ve used it, you’ll be asked to sign in to your Creative Cloud account with your Adobe ID. If you don’t have an account, you can also choose to create one from the same screen. Once you’ve done this, you’ll be taken to the project screen, this has some built-in sample projects and is where your own projects will be displayed as you create them. Tap the plus sign in the top-right of the screen to start a new project.

Starting your image project
2: The file import screen
Photoshop Mix gives us a choice of sources to import our first image. We can open an existing photo from the camera roll, take a new photo with the phone’s camera, or download one from Creative Cloud, one of our CC libraries, Facebook or Dropbox. Tapping on one of the options opens a thumbnail view of the contents. You can also navigate through any folders and collections you may have set up. I’m browsing my camera images.

The file import screen in Adobe Photoshop Mix
3: Import the background image
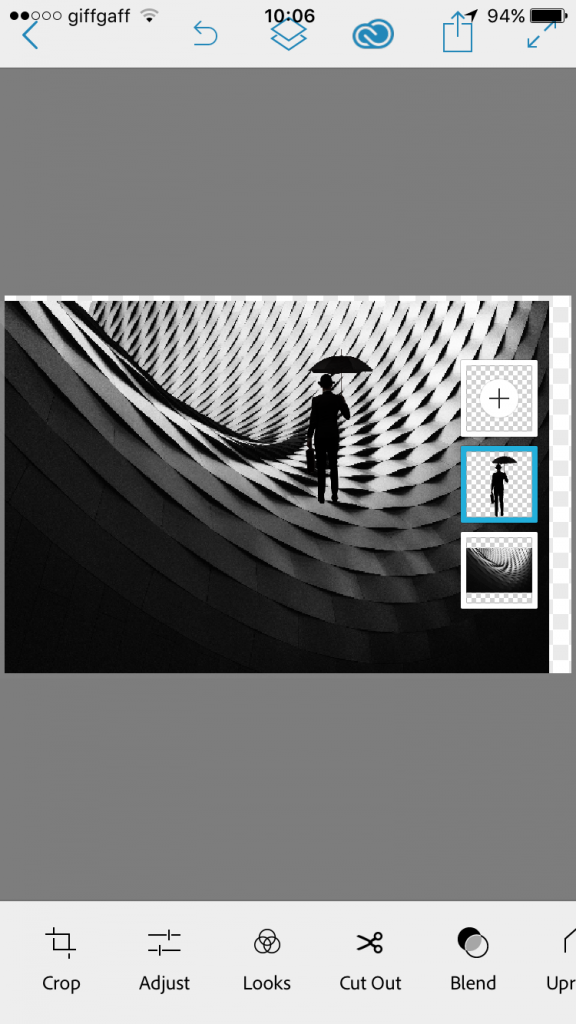
Tap the chosen image to import it into the project. This may take a few moments if you’re using a cloud-based source. I have chosen this futuristic looking shape, as I feel this will be a great background for my next layer. You will notice that there are two boxes in the middle-right of the screen. These are your image layers (you can have up to 5 layers at the time of writing this). The layer highlighted blue is the current layer, which I have just imported. We’ll leave the background image as it is.

4: Add a second layer image.
Now we’ll import another image element to place in our scene. To do this, tap the plus sign on the empty layer square in the Layer Panel. This will open up the file selection screen as we saw before. I chose the the businessman holding his umbrella . The new image will appear centralised over the background. We can see an additional layer square has been added to the layer stack on the right

5: Creating a silhouette
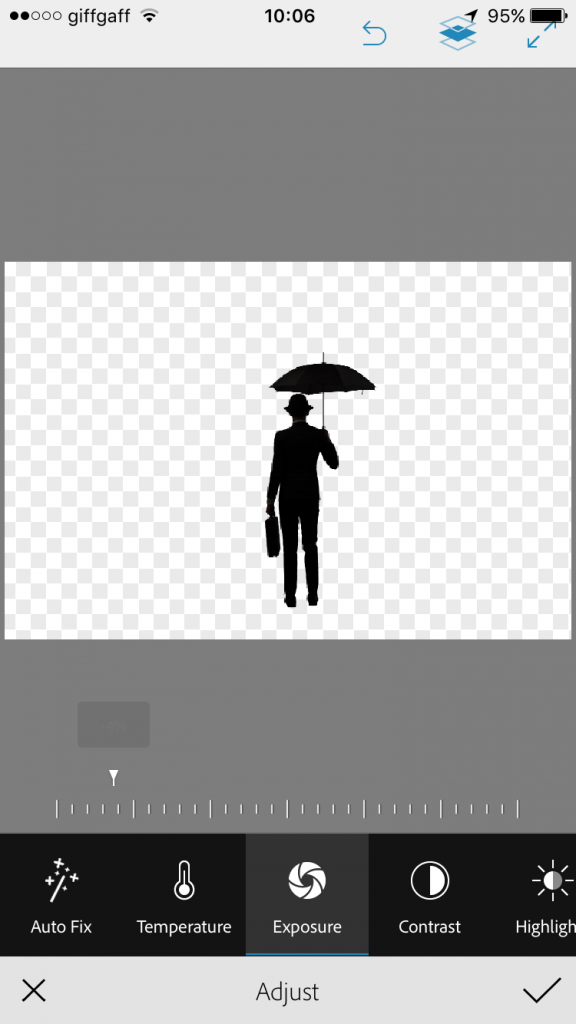
The businessman is already cut out for us, which makes it easy to edit. We are going to make him a silhouette for this image. This is very easy to do: tap the Adjust button at the bottom of the screen, this brings up a menu bar with a choice of adjustments. All we need for this is the Exposure adjustment. Tap its icon. A slider will appear above the menu. Use your finger to slide it to the left, this eliminates all the light tones from our image, creating our silhouette.

6: Change the background
Now we have our businessman silhouette, we can work on the background. I decided it would look better if it were to be rotated to create an arched tunnel. Tap on the background layer’s thumbnail to make it active. Now, with two fingers on the screen, twist to rotate the image around until it makes a tunnel shape, which gives our image a completely different look.

7: Finishing touches
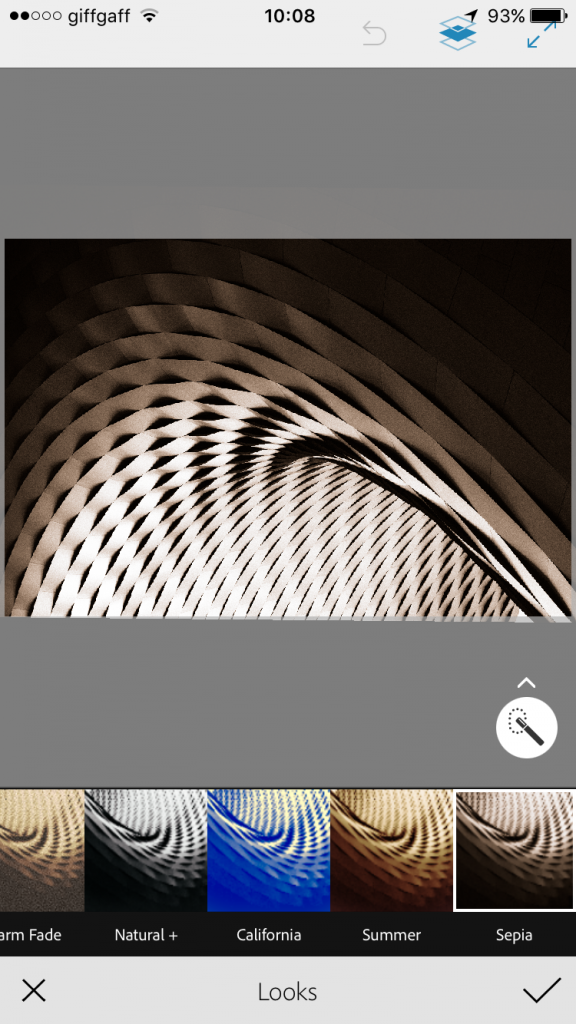
To finish off the background, go to the Adjust menu and choose Looks. We can slide the filters to the left to display the different filters. Tap to apply them until we find the one we’re happy with; in this instance I chose the Sepia filter.

8: The final Image
Here is our finished image. I do hope you’ve enjoyed this tutorial. See you next month, when we shall have some fun using the liquify tool in Adobe Photoshop Fix.


Leave a comment