
Photoshop Image Extraction with Channels
If you’re creating image composites, and especially if you’re working with stock images, you’ll find yourself needing to extract image elements from a white background. This can be a straightforward task with Photoshop, and often you’ll get better results with some of the old school techniques.
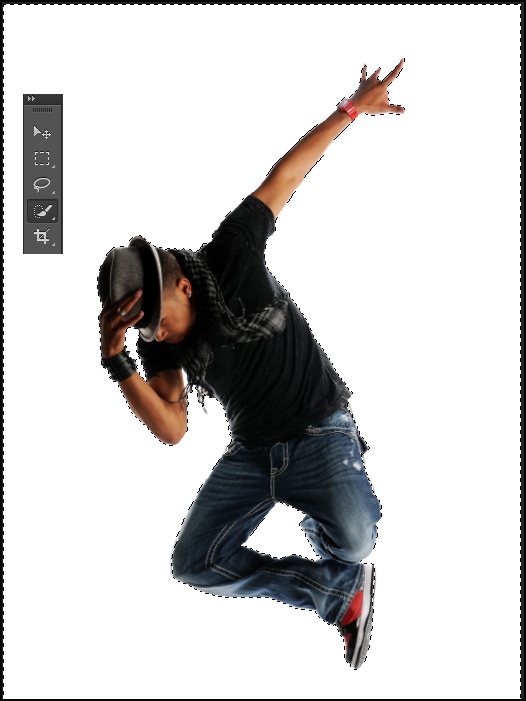
For example, take this image from Shutterstock. Here we have a figure on a white background, and your first thought might be, “I can make short work of this with Quick Selection Tool.” (Or the magic wand).

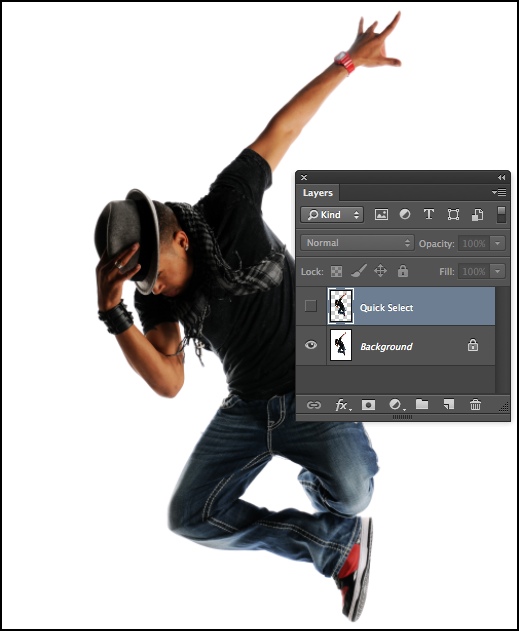
However, let’s try that out. We’ll drag quick select around the image, then go back and drag in the “holes” to pick up the extra white areas:
Now, we need to invert the selection (Select > Inverse). With the figure selected, we can press Ctrl-J/Cmd-J or choose Layer > New > Layer via Copy (I’ve renamed this layer to “Quick Select” for easy identification):
Now let’s insert a black layer under our new layer and inspect the results. Looking closely around the edges, we find this, which is typical of Quick Selection:

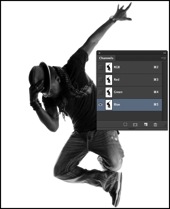
We could go on trying to tweak the quick selection, but that’s too much work. Let’s discard this and try another approach. If we return to the original layer and open the Channels panel, we can click on the red, green and blue channels to see each one separately, and we’re looking for one with the highest contrast:


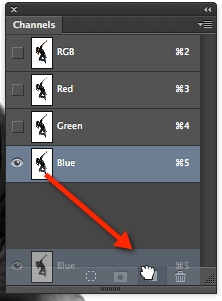
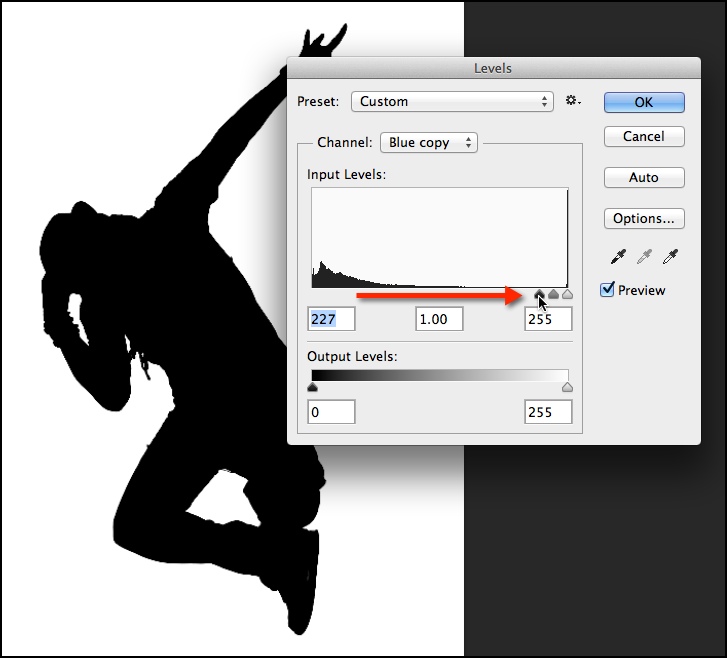
It seems to be the blue channel. So, we can drag that channel down to the “Create New Channel” icon, and we have a new channel called “Blue Copy.” Now, we click on this channel to make it active:

We are making a mask, so we want pure black and white. Bring up Levels (Ctrl-L/Cmd-L) and drag the black point slider to the right until all the gray areas become black. On some images, you may need to go over stray spots with a black brush:
Remember the rule for masking: Black conceals, and white reveals. We want the figure selected, so all we need to do is to invert the mask by pressing Ctrl-I/Cmd-I or choosing Image > Adjustments > Invert:
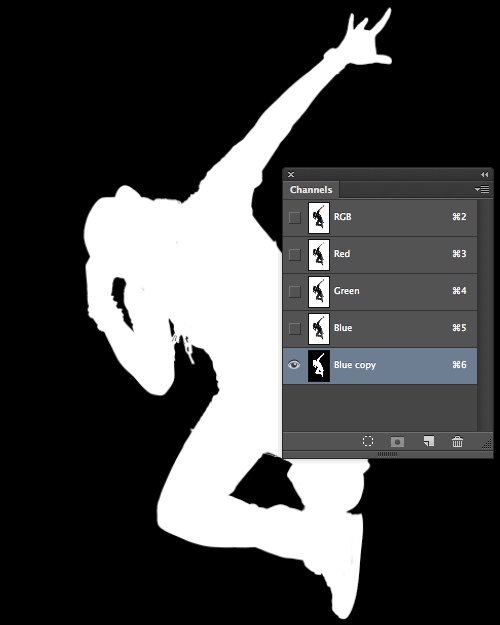
Now our mask is completed. (1) Click on the RGB channel to get back to your image (this is important). Then, (2) Ctrl-Click (Windows) or Cmd-Click (Mac) on the “Blue Copy” channel thumbnail. We now have our selection.

We can go back to the layers panel, and again copy the selection to a new layer with Ctrl-J/Cmd-J as we did above. Adding our black layer in and checking the details, we see a much better edge:

The overall result is superior! While the time to explain it was long, the actual process was simple:
- Duplicate channel (usually blue or green)
- Levels adjustment to drive all gray to black
- Invert the channel
- Load the channel as a selection by Ctrl/Cmd-Clicking
This takes seconds, and is way easier than fussing with the quick select tool. You may have more work to do if you want to composite this image onto a dark background, but for lighter backgrounds, we’re there with a few clicks every time.
Use this technique when you have an image that you’re trying to extract from a white background. This works great for logos and type as well.


Put into four steps, this is easier to remember with this technique. Every time I tried this, I made it a bigger deal than it actually was. With several things, in PS, I have found they are really easy. They just look scarey! LOL I’m getting there!
Thank you!