Create A Template To Display Your Image As A Mounted Canvas In Photoshop Part 2
Hello everyone.
In my last tutorial we saw how to create a reusable template to display our artwork as though they were mounted on canvas in situ. The base image I used is a sofa against a wall, both in neutral colours. Whilst this works well most for most images, what if we want to see how the picture would fit a particular location: a client’s office or a married couple’s lounge, perhaps?
In this article I’m going to take the template idea further to enable us to alter the colour of both the sofa and wall colour, giving us far more freedom to match the artwork to specific decor. As before, this will be completely non-destructive as we’ll be using adjustment layers and masks to create the effect. We can continue where we left off the last time. If you didn’t see the article, you can access it here, or you can just work with the base image – link below – and add in the artwork later.
Base image: Dollar Photo Club (#36872472)
Let’s get started.
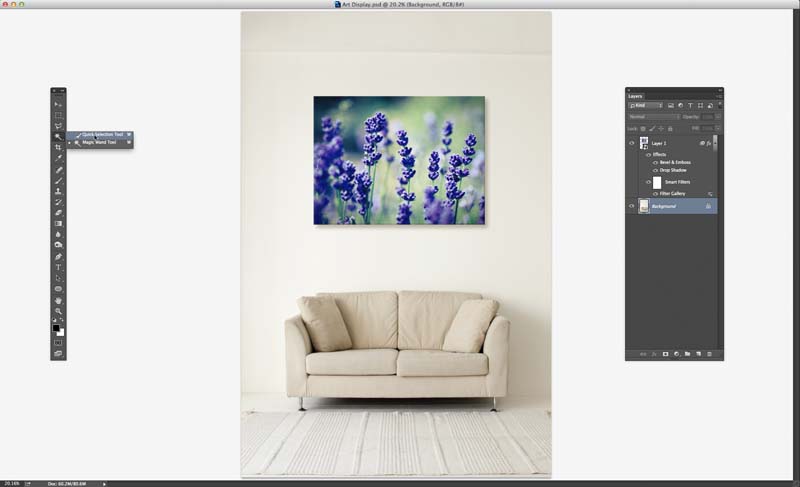
We’ll start by making the selection of the sofa. Make sure the background layer is active by clicking its thumbnail in the Layers panel. Choose the Quick Selection tool from the Toolbox (keyboard shortcut W).
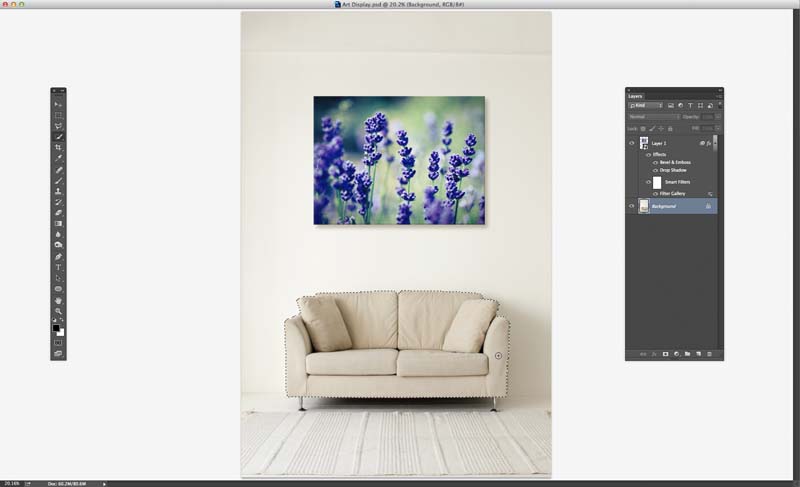
Click and drag over the sofa to make a selection. We’re only concerned with the upholstery here, so don’t worry about including the legs or the shadow. The Quick Selection tool does a great job but it’s not infallible and we’ll need to fix a few stray areas.

My go to method for fixing small selection areas is using Quick Mask. We can access this by clicking its icon in the toolbox (the rectangle with dotted circle below the foreground and background colour chips) or by using the keyboard shortcut Q.

By default, the red overlay shows us the masked areas, leaving the area we select clear. If, like me, you’d prefer to see the selected area highlighted, open the Quick Mask options panel by double-clicking its icon. Change the Color Indicates option from Masked Areas to Selected Areas. Click OK to apply the changes.

You’ll need to activate Quick Mask again (shortcut: Q) if you changed the settings. I’ve zoomed in here so we can see the areas that are missing. Select the Brush tool (shortcut: B) from the Toolbox. Choose a Hard Round tip from the Brush Presets. It’s important to use a hard brush tip as this will match the current hard egde of the selection we made.

Make sure the Foreground Colour is set to Black; we can do this by pressing D on the keyboard. Now use the brush to paint over the missing areas. As we do, they turn red (or the red is painted away, depending on the Quick Mask settings) to show they’re being included.

Continue working around the sofa. Remember to increase and decrease the brush size as you go; this can be done quickly using the left and right square bracket keys. If you make a mistake or need to remove an area, such as the section in between the back cushions, simply switch the foreground colour to white by pressing X on the keyboard and paint it out.
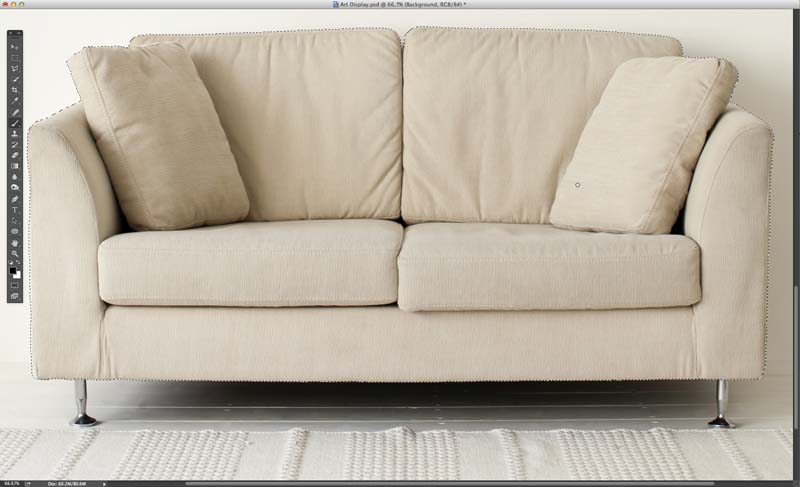
Once we’ve been round the whole sofa and corrected the errors, we can exit Quick Mask by clicking its icon or pressing Q again. The marching ants of the selection reappears, now including the repairs we made.

We need to soften the selection a little, as the edge would be too sharp as it stands. Go to the Select menu. Choose Modify > Feather. A value of 1 pixel should be enough for this image size. We don’t see any difference now but it will be evident later.
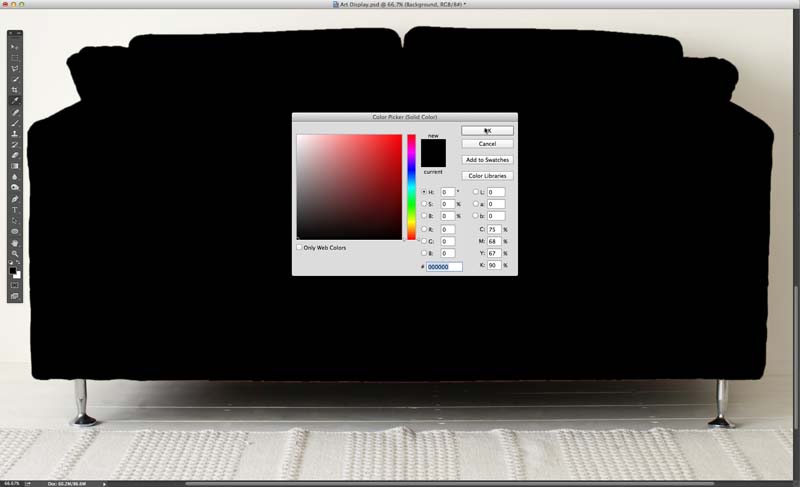
Now to change the colour of the sofa. Go to the Layer menu. Choose New Fill Layer > Solid Color. Click OK to accept the dialog defaults. The colour picker dialog appears, set to the current foreground colour: black in this case. Click OK to create the adjustment. Notice how only the sofa is affected; the selection we created has automatically been applied to the layer’s mask.

For the colour effect to work we need to change the fill layer’s Blend Mode. As the sofa is a light colour to begin with, we’ll use Multiply. We don’t see any difference yet, as our current colour of black is already the darkest and so will obliterate any of the underlying image.

Zoom out so we see the whole image – keyboard shortcut Cmd+0 (Mac) or Ctrl+0 (PC). Double-click the Color Fill layer’s thumbnail to open up the colour picker again. Although we can choose almost any colour, I often like to use a shade from the artwork itself. Here I’ve chosen a pastel green from the grass by clicking on it with the eye-dropper. Click OK to set the colour. The tones and textures of the sofa show through with the new colour applied.
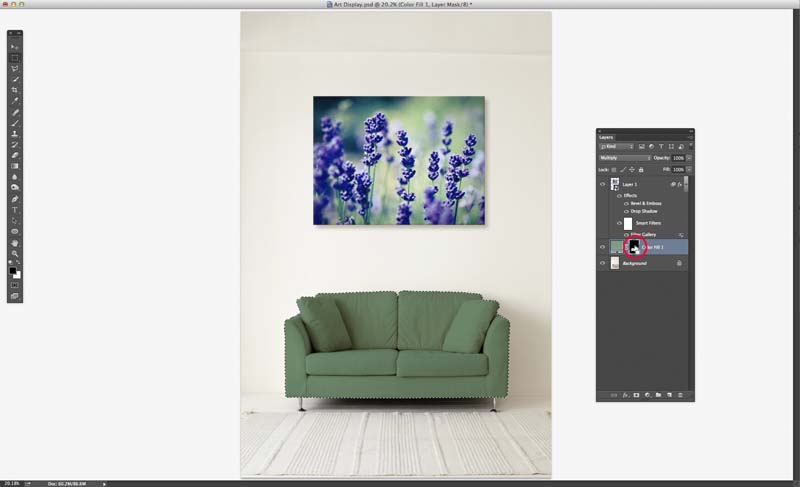
We can use the same technique to change the wall colour as well. We need to exclude the sofa, of course. We can reload the sofa’s selection to give ourselves a head start. Hold Cmd (Mac) or Ctrl (PC) and click on the Color Fill layer’s mask thumbnail. The outline of the sofa appears.
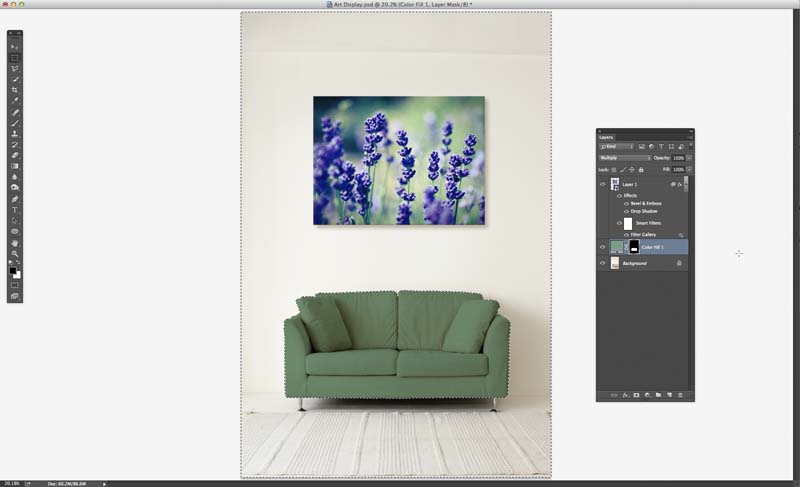
Go to the Select menu. Choose Inverse. You can also use the keyboard shortcut: Cmd+Shift+I (Mac) / Ctrl+Shift+I (PC). Now everything apart from the sofa is selected.

Grab the Rectangular Marquee tool from the Toolbox (shortcut M). Go to the Tool Options bar. Click the Intersect with Selection icon (last of the four); a small X appears next to the cursor. Draw out a selection from the top-left of the image to the bottom-right where the floor meets the wall. When we release the mouse, the wall is selected apart from the area where the sofa is.

Before we continue, we’ll make a slight adjustment to the selection. Go to the Select menu. Choose Modify > Expand. Set the value to 1 pixel. This will help to prevent any unwanted outlines appearing between the wall and the sofa. The original feather of the sofa’s selection is still in place to allow a smooth transition.

Now to create the colour overlay for the wall. Select Layer > New Fill Layer > Solid Color as we did before. Again it will be black by default. Click OK to create the layer. Notice that the mask is almost the exact opposite of the sofa’s layer.

Set the new fill layer’s blend mode to Multiply and double-click its thumbnail to open the colour picker as we did before. Again, I’m using a sampled colour from the artwork, a darker shade of lavender from the flowers this time. As with the sofa, all the tones of the wall, including the shadows have taken on the new colour.
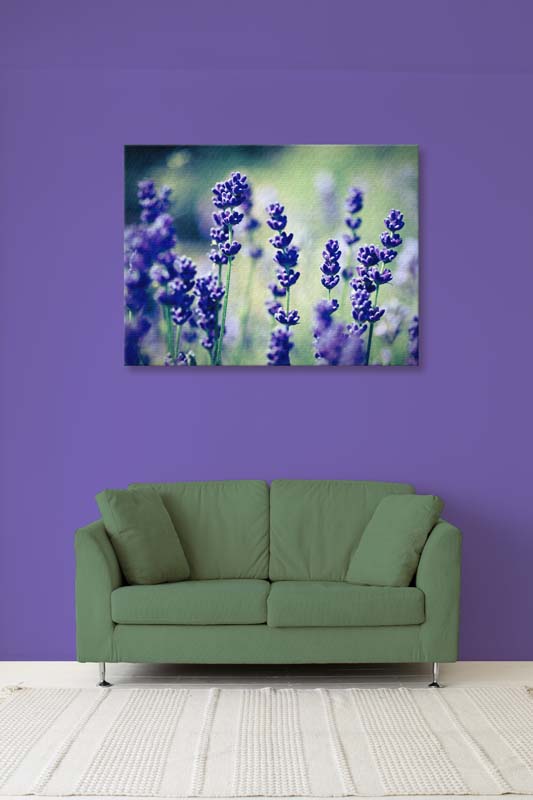
And that’s the image and template complete. We can save the file as a Photoshop PSD, as we did in the first tutorial, then come back to it time and time again to use a different image on the wall and to change the sofa and wall colours to suit. As well as the sofa and the walls, of course, we could also use the technique to change the colour of the floor and the rug and even the loose cushions; it really depends how far you want to go. It is worth noting that not all colours will work first time, a little experimentation combining colours and blend modes may be needed to bring out the tones correctly.
I hope you enjoy this tutorial and can use it with your own images.
Until the next time, take care!


Awesome tutorial with details. Thanks for sharing.