
How To Create A Rippling Flag Using The Displace Filter In Adobe Photoshop

In this tutorial we’ll be creating the effect of a rippling flag using custom artwork and one of Photoshop’s oldest distortion filters, Displace. The filter uses a monochrome image map to distort the pixels of the target layer based on the tones of the map. The brighter or darker the tone, the more the pixels of the image are pushed horizontally or vertically. This is great for creating the appearance of an object or text following the contours of a texture.
Our example image uses a photo of a hanging bedsheet as its base, which creates similar folds and wrinkles to that of a flag blowing in the wind. You could also use the same technique to create realistic custom t-shirt designs for an e-commerce website and much more besides!

Let’s get started!
1. We’ll begin by opening the base image file, a photo of a hanging bedsheet. This works really well, as it has some really nice folds and wrinkles; we need to change its orientation from portrait to landscape, though. Go to Image > Rotation > Rotate 90º Counter Clockwise. This will give us the impression of the flag blowing to the right.

Open the base image file
2. We’ll only be using the tones and texture of the sheet for our effect, so we’ll convert the layer to monochrome. To do this, select Image > Adjustments > Desaturate, or use the keyboard shortcut Cmd+Shift+U (Mac) / Ctrl+Shift+U (PC).
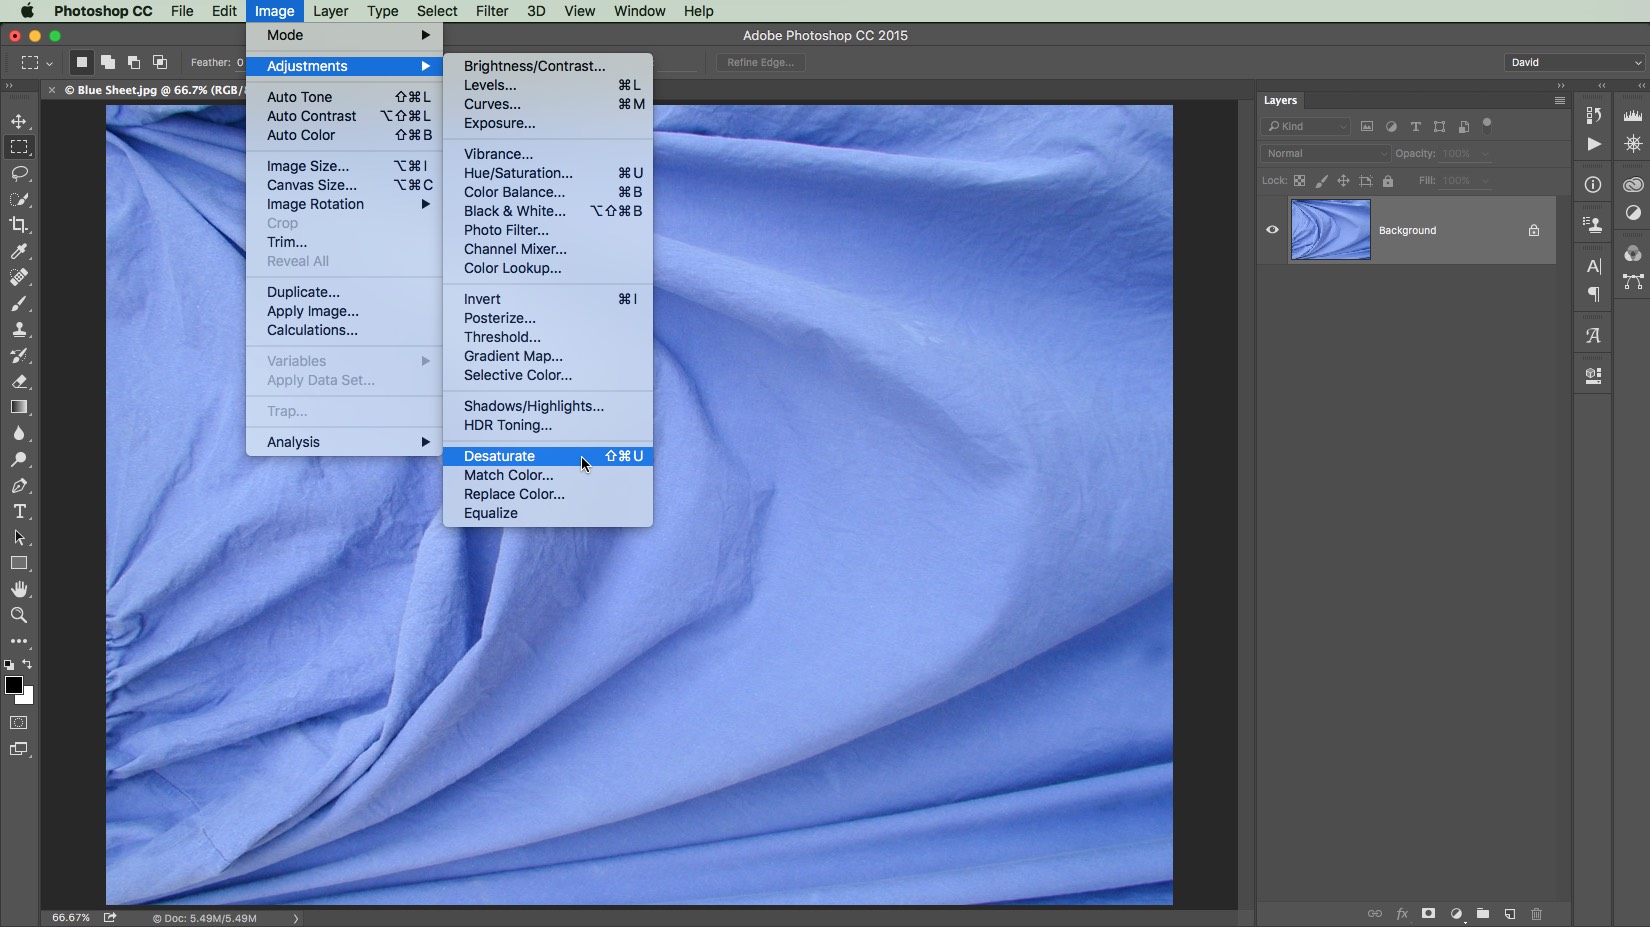
Desaturate the image
3. With the flag background in the correct orientation, we can add our artwork. The best way to do this is with the Place command, as it automatically converts the layer to a Smart Object. Go to File > Place > Place Embedded. In the example, we’ve made the artwork document the same dimensions as the base image, so it fits perfectly. Pressing Enter or clicking the tick places the image in the document as a new layer.
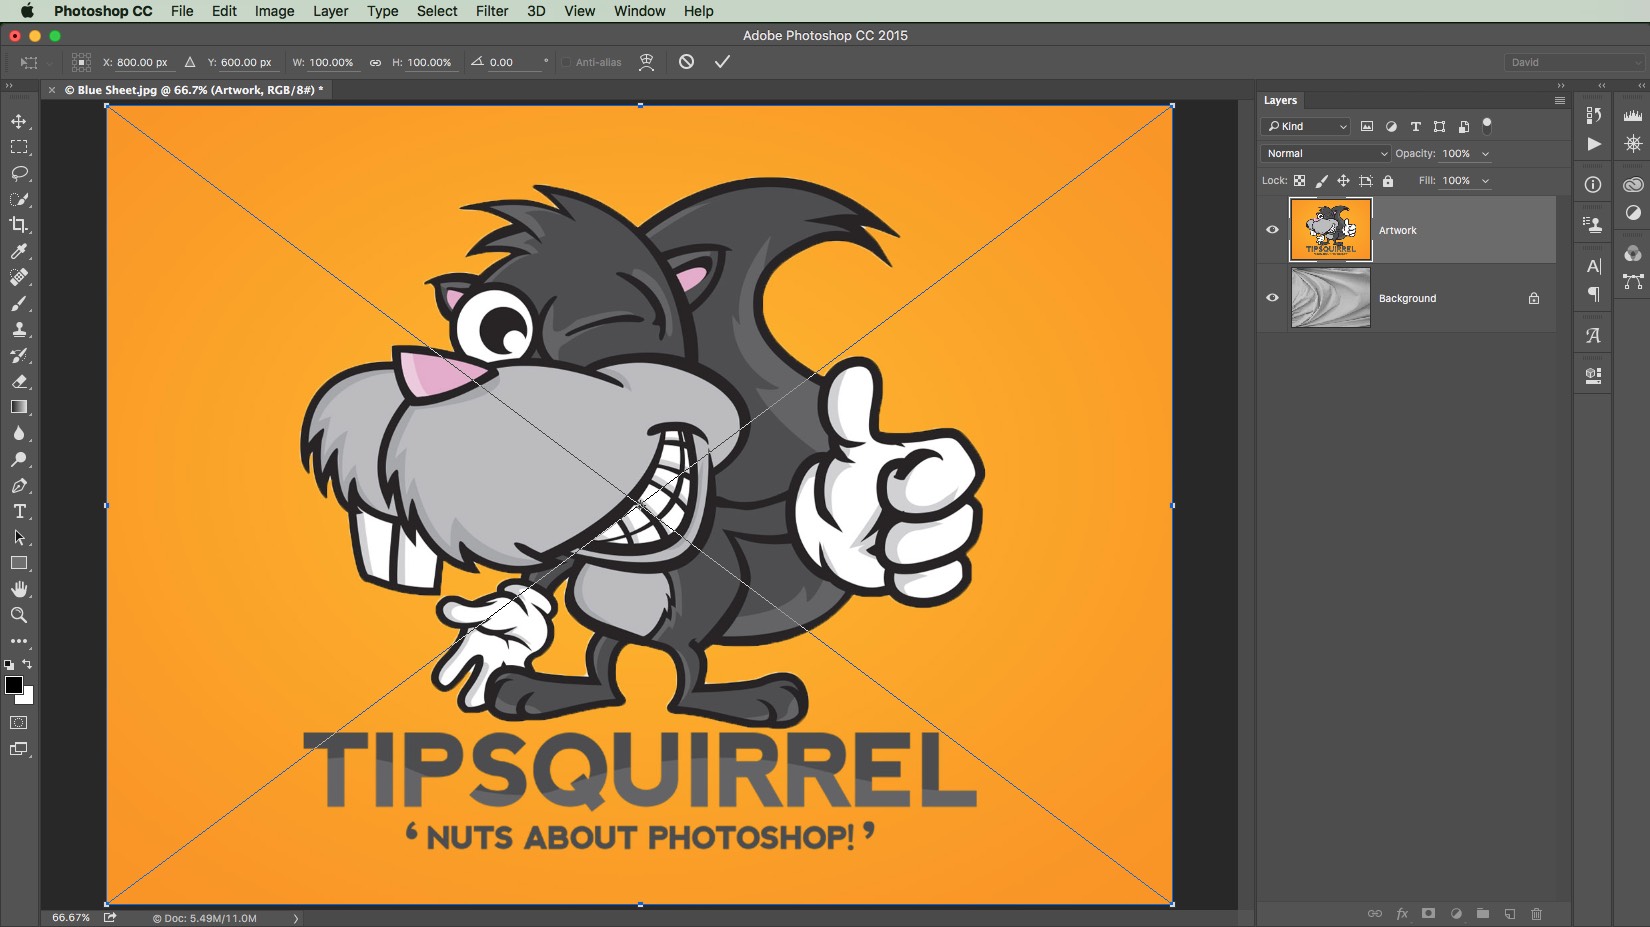
Place the artwork
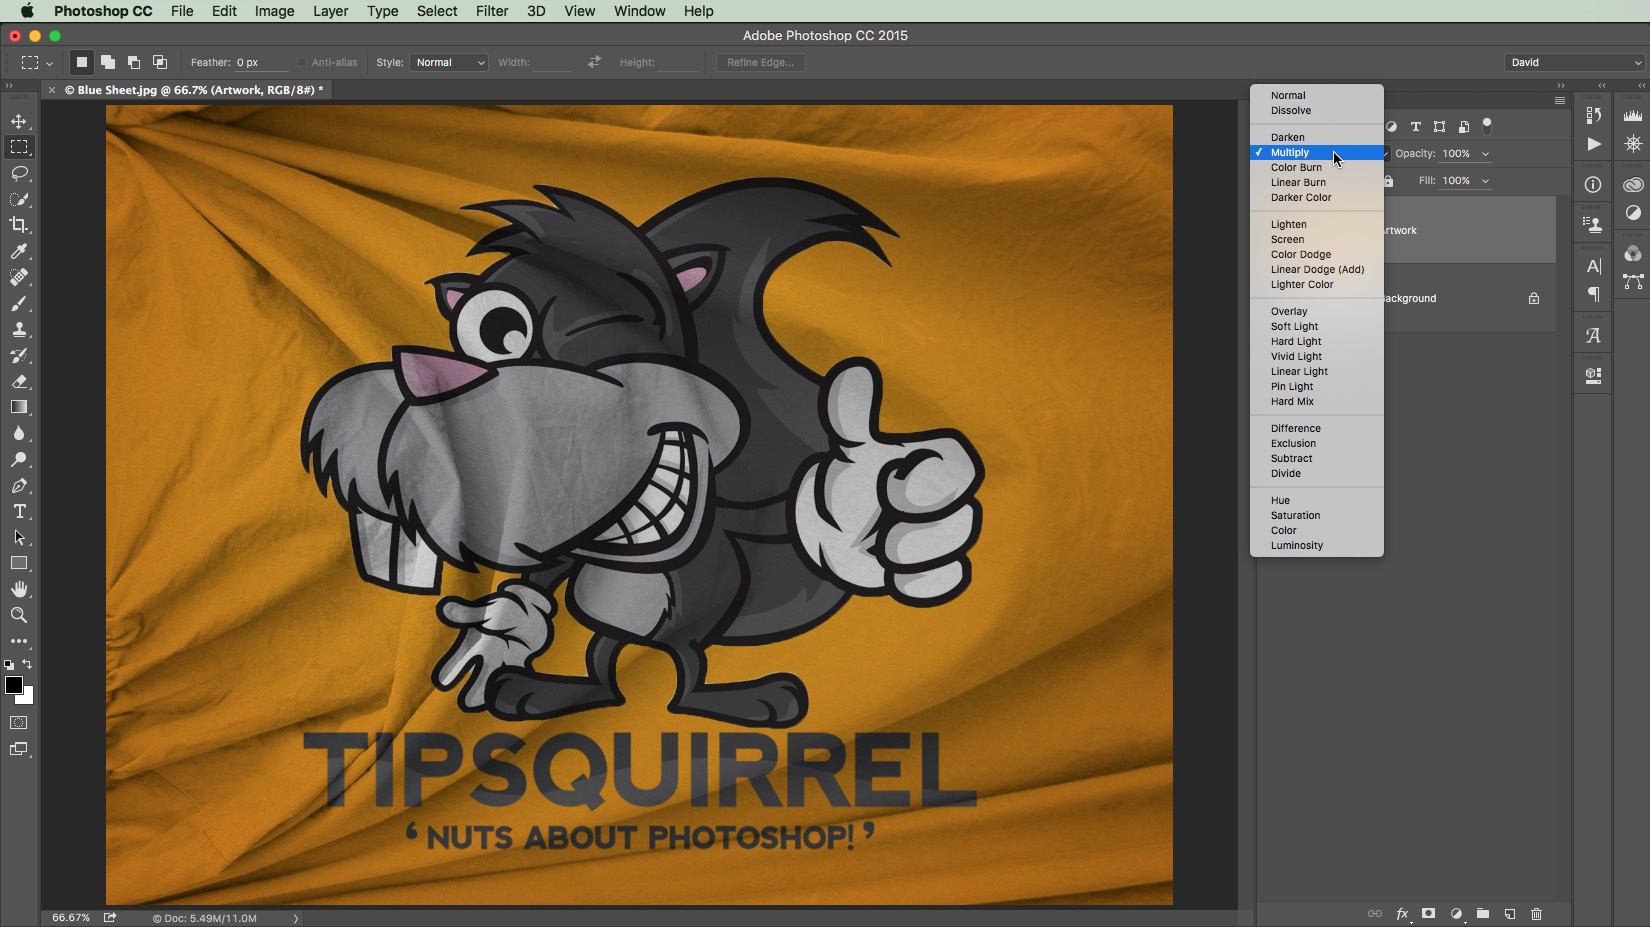
Change the Layer Blend Mode

Duplicate the base layer to a new document
6. The Displace filter uses the tones of an image to create the distortion. We’ll enhance the tones of the layer using Levels. Go to Image > Adjustments > Levels, or use the keyboard shortcut Cmd+L (Mac) / Ctrl+L (PC). Drag the Shadows slider over to the right so it meets the left edge of the histogram slope. Now do the same with the Highlights, dragging to the left to meet the right side of the histogram.

Enhance the image tones
7. We need to remove some of the detail from the image as it would cause the results to be too jagged. Go to Filter > Blur > Gaussian Blur. Adjust the blur Radius enough to soften the image but keep sufficient detail for the filter to work with. A Radius of around 8 pixels works well with the example files. Click OK to apply the blur.

Soften the image
8. The Displace filter only works with PSD files, so we need to save our displacement map image. Go to File > Save As. If you named the document when you duplicated the layer, it will appear as the default name. Otherwise, give the file a meaningful name. Choose a suitable location to save the file. Make sure the file format is Photoshop. Click Save. We’re finished with the displacement map tab so we can close it or switch back to our flag document.

Save the displacement map image
9. Now to apply the effect to our artwork. Go to Filter > Distort > Displace. A small dialog opens (remember, it’s a very old filter!). The first settings control the amount of distortion. In this instance we’ve set both Scales to 15. This means the image will be distorted up to 15 pixels both horizontally and vertically, depending on the brightness of the tones in the displacement map. We can leave the rest of the settings at their default. Click OK. The filter asks us for the displacement map image. Locate the image we just made. Click Open.

The Displace filter dialog
10. Here’s the result. The artwork has been distorted and now appears to follow the contours of the folds in the sheet. If you want to see the difference, click the Smart Filter’s eyeball icon to hide the filter effect.

The artwork with Displace applied
11. We can make some final tweaks to enhance the effect. Click the base layer’s thumbnail to make it active. Open the Levels dialog as we did before. Tighten up the Shadows and Highlights. We’ll brighten up the flag by dragging the Mid-tones slider to the left a little. We’ve also applied a small amount of Gaussian Blur (around 1px) to the artwork layer to soften the outlines a touch.

Enhance the completed effect
Once the flag’s complete, we can save it and use it in a new image. All we need to do is apply an image warp to give it a sense of movement.
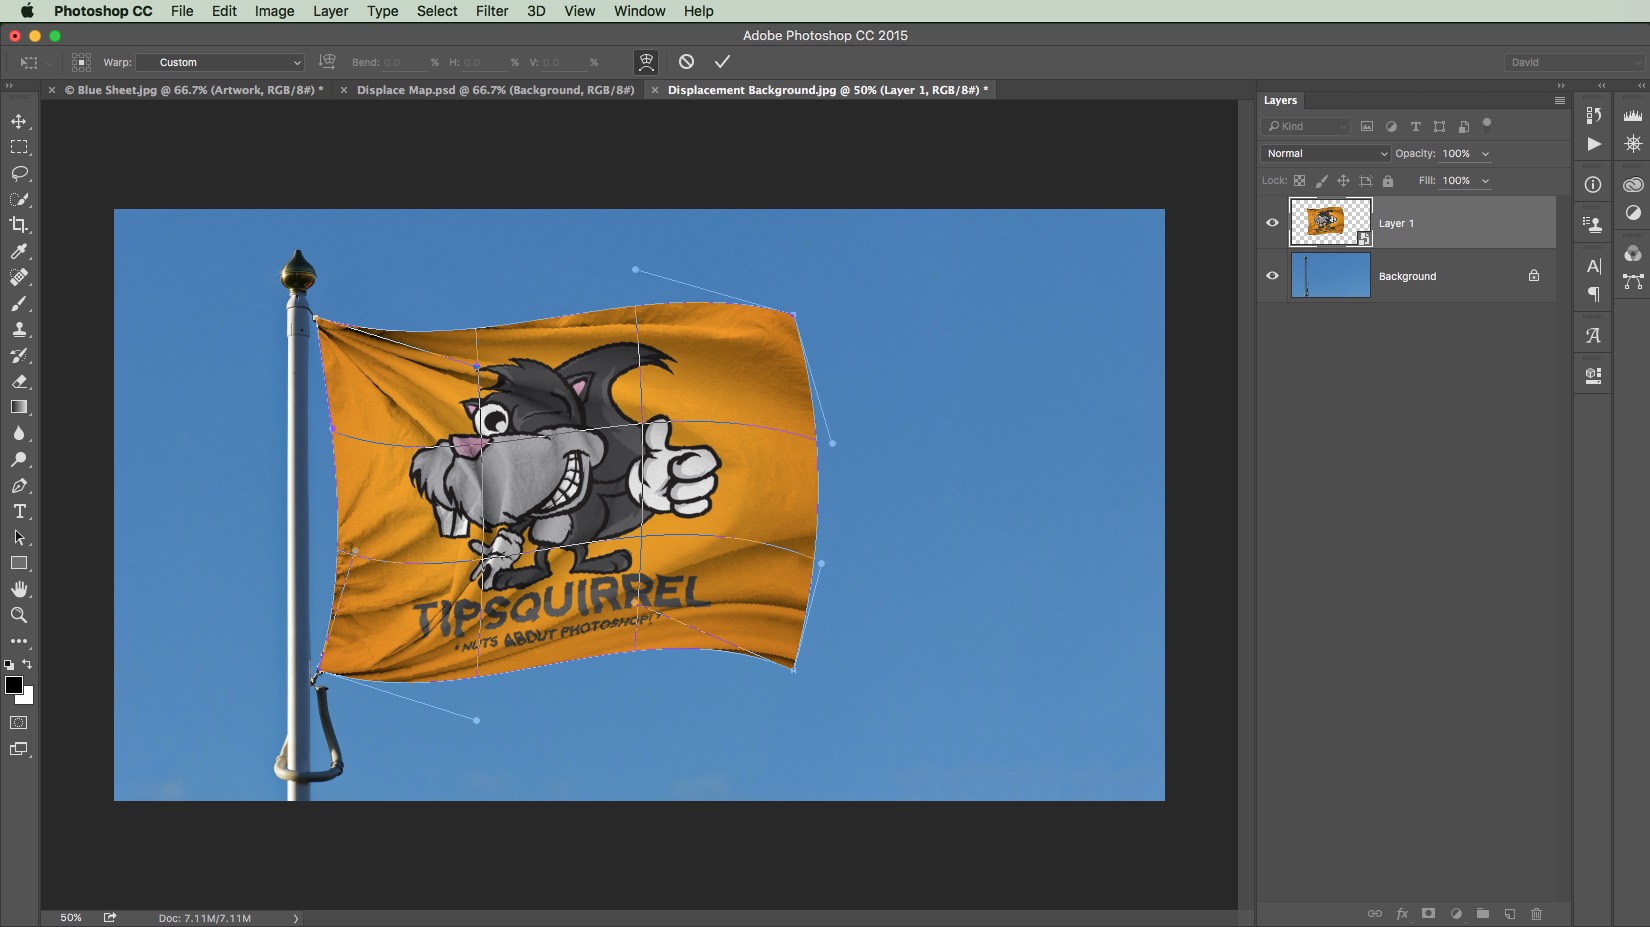
Warp the shape of the flag
And that’s our rippling flag effect complete. We can go much further, of course: the flag in the intro image has had seams added around the edge and wind fraying at the end to give it a more realistic effect.
We hope you’ve enjoyed this tutorial. Please help spread the word about TipSquirrel by sharing this and the other great tutorials on the site with your friends and colleagues!
Until next time, all the best!
David


Leave a comment