
Classic Movie Star and Marvel’s Agent Carter Inspired Photoshop Portrait
The forties were a unique time in the world of photography. There are probably not many photos taken in that era that you couldn’t identify as being taken in the 40’s. Thanks in part to the fashions, the style of the era shows through in studio portraits of the time. In an age when Hollywood was the main escape from the everyday, which was war for the majority of the decade, the magic of the silver screen was front and center in the portrait studio.

And now for something completely different, there’s this really great promotional poster for the T.V. show Marvel’s Agent Carter; have you seen it? It’s almost Black and white, but it’s not. It’s subtle, except for the vivid colors that just pop out at you. It’s everything a good ad should be…

So, in homage to the glamorous decade of the forties, and a really good ad campaign, we’re going to use a few ideas from both of them to turn a modern photograph into a 1940’s inspired portrait with a touch of the comics thrown in.
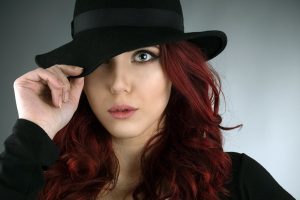
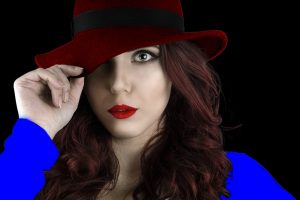
Our before image, from Fotolia, is just a simple image of a woman in a fedora. You can download it here, if you’d like to play along.
The first thing we need to do is to get rid of the light background. Add a new, blank layer over the background layer. Fill it in with Black.

Now you can use your favorite method to select and extract the background. I used Refine Edge, and it did a fair job, but still fell short of what I was looking for around the hair on the right.

I decided to “dye” the hair that was still looking blue to match the hair color. I sampled the hair color, and then used a brush roughly the same size as the hair strands to paint on the red.

Next I set the layer blend mode to Color and lowered the opacity to 50%.

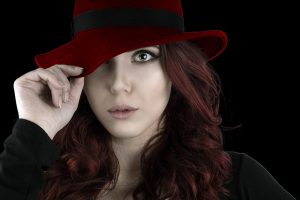
That looks better. Since 40’s photographs were, for the most part, black and white, we’re going to add a Black & White Adjustment layer.

Go through all the presets and use the sliders to find the look you like. I went with the Darker preset because I liked the contrast. I didn’t want to keep it stark black and white, so I lowered the opacity to 50% to let a hint of color come through.
Now to turn that hat ravishing red; first, find the red you want, I went with the go-to red, FF0000 in Hex, and changed the Layer Blend Mode to Color. On a blank layer, carefully draw in the hat; clean up all sloppy edges.

Now to darken the hat band to go a bit better with the mood of the image; again, on a blank layer paint the hat band in with black, clean up edges and change the blend mode to Soft Light. Lower the opacity to get the tone you want. I started out lowering it to 55%, but will probably go back and darken it later. That’s the great thing about layers; I can change anything at any time!
Now I want to deepen the shadows on our heroines face. To do this, on a new, blank layer, literally paint black all over the area you want to shadow.
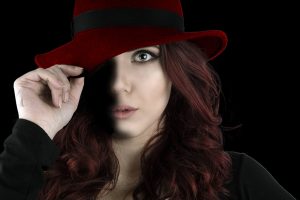
Soften the area by going to Filter > Blur > Gaussian Blur and moving the slider up just enough to soften the edges. Change the Layer Blend Mode to Soft Light.
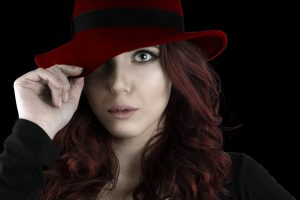
The next thing we’ll do is give her a bold red lip. On a new, blank layer brush the red of your choice carefully over the lips. I used hex value #730505, and changed the Layer Blend Mode to Overlay for the bold yet sheer color. I lowered the opacity to 85% just to help it blend a little better.

And now for the coat; after you add a new, blank layer, select a vibrant blue and paint in the coat.
Vibrant it certainly is, but it needs to be taken down a notch, or five, to look somewhat realistic. Change the Blend Mode to Vivid Light and lower the opacity to 35%.

Now we’re going to start going really dark. Make a new, blank layer and just like we did at the beginning, fill it with solid black. Lower the opacity of the black layer enough so that you can see the image underneath. Now, use the elliptical selection tool, or the Patch tool, or whatever your fav selection tool is, to select an area you want some light to shine on:
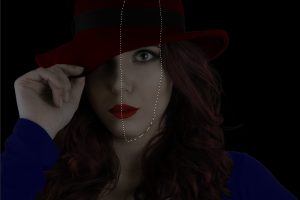
Go into Refine Edge. If you use the Elliptical selection, you can go to the tool bar and select Refine Edge. If you’re using the Patch tool, you’ll need to select and then change the tool to the selection tools to get to Refine Edge on the tool bar. Once in Refine Edge, bring the Feather slider up around halfway, and then click ok. Once the selection is active, use Ctrl or Cmd + X to delete the selection. Continue making all the selections you need, feathering and deleting the areas.

Now the lights are getting dramatic. Once you’re done with the selections, lower the opacity of the black fill layer to around 70%.

I wanted to lighten up a couple areas of the red hat, so on a new, blank layer I painted with white on the areas I wanted to brighten and changed the Blend Mode to Soft Light.
Finally, go over the eye with the Dodge and Burn tools to darken the eye makeup, brighten the white of the eyes and generally increase the contrast of the eye area.

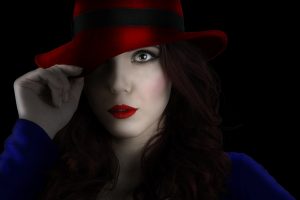
In the end, a nice, normal portrait becomes a little bit more; a little 40’s and a little comic book!


Really awesome and helpful photoshop portrait …love this.
keep it up !!