
How to Cut Out an Object From Its Background in Adobe Photoshop Mix

Hi Everyone
Last month we demonstrated how to create a simple composite image using pre cut-out elements in Adobe Photoshop Mix. This month we will be looking at how to extract elements from their backgrounds to place them into a new scene. Photoshop Mix gives us a very simple way to do this, which is often as easy as dragging your finger over the item once.
What we’ll learn:
- Starting a new project
- Importing the images
- Using the cut out tool
- Smoothing edges
- Adding a look
Let’s get started.
1: Starting your image project
Launch Photoshop Mix. If this is the first time you’ve used it, you’ll be asked to sign in to your Creative Cloud account with your Adobe ID. If you don’t have an account, you can also choose to create one from the same screen. Once you’ve done this, you’ll be taken to the project screen, this has some built-in sample projects and is where your own projects will be displayed as you create them. Tap the plus sign in the top-right of the screen to start a new project.

Starting a new project
2: The file import screen
Photoshop Mix gives us a choice of sources to import our first image. We can open an existing photo from the camera roll, take a new photo with the phone’s camera, or download one from Creative Cloud, one of our CC libraries, Facebook or Dropbox. Tapping on one of the options opens a thumbnail view of the contents. You can also navigate through any folders and collections you may have set up. I’m browsing my camera images using On my iPhone.

The file import screen in Adobe Photoshop Mix
3: Import the background image
Tap the chosen image to import it into the project. This may take a few moments if you’re using a cloud-based source. We’ve chosen this seascape as makes a great background for the artwork. You will notice that there are two boxes in the middle-right of the screen. These are your image layers (you can have up to 5 layers at the time of writing this). The layer highlighted blue is the current layer, which we’ve just imported. We’ll leave the background image as it is for the time being.

The imported background image
4: Add a second layer image
Now we’ll import another image element to place in our scene. To do this, tap the plus sign on the empty layer square in the Layer Panel. This will open up the file selection screen as we saw before. We’ve chosen an image of an origami boat. The new image appears centralised over the background. We can see an additional layer square has been added to the layer stack on the right.

A paper boat image for the foreground
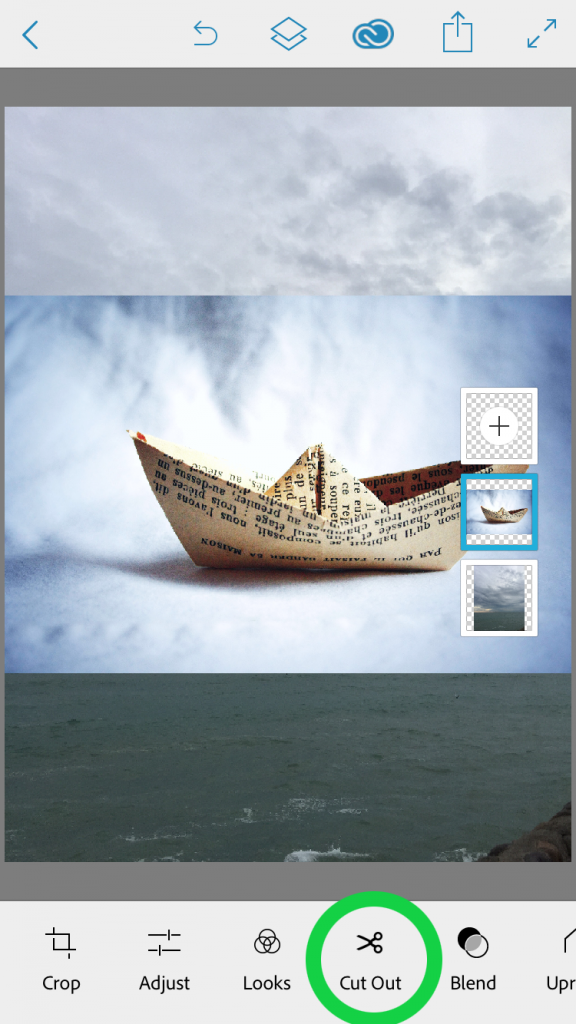
5: Switch To Cut Out mode
The origami boat is great for our image. We will need to cut it out from its background, so as to make it fit our seascape image. Tap the Cut Out icon at the bottom of the screen, this takes us into the cut out view and initially hides other layers leaving our boat layer visible and easier to work on.
Selecting the cut out tool
6: Remove the boat’s background
We will use the Smart Selection Brush here as this is very effective at taking away the unwanted background. This is found by tapping the icon at the bottom right side of the screen. We simply drag a finger over the boat to make the selection. As we do we see the background disappear, leaving the chequerboard pattern. Often this is all you will need to do, however, you may find areas that have been missed. These can be tidied up by switching to the Basic Selection Brush and painting them out manually.

The Smart Selection tool
7: Zooming into the detail
The Smart Selection tool is good but it leaves some untidy edges. We need zoom in on areas of the boat so we can see the detail. Tap and spread two fingers to enlarge the view of the boat, which really makes it easier to see the fine lines.

Viewing the detail
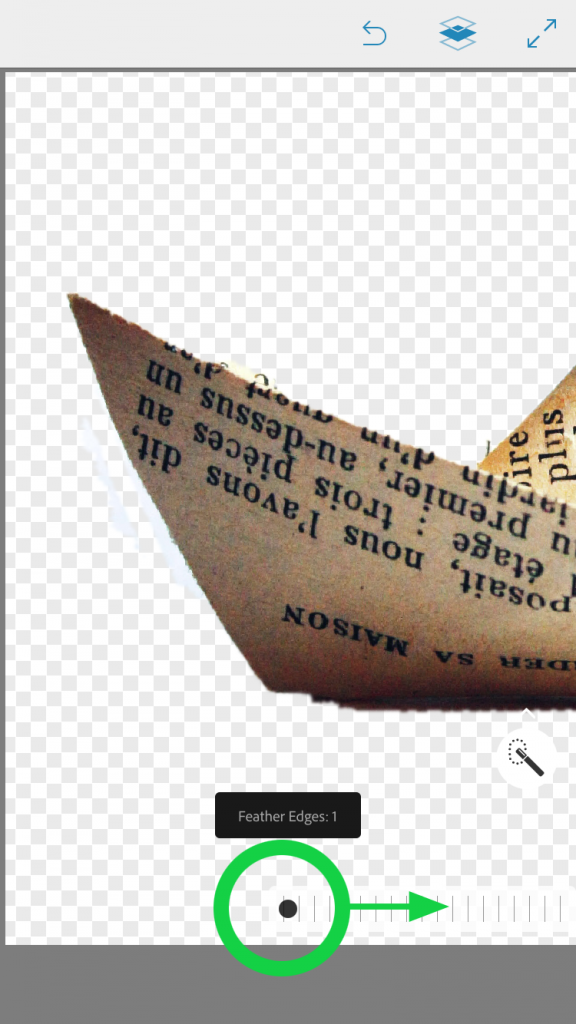
8: Smoothing Out the Edges
Press and hold the Feather tool at the bottom of the screen. We can increase the feather amount by dragging to the right until the edge looks smoother. In this instance we do not need a lot of feathering, A value of 1 has smoothed it out sufficiently. The bottom of the boat looks ragged, that’s ok, as this is how it would appear in the water. Tap the Tick Mark in the bottom right of the screen to apply the changes.
Feathering the edges
9: The Finishing Touches
To finish our simple scene, we will apply an overall effect using the built in Looks feature. Here we’ve applied the Twilight preset to the background image, which creates a slightly grainy, cross-processed appearance.

Choosing a look for the image
10: The Final Image
Here is our final image, we’ve applied the same Look preset to the paper boat as we did for the background to help it blend into the scene.

The Final Image
I hope you’ve enjoyed the tutorial and you have been inspired to go and create your own photo-montages using Photoshop Mix.
I’ll be back next month with another mobile image editing tutorial, so stay tuned!
Josephine J x


Great tutorial about how to cut out an abject form its background in adobe photoshop. So effective information share this post. Many many learn this post.
So amazing about how to cut out an object from its background in photoshop.Thanks for share this post.
Extraordinary instructional exercise about how to remove a wretched frame its experience in adobe photoshop. So compelling data share this post. Numerous many take-ups in this post.