Creating a Soft Glow Effect in Photoshop

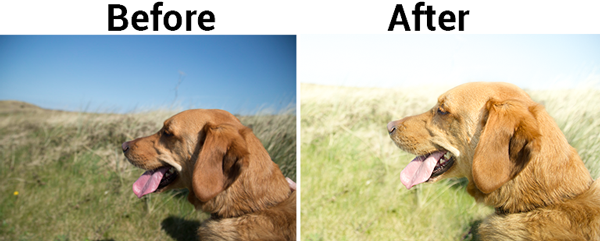
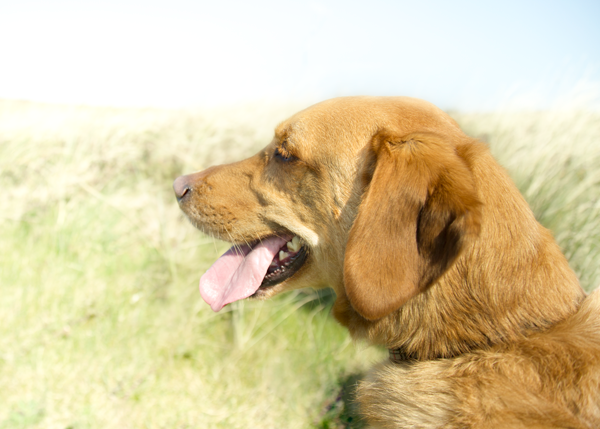
Hi there I am Sian an amateur photography and fashion blogger here to share some simple techniques I use to enhance my photos. This tutorial is about turning a shadowed image into a soft glow portrait.
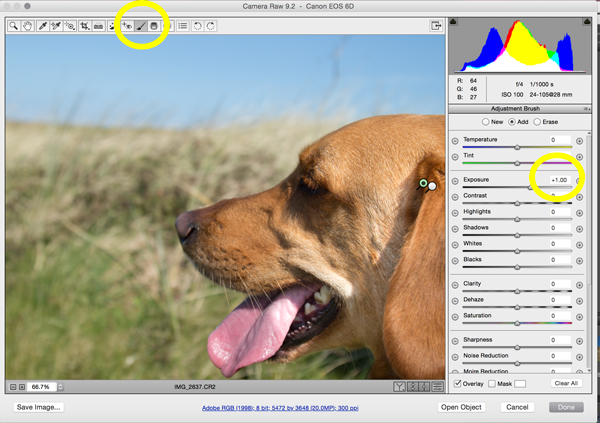
I always start by opening the image I want to to edit in photoshop raw as it is a great place to do some simple edits. I begun by using the adjustment tool to reduce some of the shadows on Gus’s face. I started with the exposure on plus 50, brushed around his shadowed eye and mouth and then upped the exposure a little more until I was happy. I did not want to get rid of the shadows just soften them a bit so I upped the exposure just a little bit more.
I then went into split toning to add a warm glow onto the image before I opened it into photoshop. I choose a warm colour and just added it on the highlights of the image. This also made Gus’s coat look very golden. Once I was happy with the colour I then opened the image up into photoshop.
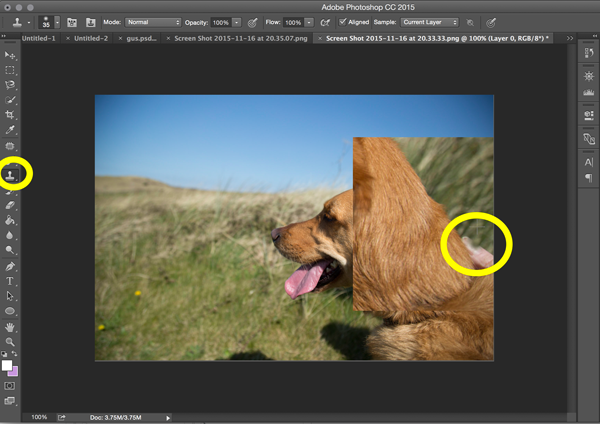
In photoshop I duplicated the layer and turned the bottom layers eye off to save incase I make any changes I am not happy with. If you look closer at the original image there is a thumb in the right hand corner I am not happy with, this is really easily removed by using the clone stamp tool. As I am going to be blurring this section slightly more later on I did not need to be perfect with this. I aimed to run the clone stamp along the grass strands though, I did this by holding the alt key and selecting the grass strands just above the thumb and then moving the brush down towards Gus’s hair.
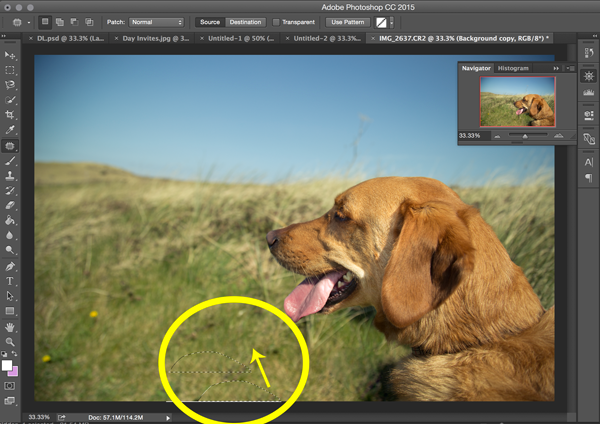
I also want to remove the shadows in the bottom left of the image, for this I used the patch tool drawing around the shadows. I did not get very close to Gus’s hair on the shadow nearest to him. This was because once I moved the patch tool out to a grass selection with no shadow it blends in to create a slight shadow that looks like it belongs to Gus instead of someone standing over him.
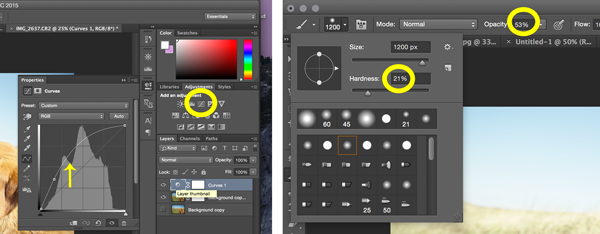
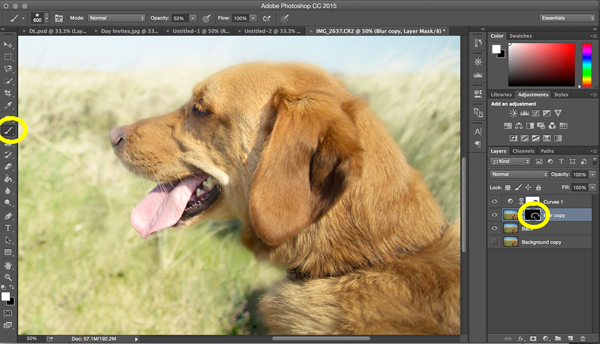
Now I have removed the shadows and thumb I can start creating that softer glow look. First I added a curve adjustment layer and just pulled the curve up towards the highlights so the image is quite bright all over. Gus now however looks too bright and I need to tone his exposure down. I first made sure I had the mask layer selected in the curves adjustment layer, then choose the brush tool, setting the foreground colour to black. I made sure the brush had a low hardness and low exposure (was set to 55%) and I started to paint Gus back in by running the brush over him, you should start seeing the exposure drop slowly and his fur going back to looking richer in colour.
Once I was happy with how Gus’s fur was looking I duplicated the layer and titled it blur. As Gus looks very sharp compared to the background I wanted to soften his edges a bit. Still selecting the top layer I went into filters, blur and gaussian blur. I set the pixels to 24.7 as I wanted it to be very soft. Now the whole of Gus is completely blurred which is not what my intentions were. So instead of adding a normal mask I add a hidden mask (hold alt down as you add a new mask layer) and changed my brush colour to white. Keeping the brush on the same opacity and hardness as previous I painted just around the edges of Gus with a small brush size. I then made the brush size slightly bigger to blend out the blur. I still felt the blur was a bit too intense so I turned down the layers opacity.
Finally cropped the image so Gus still has some looking space but I felt the original had a bit too much. Once I was happy with the crop I selected my layers and converted them to a smart object. Once they were converted I went back into camera raw through filters adding a radial filter, but instead of a dark vignette I upped the exposure so the image was brighter round the edges. I then went back to my split tone as I felt Gus’s fur was not as golden as I would like it to be. To change this I changed the hue on the shadows this time instead of the highlights to a golden colour and slightly upped the saturation. This just added a golden touch to Gus’s hair that I felt finished the edit for me.








Leave a comment