
Lightroom Curves Unleashed!
Sometimes, Lightroom’s basic Develop controls aren’t going to take you far enough, and you’ll want to exercise a little more creative control over your images. Lightroom’s Tone Curves feature can provide that added control you seek, but at a casual glance, the Tone Curve seems a bit limited. There are some safety nets built into the Lightroom Tone Curve panel to keep you from unwittingly making a mess of your image, but with a little care and exploration we can unleash the full power of curves, right within Lightroom.
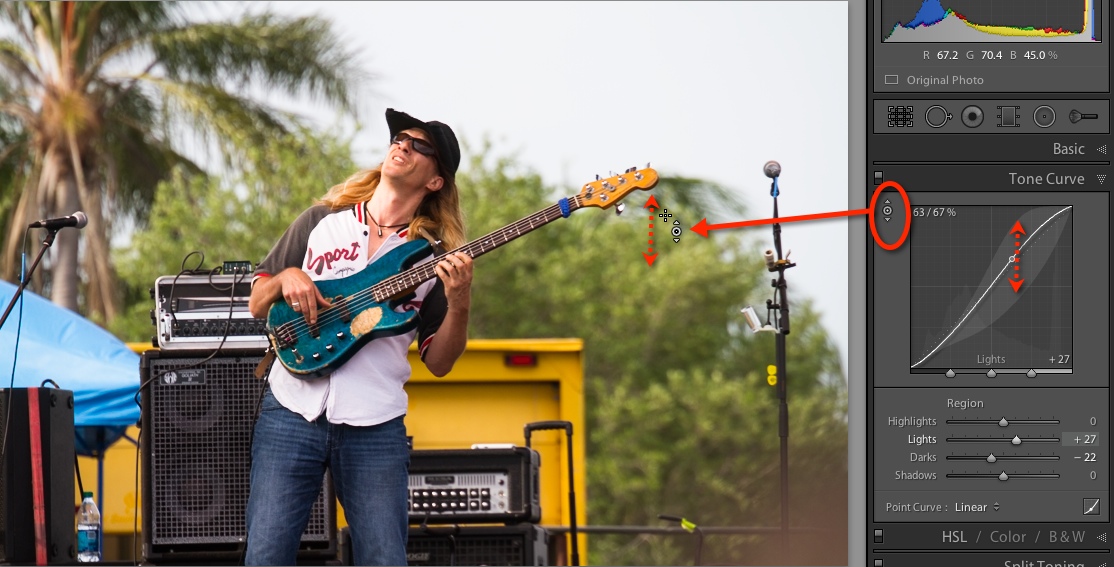
If we look just below the basic panel in Lightroom, we’ll find the Tone Curve panel. For the uninitiated, Curves are a brightness and contrast adjustment on steroids. Across the bottom of this graph (1), you’ll find the tones in your image, from dark to bright. The diagonal line represents an adjustment to the brightness, and you can pull up or down (2) to brighten and darken parts of the image.

If you’ve used Photoshop or another image editing program, you may be familiar with Curves, but the adjustments are more limited by default than what you may be used to seeing in other programs. Lightroom’s curves by default are a little restricted, and this is to help prevent an unwary user from making changes that are too radical.If we hover our cursor over the diagonal line, we can see four basic areas highlighted – Shadows, Darks, Lights, and Highlights. As each is highlighted, you can also see an envelope showing the possible range of adjustments for that section. Click and drag, and you’re affecting that tonal range of your image – and the sliders underneath are updated as well.

You could change just as easily by dragging the sliders at the bottom, and the curve above is updated dynamically. For example, if we darken the Darks, and brighten the Lights, we are adding contrast to our image.

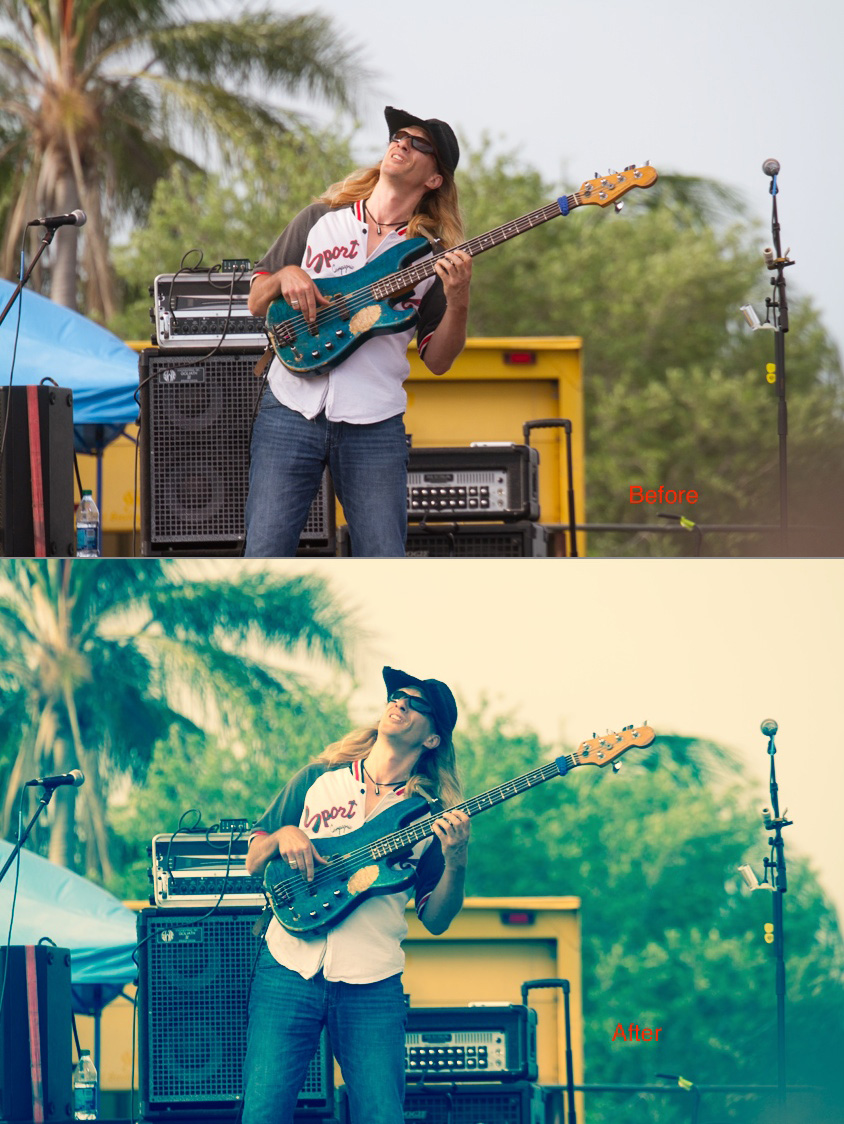
Each panel in the Develop module has a little switch so that you can get a before/after view. The Tone Curve panel is no different in this respect. Click the switch and we can see the difference in effect we created by adding this tone curve.


In addition to dragging on the curve and dragging the sliders, we have the ability to interact directly with the image, using the Targeted Adjustment Tool. Click once on the tool at the upper left of the panel, and now you you drag directly on areas of the image. Lightroom targets the appropriate zone within the Tone Curve to brighten or darken according to the tones you’ve picked within the image.
TIP: Double click the Region label to reset all the sliders to their original default value.
Notice, as mentioned, the limitation of adjustment is constrained within the gray envelope. With the default curve settings, we can’t go beyond this safety net. If you’re a curves expert, and want to control your own destiny, click the icon in the lower right corner to enable a custom point curve.

Now, we can click on the curve and drag – up to brighten, down to darken – and we can not only pick our points anywhere on the curve, as many as we want; but we can push the values as far as we want, and create settings that range from subtle to wild.

If we go back to the standard curve, by clicking the little icon again at the bottom, the sliders are still available – but now the envelopes are based on the custom curve we created a moment ago. Notice that the shape of the envelope has changed, based on the new curve profile.

We can save this curve as a preset, if we want, by clicking on the word Custom at the bottom. There are two built-in curves, for “Medium Contrast” and “Strong Contrast,” and we can add the new one we’ve just created. We’ll call this one “Contrast Boost.” You can click this preset any time to use this on other images.

TIP: Select the Linear curve to get back to the original default.
Curves give us even greater ability. If we enable the custom point curve, we can then click the RGB label and have access to the tone curve for each of the color channels independently. For example, we could create a cross-process curve to give our image a vintage effect – we do this by increasing contrast in the red channel, boosting the brightness of the green channel, and decreasing the contrast of the blue channel, radically limiting the tone density at the endpoints.


TIP: If you have a creative curve like this one, it may make more sense to save this as a Develop Preset rather than a Tone Curve Preset. In the left-hand panel. click the “+” next to Presets (1). Give your preset a name (i.e., “Vintage Cross Process”) and then, in the New Develop Preset dialog box, first choose “Check None,” (2) then select the Tone Curve parameter (3), and click Create (4). You can now click the Preset in the Presets Panel at any time you’re in the Develop Module, to apply this creative Tone Curve to any image.

As you can see, the Tone Curve feature within Lightroom comes with some restrictive safety nets to help prevent inexperienced users from inadvertently going too far. But, rules are meant to be broken, and if you feel creative, now you know how to take full advantage and unleash the power of Curves within Lightroom.


This is just awesome man how can we install light room in photoshop or is it a different software like Photoshop??
In case you don’t have an answer yet… a year later… it is a standalone piece of software. You can either purchase it through Adobe with a monthly charge, (which means if they update to a new version you get that too), or if you want the whole creative collection, you can subscribe for that and also get Lightroom 5 included.
This is the best tutorial on Lightroom’s tone curve. Thank you so much for sharing!!