
Understanding Layer Style Contours in Photoshop
If you’ve played around with Layer Styles in Photoshop, you’ve almost surely seen the “Contour” setting in the “Quality” section of the layer styles dialog box. More that likely, you’ve just moved right on by. Or, if you’ve clicked on it, you probably tried one of the presets, cringed, then hurriedly changed the contour setting back to its default, and never dared to return there again. Not to worry, we’re going to go fearlessly into that territory and find our once and for all how contours work.

When you create custom layer styles, you can use contours to control the shape of Drop Shadow, Inner Shadow, Inner Glow, Outer Glow, Bevel and Emboss, and Satin effects over a given range. To demonstrate the effect, we’re going to work with the inner glow, and we’ll change the color to black and the blend mode to multiply. Then, we’ll increase the size to 20 (I’m working with a document that is 1600 x 1200):
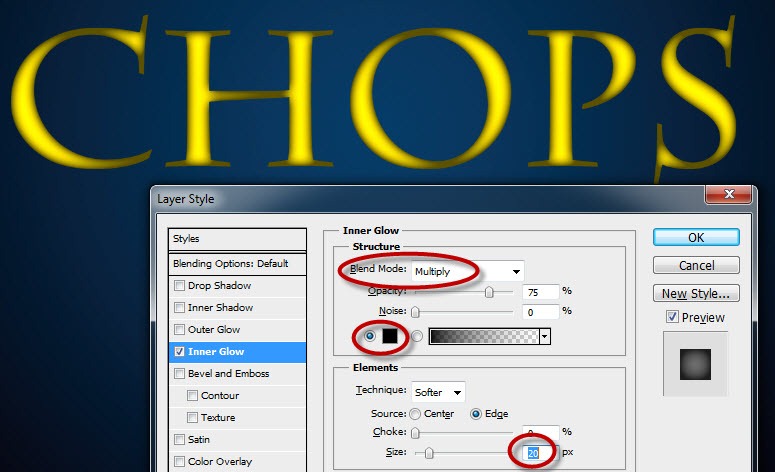
Now, why would we do such a thing? Why not use inner shadow instead, since that’s kind of what an inner shadow looks like? The reason is that inner shadow is a directional effect, casting a shadow on only one side of our layer. Inner glow, on the other hand, is applied almost like a stroke – it appears equally on all sides. By changing the color to black and the blend mode to multiply, we change the glow to a shadow, but it is present all the way around the text.
Now, we’ll see what Contour can do. Notice the contour setting is initially a square box, filled with half white, and half gray. What does this mean? We can click the drop down arrow next to the contour setting and try some of the other presets and see if we can get a clue. Here’s what happens when we change from the default Linear setting to Cone:

An interesting result, but it isn’t very self explanatory. Here’s the setting changed to Ring:

And here’s Ring-Double:

We’re getting some really neat effects now, but why? And can it be controlled? Of course, that’s why we’re here today! Part of the mystery of what these weird settings mean can be found by clicking on the thumbnail itself (not the drop down arrow). This brings up the Contour Editor.

Now, does this look familiar? The contours are really just curves in disguise. Don’t let that frighten you! We can provide the secret decoder that explains how these curves affect the layer styles. Here is how it works:

The curve is a picture of the intensity of the effect. Where the curve reaches the top of the graph, the effect is an maximum intensity, and when the curve is at the bottom, the effect is transparent – it’s invisible.
The right side of the curve represents the outer edge of the layer, while the left side represents the interior. Let’s look again at the default – Linear:

With the linear preset, the curve is a straight line – with the effect being transparent at the left, representing the interior of the layer, and the effect at maximum intensity on the right – representing the outer edge. And this is what we see, a smooth fade from nothing to dark.
Why doesn’t the effect become completely black at the outer edge? That’s because the Opacity is set to 75%. Change the opacity to 100% and it will be completely black (or whatever color you’ve set).
How wide is the fade? What defines the point at which the effect reaches full transparency in the interior? This is set by the Size setting.
Here’s another interesting effect that is educational to dissect: the Cove effect.

In this effect, the contour reached maximum intensity prior to reaching the edge, and stays at maximum for half of the width. The interesting part is that it never drops to transparent, and as a result, the effect maintains a 50% gray coverage over the entire interior of the layer.
You can build and save your own contour presets, but there are plenty of useful ones already available – you just need to use them! The effects are limited only by your imagination:


Explore, and have fun!

nice tutorial, thnaks
This was very helpful – when i first started with Photoshop I had a great instructor who tried explaining this to me – but I think that even with an amazing instructor you still need to go and and apply it, go back to the beginning and learn it again.
Thank you!