Day into Night with Photoshop
Here’s a fun effect and a way to change perspective on reality… using Photoshop adjustments to turn day into night. The difference is mostly a matter of temperature and illumination, after all, and with a picture captured in the daylight you have all the detail you could ever want in a night picture. So, how do we go about this? Let’s start with this seascape taken, obviously, in the middle of the day.
One of the key factors in turning day into night is to change the color temperature of the image. Daylight pictures tend to be warmer (meaning more yellow/orange) and evening and night pictures tend to be cooler (more blue). We have a color balance adjustment layer in Photoshop that can control just that:
Layer > New Adjustment Layer > Color Balance
Adjust the yellow/blue slider all the way to 100% blue to create a very cold color cast and begin to impart the night time feeling.
Note: If you have a raw image, and are using Camera Raw or Lightroom, you can accomplish this with the White Balance tool:
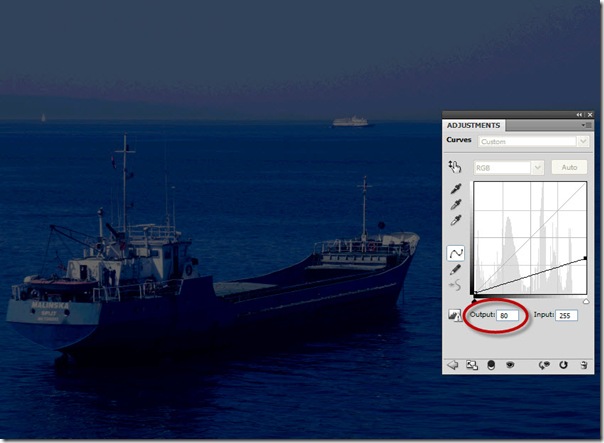
Now, this picture is still to bright and saturated to be a night image. We can remedy that quickly by using a curves adjustment layer, and simply dropping the luminosity in the lighter tones:
Layer > New Adjustment Layer > Curves
Grab the endpoint in the upper right of the curves dialog and drag it downward until the output reads 80.
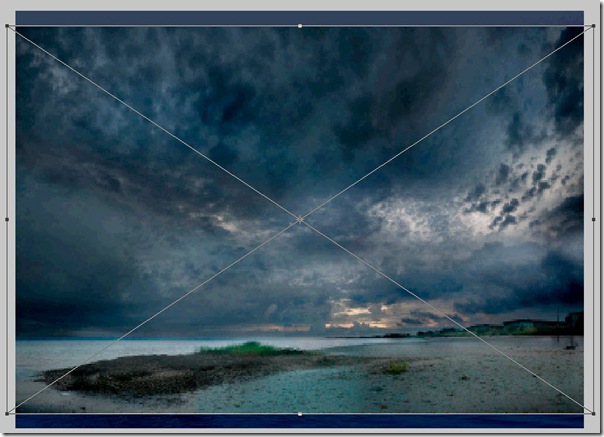
Just with these two simple adjustments, we have an almost eerie, twilight feel. Now let’s add some ominous clouds. We can simply drag in a photo with a stormy sky and use the part we want. Start by dragging the image onto our working drawing. Drag to resize the image, use Transform (Control-T/Command T) if necessary:
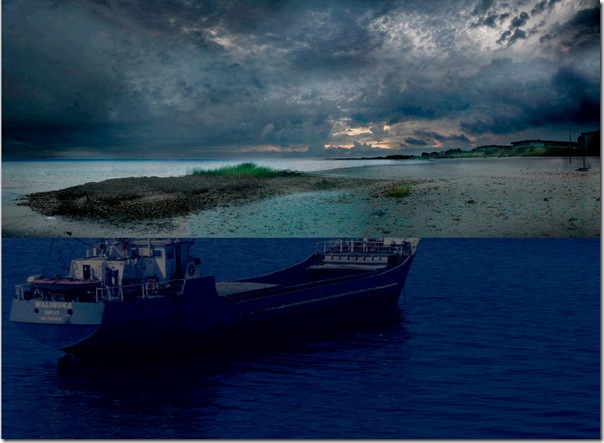
Move the layer into approximate position for the composition:
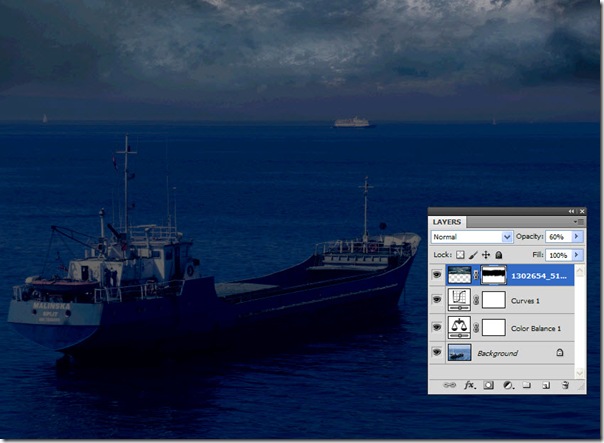
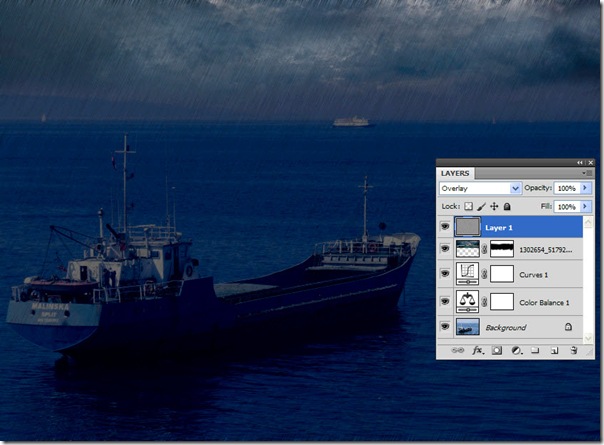
Now, we use a layer mask to refine this layer. Select Layer > Layer Mask > Reveal All and using a soft round brush, paint with black to hide the part of the clouds we don’t want. Switch to the Move Tool if necessary to reposition the image for best alignment. Finally, reduce the opacity a little (I used 60%) to blend the remaining clouds into the base image. Here is the image at this point, with the Layers Panel showing:
Next let’s add some rain:
Create a new layer at the top of the stack, and fill it with 50% Gray (Edit > Fill… and choose the option for 50% gray).
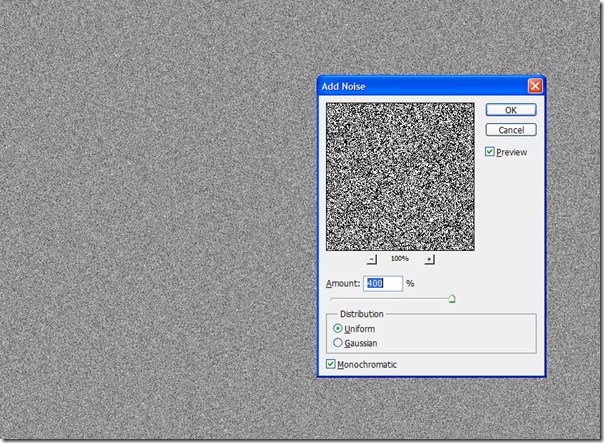
Use Filter > Noise > Add Noise and crank the amount to 400%. Make sure to select Uniform and Monochromatic.
Use Filter > Blur > Motion Blur and set the Angle to 65, and the Distance to 120 pixels.
Finally, set the Layer Blend Mode to Overlay to blend the rain into the image. Overlay makes everything that is 50% gray disappear, anything lighter has a dodge effect, and anything darker has a burn effect. This is perfect for rain:
We’ll want a more intense effect, which we can build by duplicating the layer. With the rain layer selected, press Control-J/Command-J twice to create two duplicate layers:
Now the rain is obscuring our cloud. Select the three rain layers, and use Layer > Group Layers to bundle them into a group. Use Layer > Layer Mask > Reveal All to add a new layer mask to the whole group, and paint with black at 25% opacity on the layer mask to diminish the visibility along the top edge of the image where the clouds are:
Finally, let’s add a little finishing touch to give our image some mystique. Create a new layer under the rain group, and with a small, very soft round brush, add some saturated yellow to the windows of the boat:
With a little more work, you could add some lightning, additional lights, etc. Keep in mind that since the basis for this is actually a daytime picture, you have the ability to bring back selective detail anywhere in the image you desire. It is worth another look to compare the before (day) and after (night):
With Photoshop, almost anything you can imagine is possible, and the underlying lesson is, “don’t always believe what you see!” Enjoy, and keep practicing… see you next week.





Leave a comment