Creating a Graffiti Wall With Actions
TipSquirrel welcomes back, Simon Rudd.
I had some good feedback on last weeks tutorial, especially the use of the built in actions that come with Photoshop – this week I will be showing you another trick using actions.
Step 1.
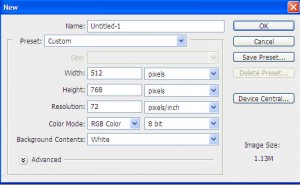
Open Photoshop and create a new document, i’m going to use 512×768, the technique we will be using will double the size of the document, so we will end up with a 1024×768 size picture.
Step 2
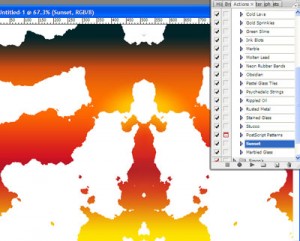
Next, like last week we want to access the actions textures, go to the actions palette and locate the Textures -See the picture below. This will give you access to the texture actions.
Step 3
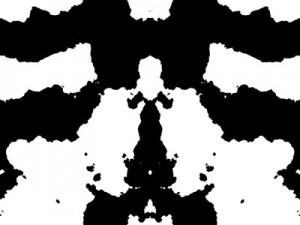
First choose the ink blots action and press the play button to execute it.
giving you a pattern like the one below…
step 4
Next choose the sunset texture action, run this action like before. set the blending mode for this layer to screen.
step 5
Next choose the Marbled Glass texture leaving the blending mode to normal.
Step 6
We now choose the bricks action setting the resulting layer to multiply
step 7
The final action is to choose the rippled oil action setting the result to overlay with a fill of 40%
because these actions are random – each wall will look different 🙂
Step 8
Next we want to download a graffiti font from DaFont
To install the font follow the instructions here .
Choose the Text Tool from the Toolbox, size to 72pt (change this if you want bigger or smaller text) and set the foreground colour to white and type whatever you want on your wall. Finally set the fill to 35%.
step 9
We want to decorate the text, we use some layer styles. First choose Outer Glow (Layer > Layer Styles > Outer Glow) and leave the default settings. Then we choose the Inner Glow (Layer > Layer Styles > Inner Glow) setting the blending mode to normal and the colour to black. Finally we select Gradient Overlay (Layer > Layer Styles > Gradient Overlay) Choose the spectrum gradient, set blending mode to overlay and click OK.
step 10
Finally make a new Layer at the top of the Layer Stack called Grass, choose the Grass brush from the brush picker and with a foreground set to yellow #a29d18 and a background set to green #197b30 and paint in some grass around the bottom of the wall.
go here to download the psd file.
That’s about it, please feel free to play with the settings and see what you can produce – as always I’d love to see your results, if you have any comments – please e-mail me.
Please go here if you wish to contact me for work
(c) Simon Rudd 10 August 2009, please don’t reproduce without prior consent 😀


Hi there! Someone in my Facebook group shared this website with us so I came to take a look. I’m definitely loving the information. I’m bookmarking and will be tweeting this to my followers! Great blog and excellent design.