XOR Text Effect with Photoshop
XOR is a technical term that comes to us from computer science, but in Photoshop we see it all the time. It is the computer graphics effect that causes our cursor to always be a different color from the background, and always causes the marching ants of our selections and bounding boxes to be a different color and distinct from the background. We see it occasionally in text designs and logos, looking something like this:
This effect is an optical illusion, and is much easier to produce than you might first think. The color transitions can be accomplished with a very straightforward Photoshop technique, using a Clipping Mask. Here’s how we would create the graphic design above:
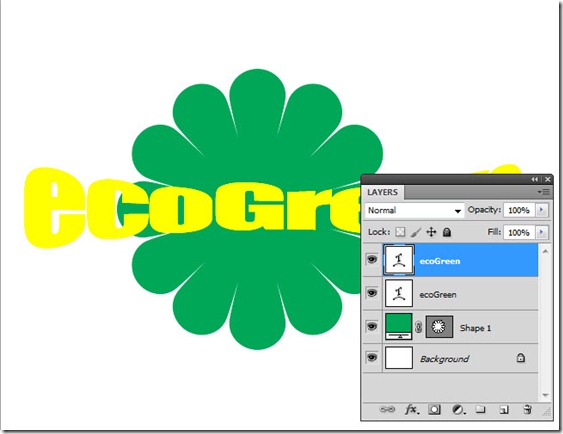
Step 1: Start with a shape layer over a background, and add some text in a contrasting color, like so:
Step 2: Now duplicate the text layer by dragging the text layer thumbnail down to the “Create a New Layer” icon at the bottom of the Layers panel:
Step 3: Next, we will change the topmost text layer to match the background color. Start by double clicking the text layer thumbnail to select the text:
In the top toolbar, click the color swatch to bring up the color picker:
And, with the color picker active, simply move the cursor over the image (it will change to an eyedropper) and sample the green color from the graphic shape:
Step 4: Click on the text layer thumbnail and drag the green text layer under the shape layer:
You should now have this result. The yellow text is on top, and the green is on bottom:
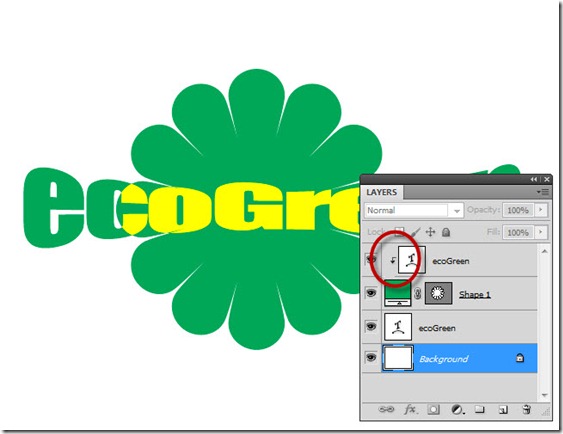
Step 5: Finally, we create the clipping mask. A clipping mask causes the layer on top (the clipped layer) to be visible ONLY where there are pixels on the next layer down (the mask layer). To create a clipping mask so that we clip the yellow text within the green shape, hover your cursor in between the two layers. Hold the Alt key on a PC, Opt key on a Mac, and the cursor will change as shown, to a double circle icon:
When you see the icon change, click and you will create the clipping mask. The Layers panel changes to show the text layer is clipped (notice the indent and the arrow) and the result is seen immediately in the graphic:
Notice how the masking is all done automatically and we don’t need to do any extra work at all. This makes it really easy to create complex looking masked text, without any really difficult effort:
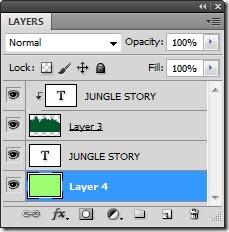
The complex masking of the text above is accomplished exactly the same way, using the clipping mask feature to create a seemingly complex effect:
With Photoshop, things are often easier than they seem! Enjoy, and I’ll see you next week.


I love this masking feature.
Thank you for taking us through the steps and making it so easy!
I love this masking feature.
Thank you for taking us through the steps and making it so easy!
Nice one. thnx for sharing Michael.
regards.
Luis S.