Working with type on a path
Back in the days before Photoshop CS, type on a path was the domain of Adobe Illustrator. With CS, and every version since, Adobe added type on a path to the arsenal of tools available to Photoshop users. However, this nifty capability is under-used and is often confusing at first – but with a little practice and the guidelines detailed below, you’ll be typesetting in ways you never thought possible.
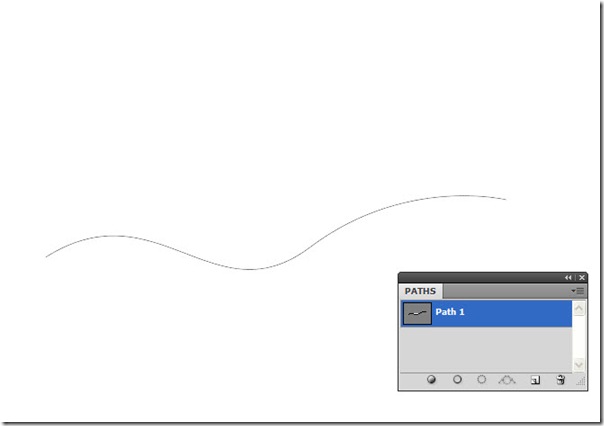
To begin this text adventure, we need a path – we can start with a simple open path created with the pen tool:
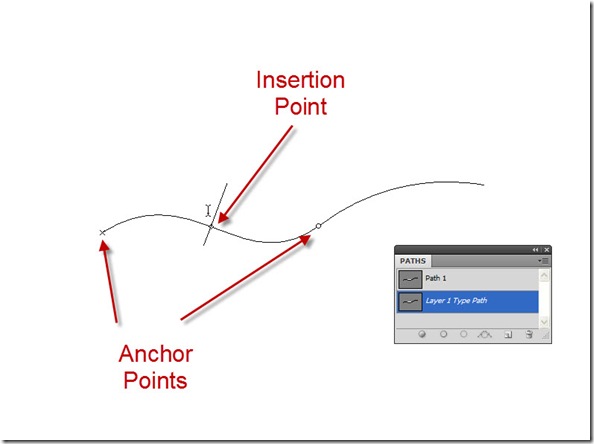
Now, setting type on this path is actually quite easy (it’s taking control of the type that can be the tricky part). Just select the regular type tool (T). Make sure you have your text color and font style and size selected (I’ve chosen Minion Pro, set to 150 point size, and a red color. I’ve also selected Center-Justified text for this illustration). Then, hover your text cursor (called an I-Beam) near the path. As you get close to the path, the cursor will change from the normal I-Beam to an I-Beam with a curvy path – this is the type on a path tool. Now, click on the path to create a text insertion point. Note that you also get a starting and ending anchor point, which defines the area of the path within which the text will appear:
It is also worth noting that a new path is created for the type, and the original path is deselected.
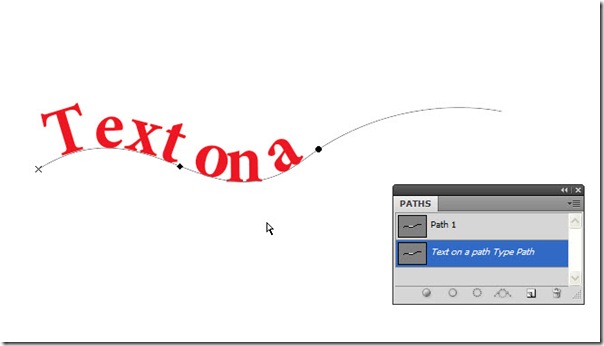
Now, we can type the words, “Text on a path,” and notice how the ending anchor point changes? The open circle contains a cross, indicating that the text is “overset,” which is a technical term that means it doesn’t fit:
We can adjust the text on the path to remedy the overset condition, and we can make other adjustments as well. To modify the text, we’ll need to switch to the Direct Selection Tool (A), sometimes called the White Arrow Tool. Note how the anchor points change when the Direct Selection Tool is active:
Move the Direct Selection Tool over the right side of the text, and the cursor changes to an I-Beam with a left-pointing arrow:
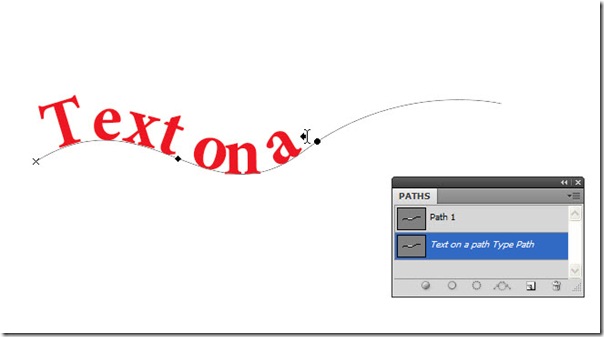
When you see this cursor, you can drag to reposition the right anchor point, moving the point to the right will allow more of the text to be visible. Again, notice how the anchor point changes to indicate that there is no overset text:
If you move the cursor and hover over the insertion point at the center (remember, this text is center justified), the cursor changes to an I-Beam with a double arrow. Drag in either direction to reposition the insertion point of the text:
If you drag below the path, the text will flip over and run in the other direction:
Now, what if you want the text below the path but don’t want it flipped over? We’ll take a look at exactly that in the next example. Let’s look at a method for creating text on a circle, such as you might see in a logo or perhaps on a stamp (such as a postal cancellation stamp). We’ll start with a circular path in the center of our document:
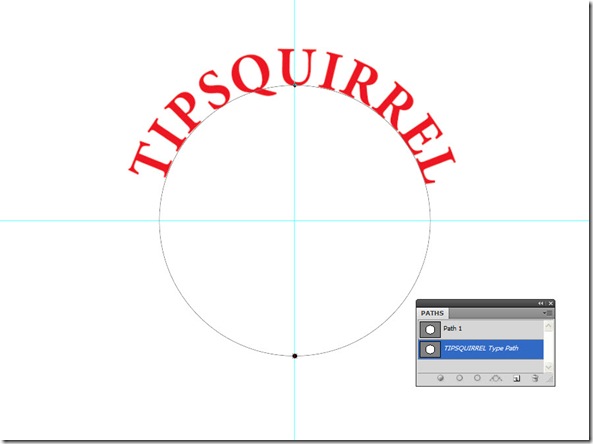
Again, using the Type Tool (T), with the text set to Minion Pro, 150 point, red, and center justified, we click at the top center of the circle and type our text. Note that I’ve positioned a guide to help align the text insertion point:
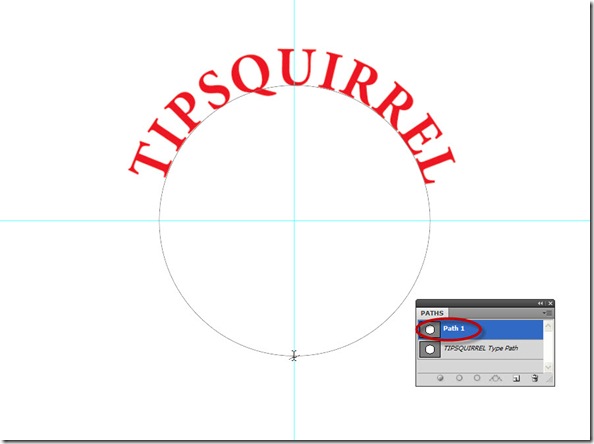
Next, we want to place additional text on the bottom of the circle. However, we have to select the original path, instead of the newly created type path. Open the Paths Panel and ensure that the Type Path is deselected, and the original path is once again selected, then, use the Type Tool as before to set an insertion point at the bottom of the circle:
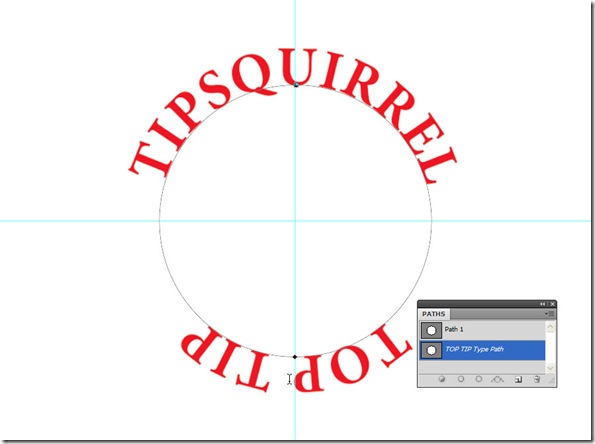
Type in the text, and notice that it follows the outside of the path. Since this is the bottom, the text is upside down – not exactly what we want:
Switch to the Direct Selection Tool, Hover over the text, and drag to flip the text. The text is right side up, but misaligned. Still not what we want:
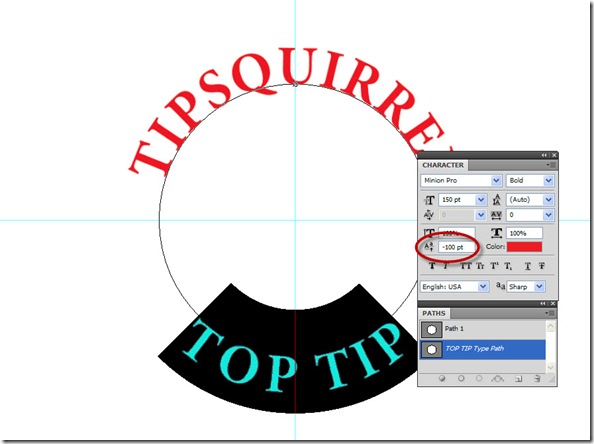
How do we solve this? With Baseline Shift. Bring up the Character Panel (Window > Character) and, with the text selected, click in the Baseline Shift field, and enter a negative value (you can start with a representative value and use the up and down arrow keys to adjust until the amount is exactly correct). In this case, a value of –100 gives us direct alignment with the path, such that the text is below the path, yet right-side-up:
Now that we have the text aligned properly, we simply add some extra graphic elements to complete the stamp:
And, there you have it. Type on a path, in Photoshop – with all the control you could desire. It is easy, once you know the secret – use the text tool with a path to create the text, then use the Direct Selection Tool to refine the effect to taste – and remember that Baseline Shift is your friend when things aren’t lining up correctly. Try it, you’ll like it!







Just what I have been searching for and now here it is! ……..thank you for such a great explanation!
I could get the text on path and never a mention of the selection tools and what comes next to MOVE the text! Also used two separate paths for top and bottom text, now I don’t have to do that!
Thank you very very much! The first tutorial that made sense to me! Awesome!
Thanks so much! I hate working with type on circles because it’s just so unintuitive. Your tutorial makes it easy. Thanks again!
Thank you! I felt like a tata trying to figure out why the dang words wouldn’t do what I wanted. So easy! Thank you!
Helped me get my job done. Thanks a lot!!!
Here’s the issue. Once I’m done text on a path and want to go back to normal typing into say a text box, for whatever reason, text is still inserted along the curved path, why? Yes, I changed to normal Type. Frustrating as blue blazes.
Hmm… Think I need a little more info before I can answer that, I’m not sure what you have done Mort. (Also, frustrating as blue blazes is now part of my lexicon)