Vectors From Photograph – Flesh Tones
Continuing our vector tutorial – we will work on the flesh this week…
Step 1
We begin by downloading the source file we last worked on from – Here. Next, group the bikini vector we made last time by selecting the first shape layer in the layer pallet, then hold shift and click the last shape layer. Follow this by pressing control & G together. Now name this new group Bikini
Step 2
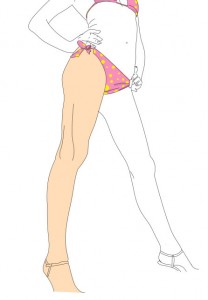
Reactivate the Lines layer (which should be outside the group we just created). This gives us an idea of the shape we are aiming at. This time we are going to concentrate on the legs…
Step 3
Set your foreground colour to pink (#ffddb7) and start to fill in the leg shape in a new layer under the bikini group. Name this layer Leg.
Step 4
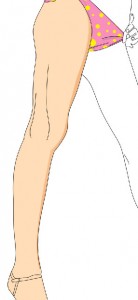
Make a new layer above the Leg layer and clip it to it (control & Alt & G) and using the pen tool shade the leg using #f5ba86. Add a layer mask to this new layer and use either a gradient or a brush to soften the edges of the shading shape.
Step 5
Next add the rest of the shading as in the picture below – use #f5ba86 (set layer to 40% opacity) and #5d3b18 (25% opacity)
Carry on doing this and fill in the other leg.
Download the psd file HERE
Follow me on twitter @revjesse


Leave a comment