Swiss Cheese Text in Photoshop
 |
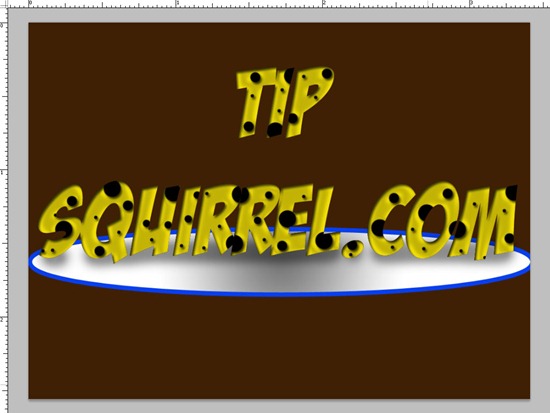
I love typography – its fun and easy. Today I wanted to show you how to make a simple “Swiss cheese effect”. |
Step 1.
Start by making a 1024×768 pixel document and colour it #3f2004, Next choose select the text tool and using a bold Font type something. I’m using the Font Badaboom
Step 2
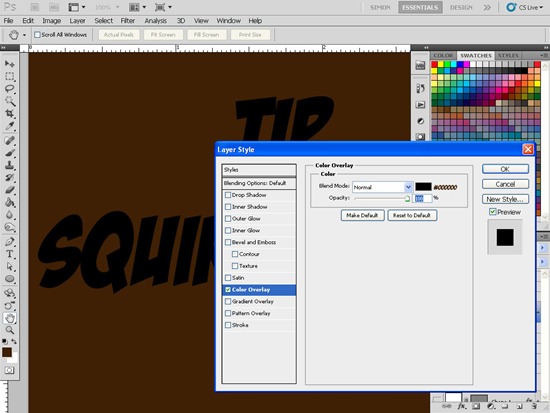
Next we want to duplicate the text layer, we do this by pressing Control & J together on the keyboard or by going to Layer>New>Layer Via Copy. Name the top layer Cheese and the lower text layer Holes. Select the Holes Layer and add a Colour Overlay Layer Style (Layer>Layer Style>Colour Overlay) and set the colour to black/#000000.
Step 3
Now select the Cheese layer, as before add a Colour overlay Adjustment Layer and set the colour to yellow / #f2df06. Follow this by adding a Inner shadow, Inner Glow and Satin Layer Style (please see pictures for settings)
Step 4.
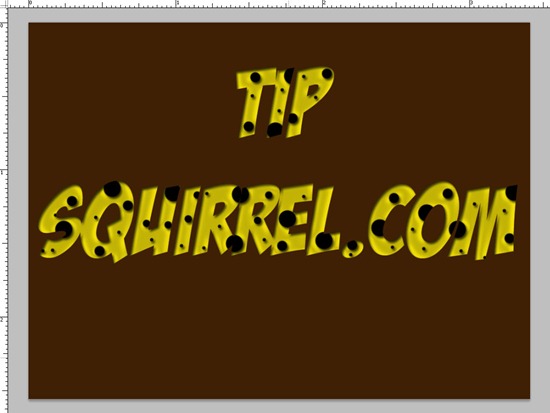
Using a hard edge brush with the foreground set the black start to add dots to the Cheese Layer, Layer mask. This will “cut” holes in the cheese layer. Change the size of the brush to make the holes random sizes.
Step 5.
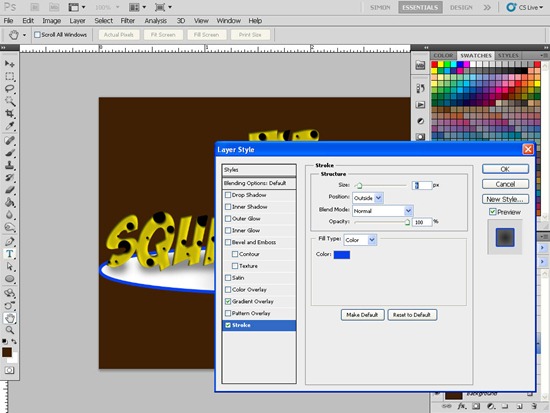
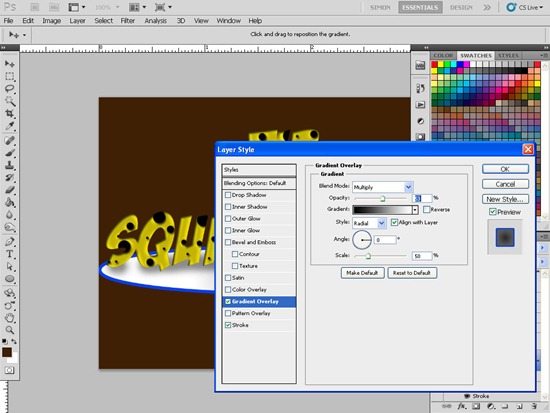
Create a white ellipse under the text, next add a Stroke Layer Style. Change the size to around 9/10 pixels and set the colour to blue. Next add a Gradient Overlay (black to white), set the style to Radial, Angel to 0 and scale to 50%.
Step 6.
Finally make a new Layer above the Ellipse and using a soft edge brush paint some shadows under the text to ground it.
🙂





Leave a comment