Smart Objects, Smarter Filters
Smart Objects have given us a tremendous amount of power in Photoshop since version CS3, and it just keeps getting better. Today, we’re going to look at a non-destructive workflow that begins with a RAW camera file, continues through Photoshop editing, and is finished off with some filters as a creative touch – and every single thing about this image will remain completely flexible and adjustable in the future, even after the file is saved and re-opened.
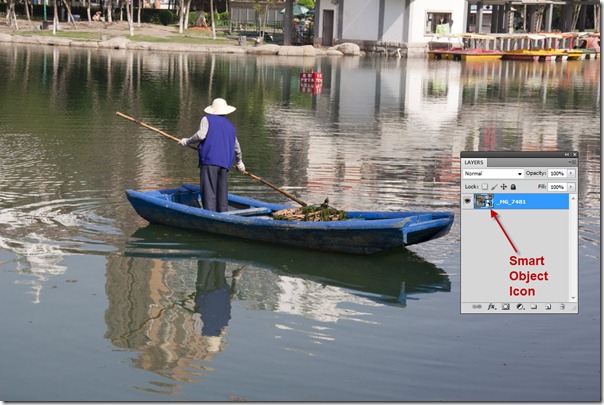
We’ll start with this snapshot of an old man standing in a skiff, skimming a lake. We’ll want to crop this photo, and provide some drama – make it a bit more high key and enhance the solitude of the moment (click on any of the images in this tutorial to enlarge them):
Beginning in Lightroom this time (although you could accomplish the same from Bridge, as we’ve seen recently) we will select the image, then choose Photo > Edit In > Open as Smart Object in Photoshop…
Remember, if you are using Bridge and opening in Camera Raw, you’ll want to make sure you also Open as Smart Object as described in this tutorial.
In either case, once we’ve opened the object in Photoshop, it appears as a Smart Object in the Layers panel, as indicated by the small “package” icon on the layer thumbnail:
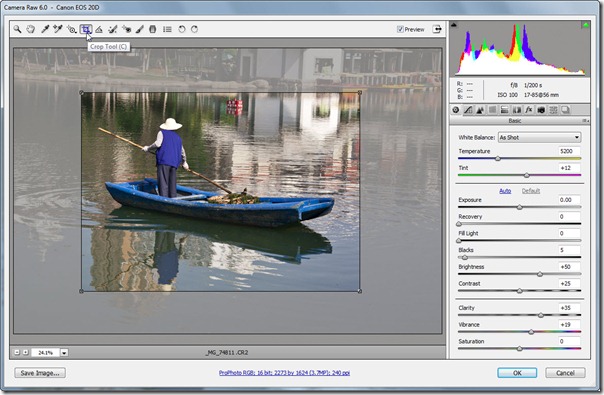
We want to crop and adjust this image, so double click the thumbnail, and the Smart Object is opened in its native application – which in this case, is Adobe Camera Raw. We will start by using the Crop Tool to isolate the portion of the image we want:
Now, while we’re here in Camera Raw, we can take advantage of the excellent new Noise Reduction features that have been introduced with CS5 (these new features aren’t yet available in the released version of Lightroom, so by using this workflow you’re able to take advantage of the new Noise Reduction today):
Once we have our adjustments the way we like them, we click “OK” and we’re back to the image, and the Smart Object in the Layers Panel.
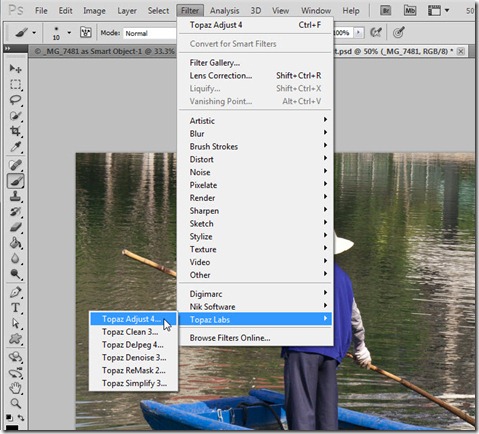
Now, let’s consider adding a filter. With Smart Objects, most Photoshop filters and many third-party filters are able to function as Smart Filters – a nondestructive means of applying the filter that can be adjusted at any time. In this case, we want to add some drama with Topaz Adjust, so we choose the filter as normal:
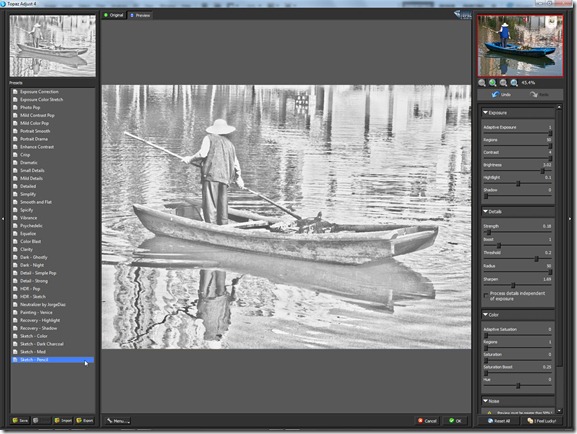
This brings up the Topaz interface, and for this example, we will want to go with the “Sketch – Pencil” preset with no further adjustments.
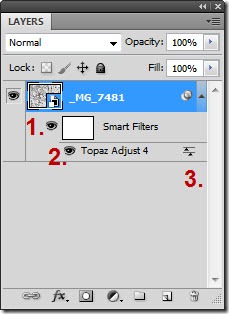
Click “OK” to accept and bring us back to the document, and notice that the Layers panel has several changes:
- We see a Smart Filters entry indented below our Smart Object. This Smart Filters line has a layer mask, and we will use this a little later on. There is also an eyeball icon that controls visibility of all Smart Filters.
- We see that the Topaz Adjust 4 filter has an entry of its own indented below the main Smart Filters heading. Note that the Smart Filter also has its own eyeball icon; you can toggle visibility of individual Smart Filters within the stack as desired.
- We see that the Smart Filter entry for Topaz Adjust has a small icon on the right that resembles a set of sliders; this icon provides access to blending options.
Let’s see how all this works!
We’ll start with the layer mask. In this image, while the monochromatic effect is nice, perhaps it would be better to bring back the color in the subject of the image. By painting on the layer mask in the standard way, we can hide just the Smart Filters from showing. Note that the layer mask applies to ALL Smart Filters, there is no simple way to mask individual Smart Filters:
OK, that is better, but the grayscale is a bit flat, let’s spice it up a bit. Double click on the blending options for the Smart Filter, and we get a dialog box. We’ll want to set the Blend Mode to Hard Light, and leave the Opacity at 100%. Click on “OK.”
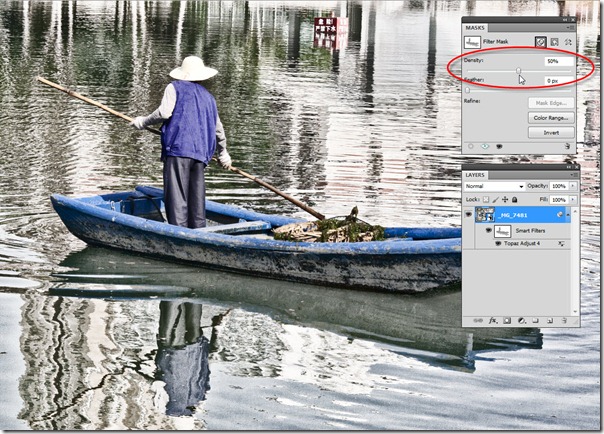
Now, let’s re-introduce some of that high key effect into the subject. We’ll do that by allowing some of the effect to show through the mask. The easiest way to do this non-destructively is using the Masks Panel, first introduced in CS4. If you can’t already see it, choose Window > Masks and then (with the Smart Filter Mask selected) start to adjust the Density setting. In this example, the density is only 50%:
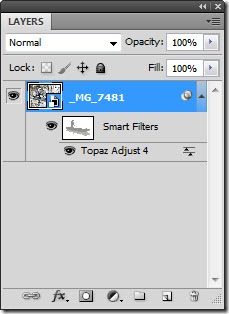
Note how some of the filter effects are starting to show through, but we’re maintaining a good portion of the original color and texture. A closer look at the layers panel shows that our mask has become light gray (50% gray instead of the original black), but this is completely non-destructive. Choosing the Density setting in the Masks panel at any time will allow further changes to this mask.
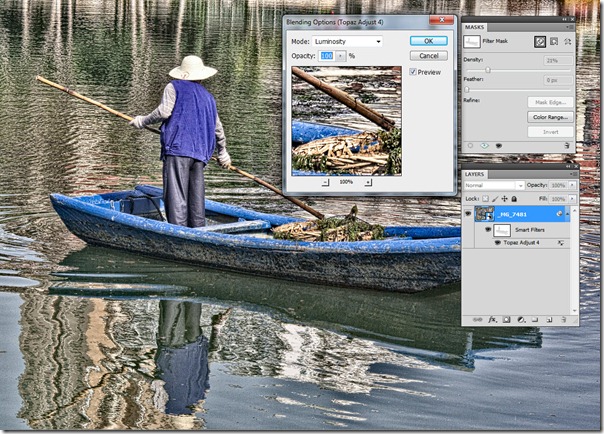
So, we have a completely flexible edit path, right from the RAW file through to the finished image. Want to change that Topaz filter? Just click the name of the filter, and the filter interface will re-open. In this case, we have changed the Topaz preset from the original “Sketch – Pencil” to a new preset, called “Psychedelic,” and we have changed the Blending Options from Hard Light to Luminosity:
The possibilities are endless, and it doesn’t stop there. We can add Smart Filters to the stack, In this case, we have added the Texturizer (Filter > Texture > Texturizer…) to provide a bit of canvas texture to the image:
No matter how we keep piling on, every one of these is completely editable, even after you save the file. Furthermore, in each case, you have complete access to every step, all the way back to the original RAW file date and the Camera Raw adjustments made. This is truly a flexible work flow, and it is made possible through the power of Smart Objects.







Leave a comment