Simulating Double Exposure with Photoshop
A few days ago I was looking through some stunning triple exposure photos and thought I would show you a basic way of creating a similar effect using Photoshop.
Step 1.
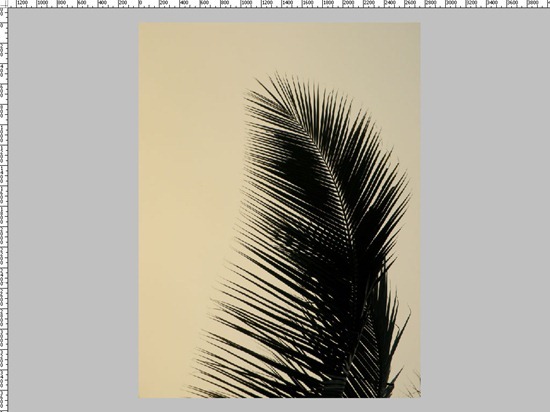
Download these three base photos – Texture, Face and Leaf.
Step 2.
Rotate the Leaf photo 90° clockwise so the leaf is facing upwards.
Step 3.
Select the Eye Dropper tool and sample the background colour, create a New Layer above the Leaf’s background Layer and fill it with the sampled colour, hide this layer for later use.
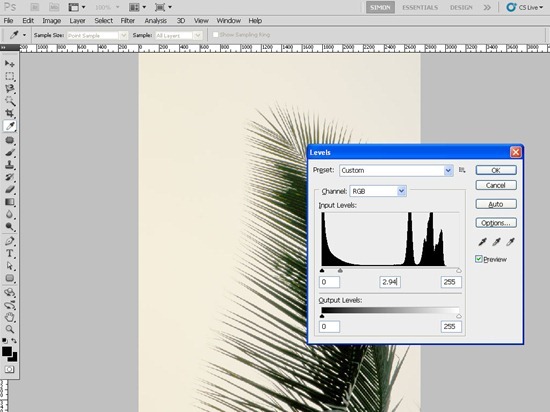
Move to the background Layer and Select the Levels Adjustment (Image>Adjustment>Levels), move the middle slider to the left until it reads about 2.94, then click okay.
Step 4.
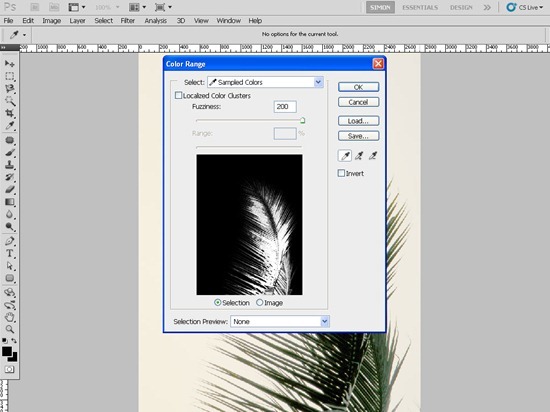
Select the Colour Range Tool (Select>Colour Range>) click on the leaf then move the fuzziness slider all the way up to 200, now click OK. This puts a selection around the leaf, promote this selection to a new Layer by pressing Control / Command & J or Level>New>Layer Via Copy. Name this Layer as “Leaf extracted”.
Step 5.
Move the newly created layer to the top of the Layer Stack and hide the original Leaf Layer – at this point you can also unhide the new Layer we created in step 3- This will be the background for our double exposure.
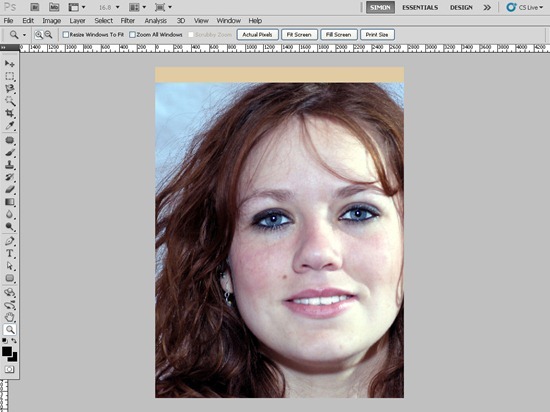
Open the Face image and copy to it to the Leaf image (Hold Alt / Opt and drag to New Layer Icon). Place the face Layer at the top of the Layer stack, finally Resize the face image until its larger than the leaf.
Step 6.
Select the Texture image and as before copy it to the leaf picture and place it at the top of the Layer stack – Set the Blending mode to Soft Light.
Step 7.
We now want to strip the image of its colour, so we add a Black and White Adjustment Layer above the Texture Layer. Just leave it as default – we can adjust is later if you want to make the picture darker or lighter.
Step 8.
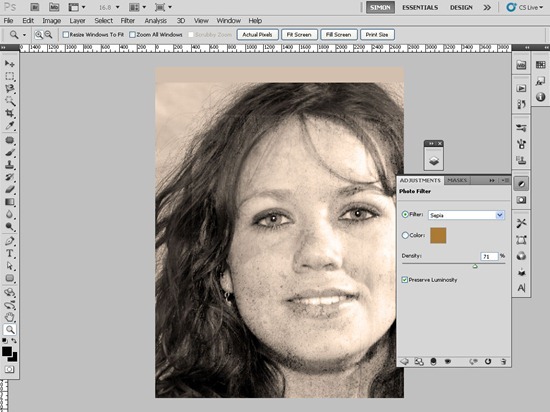
Add a Photo Filter Adjustment Layer above the Black and White Adjustment Layer and set the colour to Sepia, increase the Density to 71 and tick preserve luminosity.
Step 9.
We now select the Photo Filter, The Black and white, Texture and face images by holding Control / Command and clicking each icon in the Layer Palette. We now Clip them to the leaf extracted image by pressing Control / Command & Alt / Opt and G. This will create the double exposure effect. We can also add other bits to the Leaf Extracted layer for example other leaves to expose more of the face and texture.
I hope you like this tutorial and please have a look at my Photoshop tutorial archive at http://www.littlephototshopofhorrors.co.uk
:0)





This is honestly an aweful tutorial. Lol, it looks horrendous.
Each to their own Sean, we appreciate all feedback. If the effect isn’t for you then maybe the technique is something you can adapt for your own work.
Hahaha – well thanks for your honesty 😀 The effect is really something that can be worked upon to create other effects. I intend to write a more in depth and researched version of this tutorial commercially at a later date 🙂
Hi Eric- I followed the directions and everything came out right until I clipped the 4 layers to the leaf extraction. I didn’t get any of the leaf. I am using PSE 10 and improvised your instructions to achieve the same results. Also, I am using a Mac. My problem seems to be in the ‘Control / Command & Alt / Opt and G’ move. I enjoy learning new effects and hope to master this one. Is it possible using PSE 10?