
Shadows/Highlights : A Hidden Photoshop Smart Filter
Here on TipSquirrel we’ve looked at Smart Objects and Smart Filters, but there are two commands “squirreled” away, that are available as Smart Filters – but aren’t at all obvious (hint: they aren’t located under the Filter menu). Today, we’ll discuss the Shadow/Highlight command, which is a really great feature added a couple of versions back in Photoshop history.
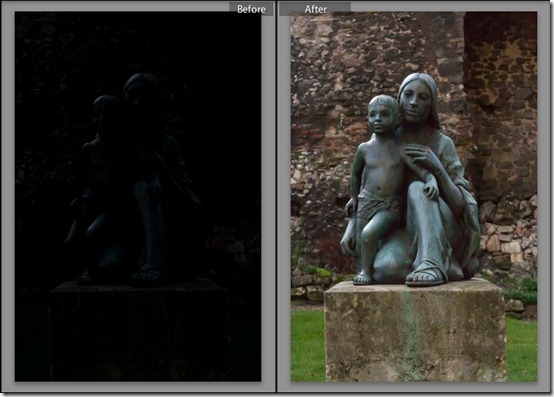
Shadow/Highlight is a command that brings a lot of the goodness of camera raw’s image adjustment capabilities right into the Photoshop editor. For example, take a look at the image below. Nice potential, but it’s kind of flat, a little dark, and needs brightening but without blowing out the sky:

Now, we could jump right in and use Shadow/Highlight on this image, but that isn’t what this tutorial is about! We’re going to use S/H as a Smart Filter. And, in order to do that, we need to convert the image layer to a smart filter. In this image, the entire image is flattened, and we need to convert the image layer to a Smart Object. If your document has multiple layers, you can highlight them all and convert them the same way.
Just select the layer, and from the layers panel flyout menu (in the upper right corner), choose Convert To Smart Object.

You’ll know that the Smart Object has been created from the small “badge” icon that appears on the layer thumbnail:

Now, with the Smart Object selected, we can go ahead and choose Image > Adjustments > Shadow/Highlights. Notice that almost all the other commands here are grayed out for Smart Objects?

With the command active, we can make some adjustments to the image. Bring up the shadows using the default setting is a great start. This is a lot like the Fill Light slider in Camera Raw.

Once we click OK, take a look at the Layers panel – and here’s the special feature: Shadow/Highlights is now listed below the Smart Object, just as any Smart Filter would be. Cool!

This means that we can double click the words Shadow/Highlights in the layers panel to bring up the adjustment dialog again, at any time. We’ve created a non-destructive adjustment!

And, while we’re adjusting, don’t forget Show More Options. Checking this expands the dialog to give us many sliders to play with. In fact, notice the Midtone Contrast slider. This is, more or less, the same as the Clarity slider in Camera Raw.

And, as with any Smart Filter, we have the ability to double click the little “sliders” icon next to the filter name, to bring up the Smart Filter blending options. We can adjust the opacity of the filter, to better control its effect, and we can change the blend modes for all kinds of interesting effects:

With the adjustments complete, we’ve finished our image – and found a new Smart Filter lurking, un-advertised, in another part of the Photoshop menu tree!

Until next week, enjoy, have fun, and take Photoshop past the limits!


Leave a comment