Shading vectors in Photoshop
Over the last couple of tutorials we have been gently introducing ourselves to vectors, firstly adding the lines then some colour. Today we are going to work on details.
Step 1.
Firstly download the psd file from http://rev-jesse-c-stock.deviantart.com/art/vector-art-tutorial-139160627 and open it in Photoshop.

Step 2
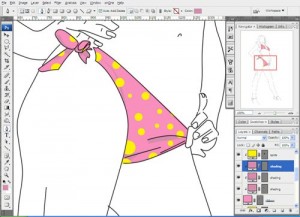
Now we are going to zoom in on the pants and add some shading, if we compare the original picture to the new one we can see where the darker areas are.
Step 3
Choose a darker shade of pink for the shadows – I will be using #d78cad. In the layer pallet choose the pants Layer and below the spots Layer (Which we previously clipped to the pants layer – see last tutorial) make a new Layer (Layer > New > Layer) called shading.
Step 4
Using the pen tool start to fill in the parts of the picture we previously highlighted; use the picture below as reference.
Step 5
Do the same for the ribbon and the bra.
Step 6
If we now hide the lines by clicking on the eye in the Layer Palette next to the lines Layer you will be able to see the bikini in its full vector goodness.
Next week we will look into filling out the rest of her.
Go to http://rev-jesse-c-stock.deviantart.com/art/Vector-Bikini-140657822 to download the new psd file
Follow me on twitter


Leave a comment