
Restoring Wood Grain
When restoring old photos, you’ll likely run into more than a few wood floors. In early portraits, mostly the 1860 -1870 variety, the studios themselves often had wood plank flooring. Let’s just say, for the sake of argument, that the wood floor pictured in the photograph is a mess, which chances are it will be. What would you? You have, from where I’m sitting, at least three options (maybe more, but I’m only going to talk about three today, so there you have it:
First option (Forget it): Make the floor “plain”. In other words, strip out all the wood and replace it with a plain color, even a gradient. Imagine, if you will, a beautiful wood floor in your home. Now, go slap some paint over it. Exactly! Don’t do it in your restoration, either.
Second option (Comp it): Find a good photo of a wood floor on the internet and composite it in. I have done and continue to do this. I have a good collection of photos of everyday objects I use to composite from. Yes, you can just lift them from anywhere because after you’re done no one will know where you got it. Except you. Stock photo sites have good selections and you can just buy the cheapest, lower quality ones. This is probably your best option, most of the time.
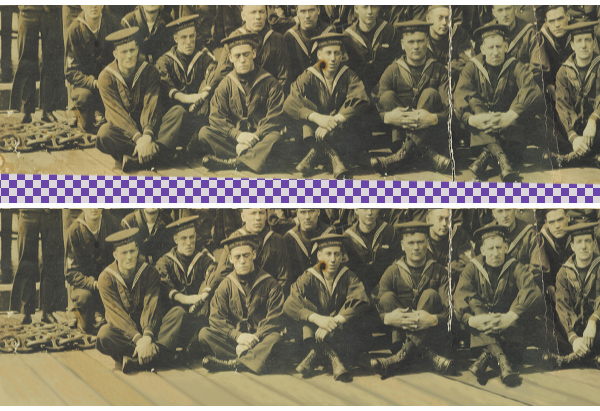
For when the second won’t work: I frankly haven’t found too many incidences when it wouldn’t, but here’s a good example. A week ago a client brought me a 1×5 foot photograph, taken in 1918, of the officers and crew of the U.S.S. Kearsarge. Obviously, at 1×5 feet, it would be redundant for me to say it was huge, so suffice it to say that the tightly rolled, quite brittle photograph had to be very carefully scanned in many pieces and stitched together using the Auto-Align Layers feature in Photoshop CS4. The originally cropped panorama reverted back to an uncropped panoramic state when re-pieced together, so if I had cropped it at that point, I would have lost a lot of the bottom of the photo, including some text. I therefore needed to extend the ships deck enough to get a good crop line low enough to retain the pertinent information. One one end of the photo this was easy enough. There was a lot of great decking information available to clone from.

The other side – not so much.
In fact it looked rather like Option One, above. Using a composite and distorting the perspective was good at first, but it was getting major complicated about the time the perspective had the wood going into horizontal. Besides, it was looking pretty pooey. So, I moved on to the next option…
Third option (Fake it): When you can’t beat ’em, join ’em. So instead of compositing new decking on top of, then blending into the old, I simply put a wood texture on top of the existing decking. Creating a wood texture from scratch was the only way to go. Again, if I used a composite I would have had to distort each plank individually and, if only using one reference photo, all the grain would be the same. Here’s how I made the wood texture I needed.
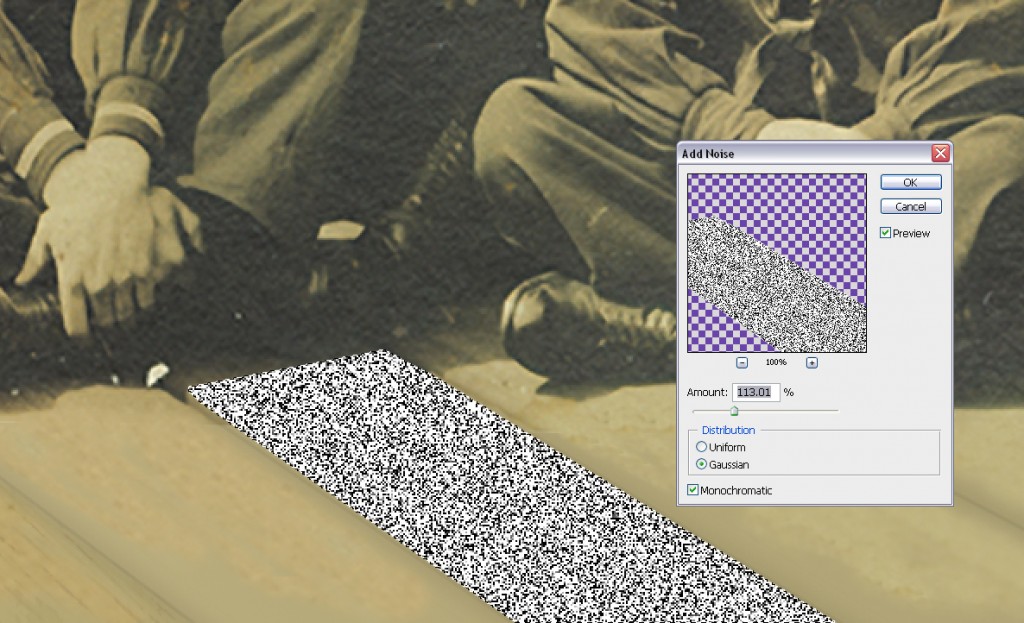
Using the Polygonal Lasso Tool, I selected one of the decking boards. On a new layer, fill the selection with either a match with what you’re placing the texture over, or white. For this demonstration I used white for the fill.

Next, add noise in the Filter menu (Filter > Noise > Add Noise). Always use the Monochromatic selection, but otherwise mix up the options each time you do this step. Vary the amount of noise and the distribution. The goal is to make each plank different, even if just slightly.
Going again to the Filter menu, give it a Motion Blur (Filter > Blur > Motion Blur). In this step, you can vary the distance every once in a while, but be very careful to adjust the direction of the blur each and every time, making sure it follows the “grain” of the wood.

Returning to the Filter menu, this time we’re going to give a little depth to the “grain” with a Poster Edge (Filter > Artistic > Poster Edges). You can vary the settings in this step, also, but the default settings are also fine.

To finish off our easy wood texture, we’ll put it through a Layer Blend Mode. Again, you want to vary these! I used Darken, Multiply, Color Burn, Soft Light, Overlay…Each gives a different tone which helps the wood look a little more “real”.

The blend modes that work best for you may differ, depending on the colors and tones in your photograph. Run through all of them to choose the best ones for your project. Now, lower the opacity. I used different settings, again, to achieve variation, but kept in the 5% to 15% range. You don’t want the grain stronger than the rest of the photograph.

And that, as they say, is that. If you ever need to fix a wood floor in your digital photo restoration and a composite isn’t practical, give this technique a try! Just remember to use a light hand and keep it subtle!


YIKES! Did you really just sat that?
“…you can just lift them from anywhere because after you’re done no one will know where you got it.”
It’s this line of thinking that cheapens our craft and costs photographers and retouchers money. Please consider paying for the rights to use images. I have been on the other end of this scenario and it does not feel good to see your work stolen.
Perhaps you should go back and re-read my article. I said, basically, yes, you could, but you shouldn’t. That what the “Except you” meant. You would know and it wouldn’t be a good feeling. To make it clearer to those who might not know they way I feel about copyright laws, when I said “this is probably your best option, most of the time”, I meant compositing on the whole, rather than “drawing” something in, not it’s best to use stock footage, but ok to steal some of the time, Again, it’s not. I use stock, other photos in my collection or take my own composite material. Again, obviously, the commenter knows nothing of my thoughts and feelings on copyright infringement and using others work, but most do, so rest assured that “cheapening our craft” was never intended. I believe my fight for the opposite, as a matter of fact, is completely on the record through articles on my blog, other blogs and my public lectures on the subject.
I appreciate your comments Richard and fully appreciate how frustrating it is when your work is used without your consent or acknowledgement. I would however ask that you reconsider how you read the article and that you may have taken a single sentence out of context.
Knowing Janine as I do, I can fully appreciate how hurtful your comment could be. Her integrity is nothing short of exemplary, and to be accused of cheapening her craft strikes at the very heart of all she stands for.
TipSquirrel.com prides itself on catering or all users of Photoshop, be they novices looking for quick tips or professional photographers, post processors, retouchers etcetera looking to build on their knowledge. To imagine that an article would be posted that would invite the latter to use each others work is madness.
For the first 6 months of my photoshopping life, I never even considered copyright, and image searches from large search engines were easily the norm for me. Then when I got more in to reading up on tutorials such as this one, I paid more attention to it, and now painstakingly search for free stock (not earning from my craft so relying on those kind enough to share).
I read this article as if it were aimed at me, saying “oi, Sarah, you *could* go and swipe the image like you used to in the early days when it was all new and you didn’t know better… or you can try the following…”
The “following” being what we’re all out to do when we read a tutorial, to learn something new 🙂 Those that do use pictures without permission do so because quite frankly they’re either too lazy to do otherwise, or they don’t realise there’s an issue. This article will teach those that don’t realise how to do something better… whereas those too lazy wouldn’t bother changing their ways regardless of how much you slap a “DON’T STEAL THIS” watermark on everything.
Though it’s a good source of comment, not debate, as we’re generally all on the same side. Maybe someone with the know can do a tutorial introduction for beginners on all the different types of license and what they mean.
Sarah,
We all start out that way, I think. Unfortunately, in our ignorance we think of everything on the internet being “free”. I’ve been the victim of photo related work theft, so the last thing I would do is advocate it! Over time, I’ve built up my own “composite library” of stock images (they’re not that expensive, especially when used more than once,) public domain photos, photos in my personal family collection and ones I’ve taken myself. You got my point in the article perfectly. I thank you!
Janine
For the record, when I read this, I took it in the spirit I believe it was intended… the “except you” stands out there, like the little angel of conscience on your shoulder; Janine is reminding you that you have other ways to accomplish what you’re after. Stock images, whether purchased or created, are a great source of material for restorations, and the availability of inexpensive stock (and inexpensive cameras, for that matter) provide many options for the restoration artist.
This tutorial wasn’t about lifting images, it was about adding secret weapons to your arsenal for recreating from scratch the pieces you can’t find; and Janine has done an excellent job of it!
mh++
Another excellent tutorial. I’m also ecstatic to see folks fired up in a discussion on copyright.
However, this article brings up my concern regarding literacy in America. The Internet & Google are wonderful things, but why is it SEO specialists keep telling me to dumb down my writing?
I admire Janine’s gift with the written word, but alas, the subtlety of her sarcasm is often overlooked by the casual reader. (Let me be clear, I said CASUAL not STUPID).
For myself, I have found that visual indicators, e.g., bold, color, symbls<{[, etc., are necessary to make clear the point in each article I write.
Janine is the last of a long line of folks who can establish an idea through well-crafted prose that make your mind tingle as the word forms travel through your optical pathways firing off synapses in your brain.
I envy her so.