Repairing Ink Blots
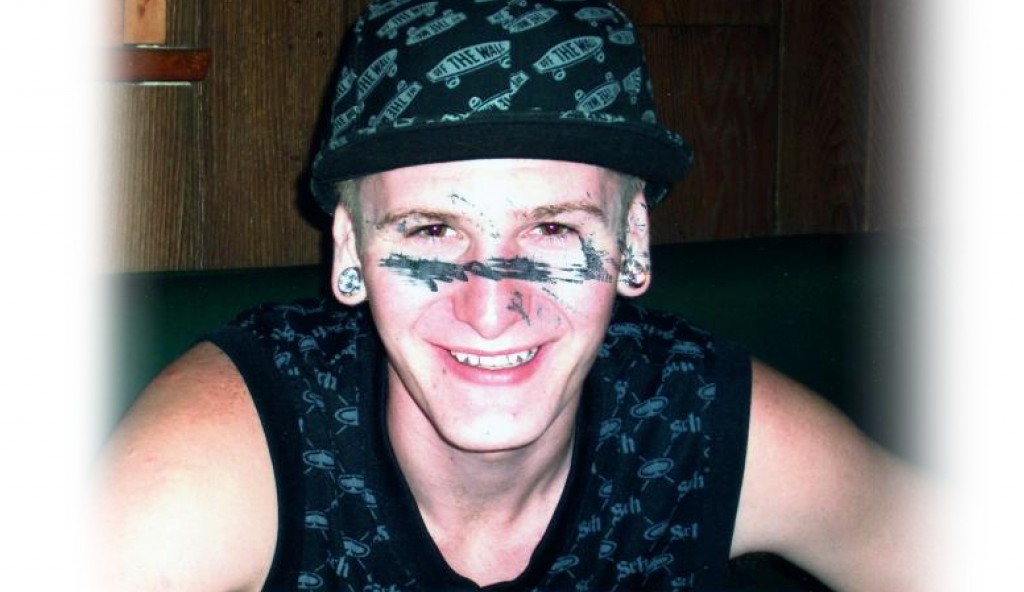
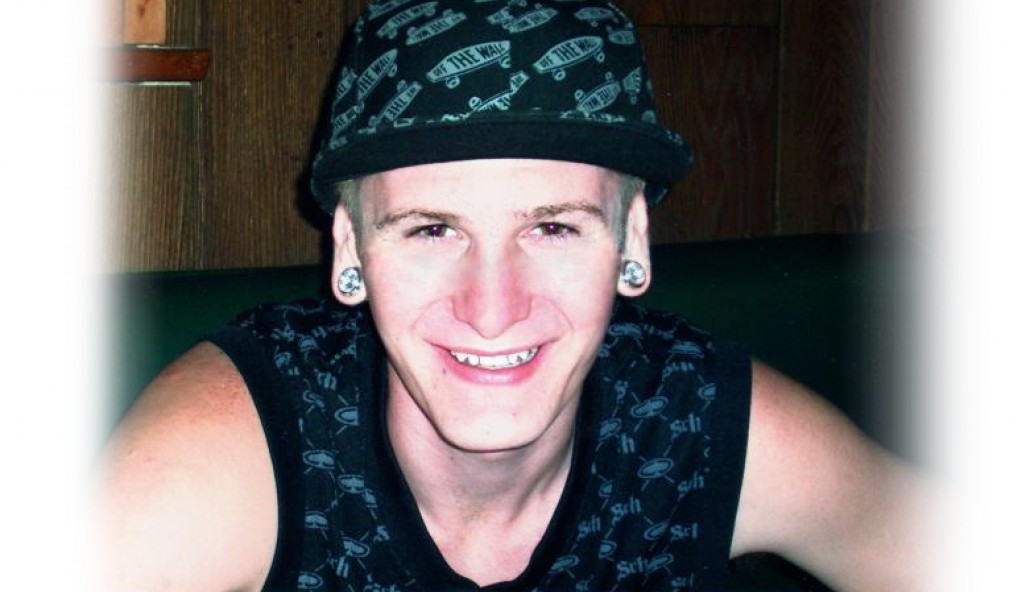
Bad things happen. Bad things even happen to our photos. Bad things like…ink. So when the bad thing happens, how do you go about fixing it? The first thing to remember is to not try to wipe it off your original. That will just make more of a mess. If it’s wet, it will just make your ink spot a bigger, smudgey ink spot. If it’s dry, you’ll probably find yourself removing the top layer of the photo, which is where the actual image lies. Not a good thing. So letting the ink dry, scanning it and repairing it digitally would probably be your best option. This particular example is an intermediate level project, given the need to replace and blend areas, but ink repair doesn’t have to be hard!.
Today’s example photo comes from National Association of Photoshop Professionals (NAPP) member Mike Hampen. Mike has a photo that has one of those bigger, smudgey ink spots on it, and wanted to know how he could go about removing it.

The average person with photo editing knowledge would probably think “clone” right off the bat. I would urge you to not think in that direction, just yet. If you just start cloning without a bit of prep work, the results might end up being less than stellar. I did a bit of straight cloning, below. Yes, for the most part, it’s sloppy and has little cleanup, but it does give a fair idea of what can happen. Plus, if you do a bit of prep work now, the cleanup will take less time!

By prep work, I mostly mean, especially if the ink spot is fairly large, lightening the spot. Light areas are easier to fix on light areas. Same for dark on dark. It just makes sense. If the tone of the area to be fixed more closely approximates the tone of the area around it, the easier it will be to repair. For this, go for as many curves adjustment layers as you need to lighten the area significantly.

Next, look for obvious places you can steal borrow from. In this instance, the fibro-fatty tissue over the nostrils look to be fairly symmetrical, so you could borrow the area from one to use on the other side. You can also borrow the one un-inked ear to replace the other. Just be sure you take care to blend carefully using masks.

Now it’s just a matter of cleanup! Yes, now you can use the Clone tool! However, do not use only the clone tool! Use the Clone tool, Healing Brush, Patch Tool; all the tools you have at you disposal! Also remember when you are using these tools to sample different areas! Using the same sample area repeatedly only leads to patchy, pixel cloudy results!

So, there’s a quick tip on ink! But there is one more glaring area that can be toned down in this photo! Even though I’ve covered it before (I’m just a pun machine today!), let’s go over toning down blown out areas quickly:
Open a new, blank layer. Choose a color close to the area you’d like toned down. Paint over the blown out areas. When you’ve covered all the areas, soften the edges with the Blur Tool or a light Gaussian Blur.

Set the Layer Blend Mode to Darken, and lower the opacity to around 25%.

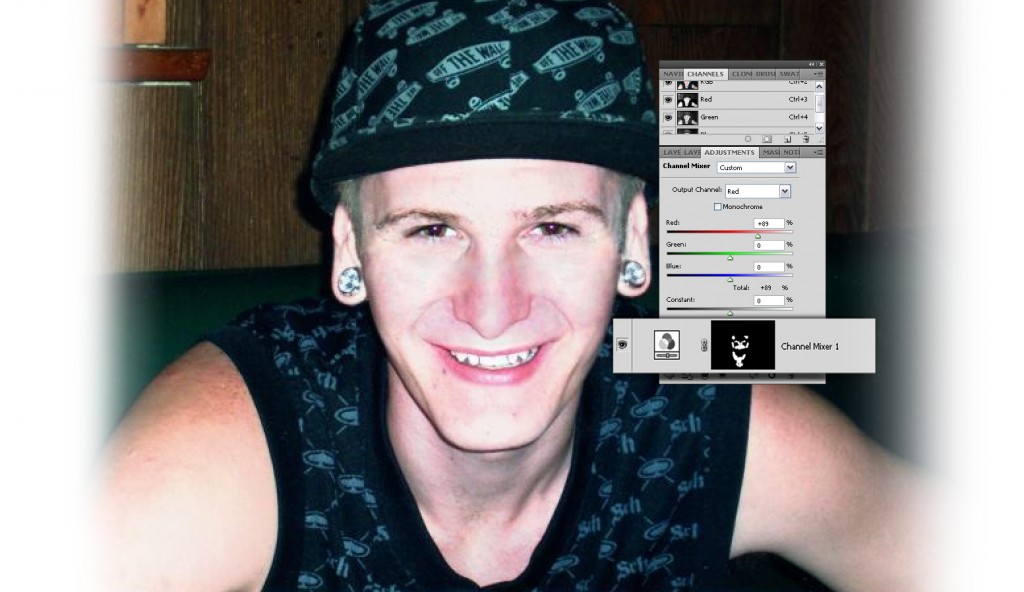
In this particular instance, I want to tone the red on the face down a bit, so I use a Channel Mixer Adjustment and bring the red down to about 90%. Mask off the areas you want to tone down. Bring the opacity of the Channel Mixer layer down to around 35%

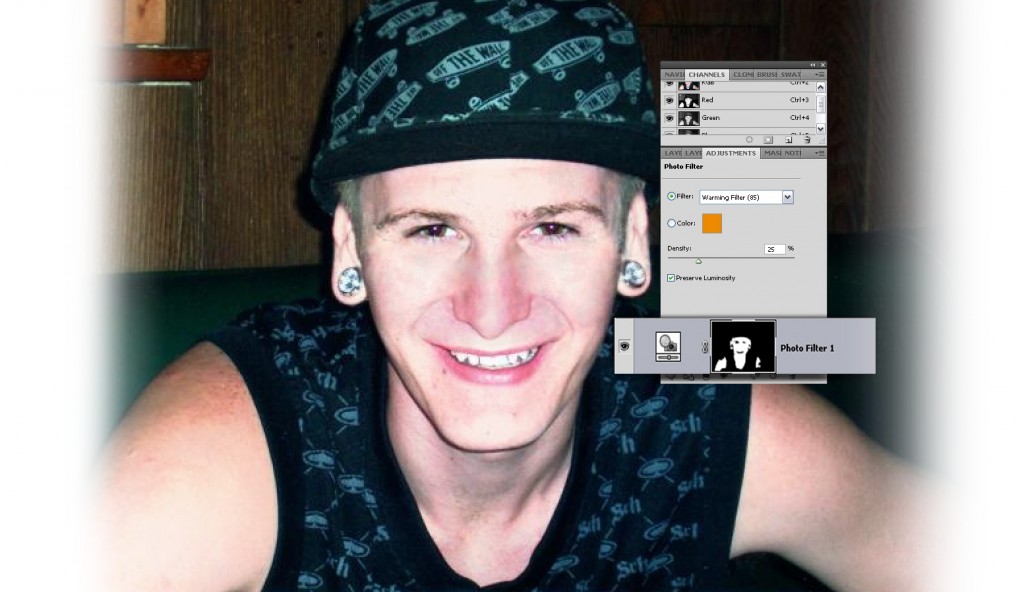
Now, just blend the skin tone a bit more with a photo filter, again masking the areas you want to make a bit warmer. Lower the layer opacity to between 25% and 50%, or to a setting that looks best to you.

Don’t forget to take care of any red-eye issues. Remember to use these steps as a guideline and to experiment with different steps and settings to find what works best for you!


Leave a comment