Refining Masks with Overlay Blending
After a weeks break TipSquirrel welcomes back Mike Hoffman
Creating a good mask is an essential part of retouching and compositing images, but the process of developing that mask doesn’t have to be painstaking or overly time consuming. You can get a very workable mask by starting with one of the color channels from your image, and refining it with some quick enhancements. In this topic, we’ll examine some techniques for refining masks using Photoshop’s Overlay blending mode.
Let’s begin with the image we want to enhance. In this photograph, we have a Great Blue Heron – nicely composed and well-cropped, but the subject of our image doesn’t separate very well from the background:
While we could try some image-wide adjustments with levels or curves, this image would benefit from brightening up the subject (the bird) while muting the background. Our technique will even allow for replacing the background entirely, if you desire. Let’s get started.
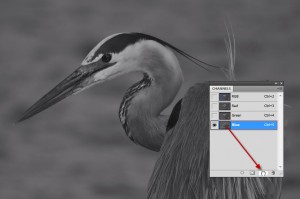
Begin by examining the color channels in this image (Window > Channels). Click on the Red, Green and Blue channels in the Channels Panel to see which one has the best contrast. While none of them are outstanding, the Blue Channel does have slightly more contrast than the other two:
Let’s duplicate the Blue Channel, by dragging its thumbnail down to the “Create New Channel” icon in the Channels Panel:
This creates a new channel called “Blue Copy” and sets it as the current channel; all the other channels are turned off (see the eyeball icons next to the channels, only “Blue Copy” is on):
Let’s bump the contrast just a bit overall, using curves. Select Image > Adjustments > Curves… and adjust as shown. Our goal is a completely black and white mask, so we’re trying to send the highlights towards white and the shadows towards black, and increase the contrast with this adjustment:
Now, we’ll use Overlay blending to increase the contrast further. Perform the following commands:
Select > All
Edit > Copy
Edit > Paste
At this point, there is no change – we’ve pasted the exact same image onto itself. Now, try this command:
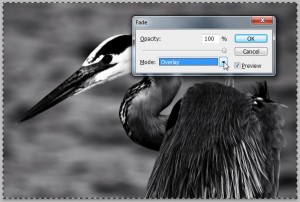
Edit > Fade…
This step must be performed IMMEDIATELY after the “Paste” command. This brings up the Fade dialog box, which has another of Photoshop’s hidden locations for using blend modes! Change the blend mode to “Overlay” and leave the Opacity at 100%. The result is the same as two layers stacked together in Overlay blend mode – more contrast:
Let’s add more density. The original Blue channel is still on the clipboard. Once again, choose Edit > Paste followed by Edit > Fade… :
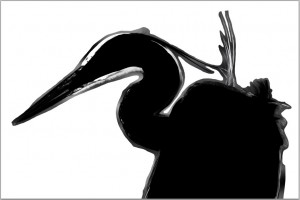
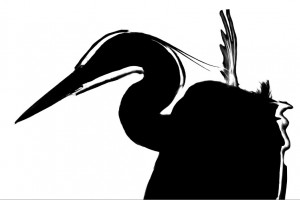
Now we’ve got a lot more contrast to work with, but our mask is not nearly complete. We will need to refine the edges. We can start by quickly selecting the background with the Lasso tool, and filling it with white color. Don’t go too close to the edge of the bird; just loosely select the open areas. Then loosely select inside the bird with the lasso tool and fill with black. We’ve now got just the edges to deal with:
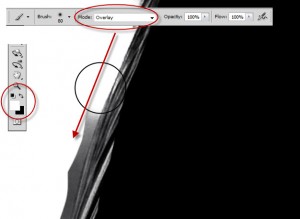
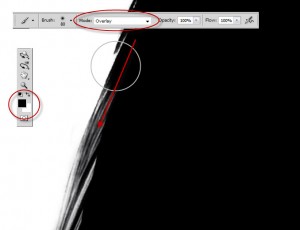
Overlay to the rescue again! Set your foreground color to White, and select a soft round brush with a fairly large size. In the Brush Toolbar, change the “Mode” to “Overlay.” Yet another place within Photoshop where we can take advantage of blending modes!
Now, start painting in a white area, and slowly encroach into the black. Notice how, with Overlay mode selected, the black in completely untouched – only the grays are lightened! We don’t have to be precise, and can brush with quick sweeps of a rather large brush – making quick work of refining the edges:
Continue working with white color around the edges, always starting in the white area and brushing along the edges and right over the black. The grays disappear as if by magic, while the blacks remain untouched:
Now, let’s touch up inside the black areas. Leaving the Brush tool set to Overlay mode, change the foreground color to Black. Start in the interior and paint towards and along the edge. This time, the grey areas become black, while the white is untouched:
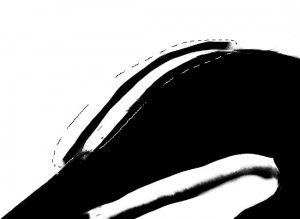
In this image, we are challenged because in some areas the background is darker than the subject, and in some areas lighter. If we refine in sections, we end up with lots of good, well-defined edges, but some are in reverse color:
We can make quick work of this issue. Looking at the head, we select the area that has reversed color with the lasso tool:
Now, we simply choose Image > Adjustments > Invert. The edge colors are now in the correct areas:
We’ve got some extra back in the background, just select it with the lasso and fill with white:
Likewise, we have some extra white in the interior, select it with the lasso and fill with black:
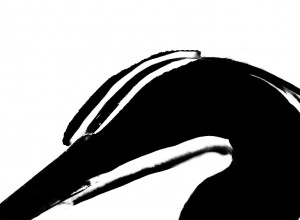
Continue working around the subject, and in very short order, we have a very passable mask. Just a couple of areas require hand-touchup:
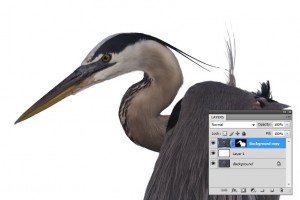
All in all, a very quick job of masking, and we’re ready to use this mask. Return to the composite channel by clicking on “RGB” in the Channels Panel. Now, you can use Select > >Load Selection… to load your Blue Channel Copy and you’re ready to mask away. Remember that white color represents the selected area, so you can use Select > Inverse to change the selection from background to subject. Create a layer mask, and we’ve successfully isolated the subject – ready for further enhancement, or extraction into another image:
I hope you’ve enjoyed our tour of Overlay blend modes! Next week, we’ll take a look at Difference blending.










Hi there,
Really want to use this but you lost me,
I have a heron of mine, followed all the steps, got mine nice and black in a copy of the green channel which offered the best contrast. Then I clicked rgb again to have all channels selected and when I go back to my layers pallet the heron is gold. Looking at your screen at that point I see you have an intermediate white layer and a layer mask on a level above that. The instructions didn’t mention making any layers …just open the image and get into the channels. So somewhere along the line I got dumped.
Please clairfy as I think this will be an excellent selection system if I can just understand it fully.
Thanks,
jj