Photoshop Auto Blend Layers
For this tutorial I want to start off by first of all giving you a little bit of a background story…
A couple of months back I was asked to take a promotional photograph advertising an event raising money for both Cystic Fibrosis Research and the Marchant Family Trust. The photograph which was to be made into a poster was to be shot on location and include five people; one of whom was a little 3 year old boy by the name of ‘Alfie’ who was diagnosed with Cystic Fibrosis (a severe muscle wasting condition) a short while back.
As you can imagine it was really important to get the shot; location had been scouted, those involved knew exactly where to be and when, and kit was prepped; we were ready to go…until that was when the morning of the shoot arrived and the weather had turned to heavy rain and near gale force winds.
Long story short, because of the conditions we came away from the shoot not entirely happy with the final result; however all was not lost….
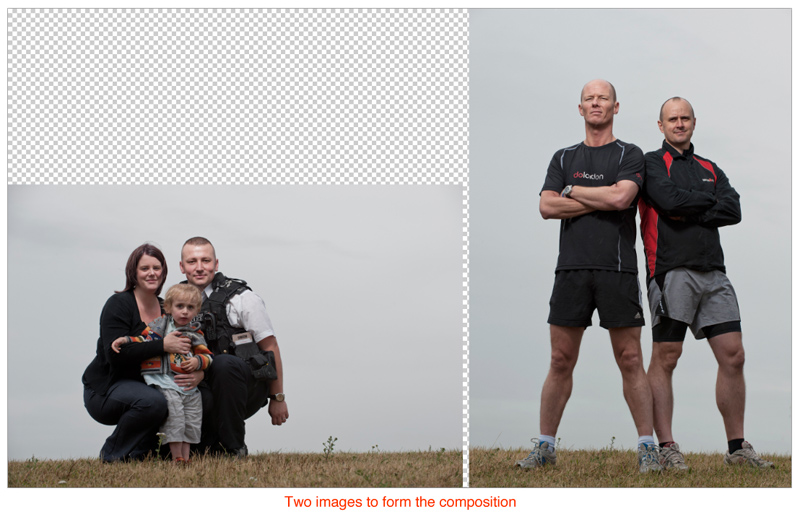
Before packing away I decided to take two quick portraits; one of little Alfie with his parents and one of the guys who were involved in the money raising event and later during Post Production thanks to a little known/used feature in Photoshop called Auto Blend Layers we were able to produce something we were very happy with.
Now before we go into how to use Auto Blend Layers, here’s a short 2x speed video showing the entire editing process to create the ‘Run for Alfie’ poster out of the two final portraits where you can see Auto Blend Layers in action:
There’s no question that Auto Blend Layers saved a heck of alot of time in the Post Production taking just a couple of seconds to seamlessly blend the two images together.
How to use Auto Blend Layers
First off here’s the two separate portraits we used to make the final poster:

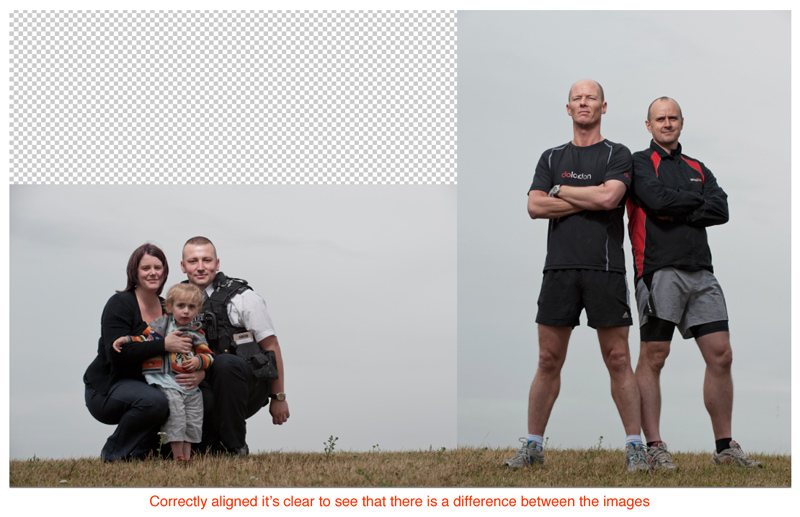
When placed side by side is clear to see the obvious differences between them, particularly in the sky which would have taken considerable time to match between the two:

So let’s look at blending these two images together…
First of all we need to ensure that the images (no matter how many we’re using) overlap each other just slightly:

Once the images are set, make sure that all the layers we’re blending are active in the Layers Panel:

Now we can move onto the AUTO BLEND LAYERS facility and this is found in the EDIT menu:

Clicking on AUTO BLEND LAYERS brings up the following dialog box and to be honest there’ll very rarely be a time when you’ll need to change anything here so just leave everything at it’s default settings and click ‘OK’

Moments later after Photoshop has worked it’s magic the layers are seamlessly blended together:

So there you have it…Auto Blend Layers; a powerful little tool within Photoshop that you may never call upon but when you need to you’ll find that it really can ‘save the day’ in more ways than one.


Great tip, I loved the video… Had to pause and run it slow a couple of times to actually see what you were doing, but it was still great.
Just a quick note.
In the text above you mentioned Cystic Fibrosis (a genetic mutation which affects the bodies ability to regulate the components of sweat, digestive juices, and mucus) but the image title says Muscular Dystrophy (amongst other things progressive skeletal muscle weakness).