Photoshop A Holiday Card 2010 Pt. 2
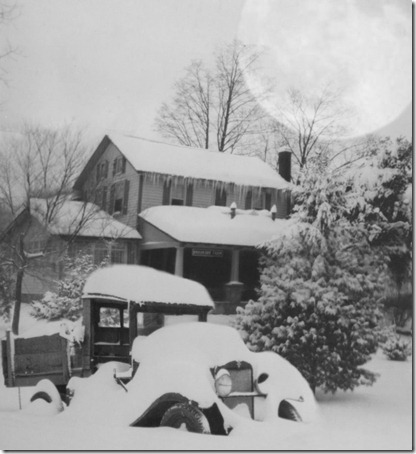
When we left our holiday card last time, we’d just combined three photos into one. Now we’ll finish things up by adding a moon and a bit of nighttime ambiance.
First, find a photo of the full moon. You can either go outside and take one, or purchase one from a stock photo site, or you can search the internet for public domain photos of the moon. Please be sure to specify public domain! We don’t want to rip off anyone’s work! A public domain search won’t always prove fruitful, but in the case of the moon, you can find a lot of great public domain photos. Have a quick look to see if your photo has any distinct shadows and make note of which direction the light is coming from. This is where you’ll want to have your light source, and where you’ll place the moon. Remove the sky area, or background, from around the moon and drag and drop it into the main image. Change the tone of the moon, either by going to Image > Adjustments > Match Color, or Image > Adjustments > Desaturate, if your image is black and white. Once the moon is placed in the image, use a blend mode to integrate it. That way any trees, etc. that should be in the foreground will be in the foreground, and the edges will blend better. I used Overlay at 100% Opacity. If the edges are still too sharp, go over them lightly with the Blur Tool.
Add a new, blank layer at the top of the layer stack by selecting the Create a New Layer icon at the bottom of the layers panel (looks like a page with its lower left corner folded up). Now choose a dark blue tone of your choice by clicking the Color Picker at the bottom of the tool panel. Fill the blank layer with the color by going to the Edit menu and choosing Fill.
Back in the Layers panel, go to the Layer Blend Modes drop down menu and scroll through the blend modes to see what each one does to your fill layer. You’re looking for a nighttime effect. I used Linear Light.
Now go to the Filter > Render > Lighting Effects.
In the Lighting Effects dialog box, I choose the Omni directional light, and placed it at the upper right hand corner, where the moon will be in this photo. Select OK.
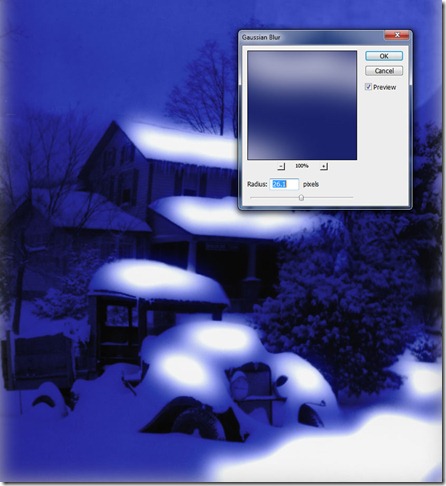
Now we’re going to give a little life to the snow. Add a new, blank layer. Make white your foreground color and select the Brush Tool, set to a medium size. Paint in the areas of the snow that would be likely to have the light of the moon hitting them.
Go to Filter > Blur > Motion Blur. This step is to give a directionality to the light, so make the blur go in the direction that the moon is shining. Select OK.
Now go back to Filter > Blur, but this time select Gaussian Blur. Choose a Radius somewhere around midpoint and select OK.
Take the opacity of the highlight layer down between 15 and 20%, just enough to make a soft glow.
Now we’ll add a little holiday flare! Select the Brush Tool in your tool bar and go to the drop down menu at the top located second from the left, the Brush Preset Picker. Select Assorted Brushes, at the top of the presets. In Assorted Brushes, select Starburst-Small.
Keep the brush very small and add red, green, yellow and blue lights wherever you want there to be Christmas lights. I kept it to the roofline. When you’re done, you can go through the Layer Blend Modes to see if any of them add anything you like to the lights. I used a Screen Blend Mode because it added a little more sparkle.
I kept the opacity at 100%, but if you’d like the lights to be a little more subdued, you can take it down to 50% or so.
If you get to this point and think “Oh! That card is waaayyy too dark!” simply duplicate the layer and change the Layer Blend Mode to Screen to lighten it up. If it’s too light, take down the opacity!
All that’s left now is to get inventive, in a Photoshop kinda way, with a frame! Search for Holiday fabric to scan and use in your frame, go to free Photoshop brush sites to look for holiday, scroll and swirl brushes to add decorative elements to your cards, find interesting free fonts, and most of all, have fun!


Pretty card. Thanks for the tutorial.
Audrey
I came across your article when i was looking for info on the flip photo scanner (which I have) and found it to be very interesting, and then I looked through your other articles. I would like to thank you for taking the time to post these, they are very informative. Your site is one of the best I have come across. Again thank you for taking the time.