No Flipping Photoshop
Without a doubt, the hardest damage to restore in a photo is damage to people, especially faces. It’s also, without a doubt this area that is also the most important.
No matter how devastating the damage to the rest of a photo, if the images of the people are intact, it’s pretty easy to repair. As long as perspective, the laws of physics etc. are followed, repairing legs, arms, inanimate objects and backgrounds can be replaced and repaired with skill, talent and patience.
If the repair is applied seamlessly, you probably won’t hear a person say “That’s not grandpa’s fingernail”, but you will hear (believe me, you will!), “Those aren’t my eyes” or “that doesn’t even look like Grandma!”. You see, we can be fooled by what amounts to minor repairs, the aforementioned inanimate objects and backgrounds. Our eyes see a big difference, a lot of damage fixed and our brains think “Wow!” without taking into account that the badly damaged area was a plain background. But if the damage is in the face of a person and is not fixed in a satisfactory way, look out! In other words, you can fool some of the people some of the time, but mess with Grandma’s face and we’re going to have words!

One of the first “fixes” I ever saw in digital photo restoration was the old flip maneuver, where you take something, duplicate it and flip it horizontally. Although I’ve seen it used on other things (like used to make perfectly symmetrical trees of the variety you won’t find in nature), it’s mostly used for facial features, to fix eyes, noses, ears and mouths. If it’s done correctly, it can be a great fix! If it’s done poorly it can be, to put it mildly, not good.
Faces, like trees, are not perfectly symmetrical. Sometimes symmetrical faces, or facial features look obviously wrong – like Area 51 alien wrong. Sometimes it’s not quite so obvious, but you know something is wrong, and that’s all if the flip is done right! If it’s done wrong, not taking into account that the person isn’t looking straight at the camera, or their head’s tilted, or the shadows are different, or any number of things, you’ll have a Grade A Photoshop disaster on your hands.

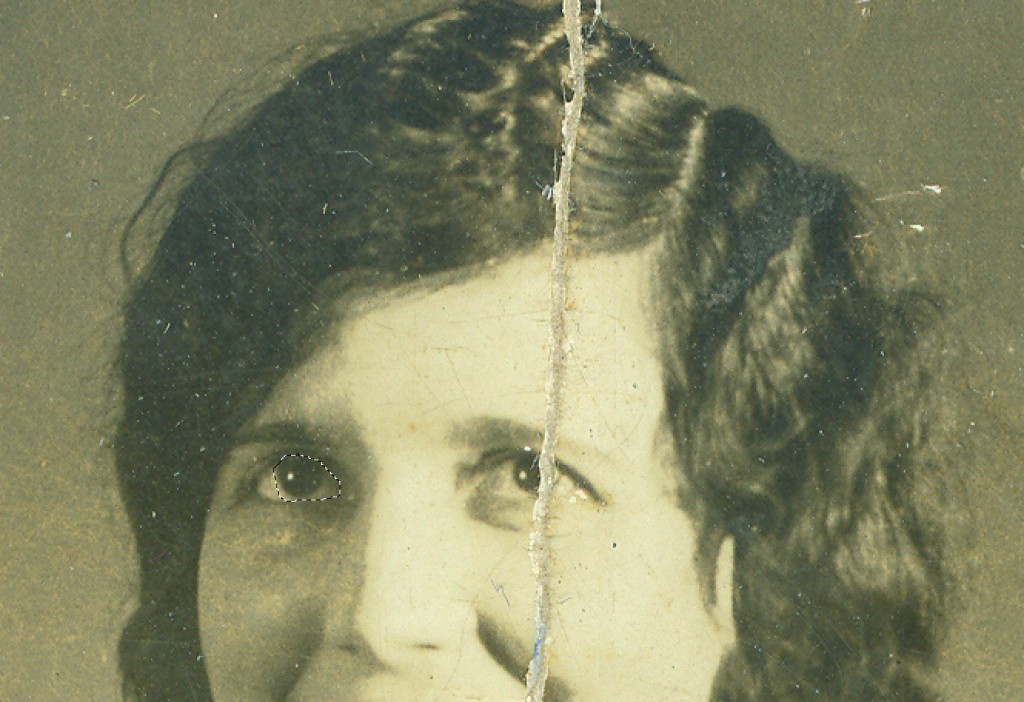
One way you can utilize the “Flip Method” and still get great, realistic results is to select and flip individual parts or even parts of parts. Sometimes, if you’re just borrowing parts, no flipping is even necessary! For example, you’ll notice in the photo below a rather significant tear is bisecting an eye, obliterating half a pupil. Now, some would just “draw” the other half of the pupil in, but I don’t recommend that. It’s almost never a good idea to draw anything on a photo because it will look like you drew on a photo. Unless your name is Bert Monroy, and I’m pretty sure it’s not, stick to compositing pieces from a photo into the photo and, if at all possible, use pieces from the same photo.

We need to composite part of the pupil, and we’ll borrow from the other, intact, eye, but don’t only select the pupil! Select the whole pupil and some of the area that will fall on the other side of the tear.

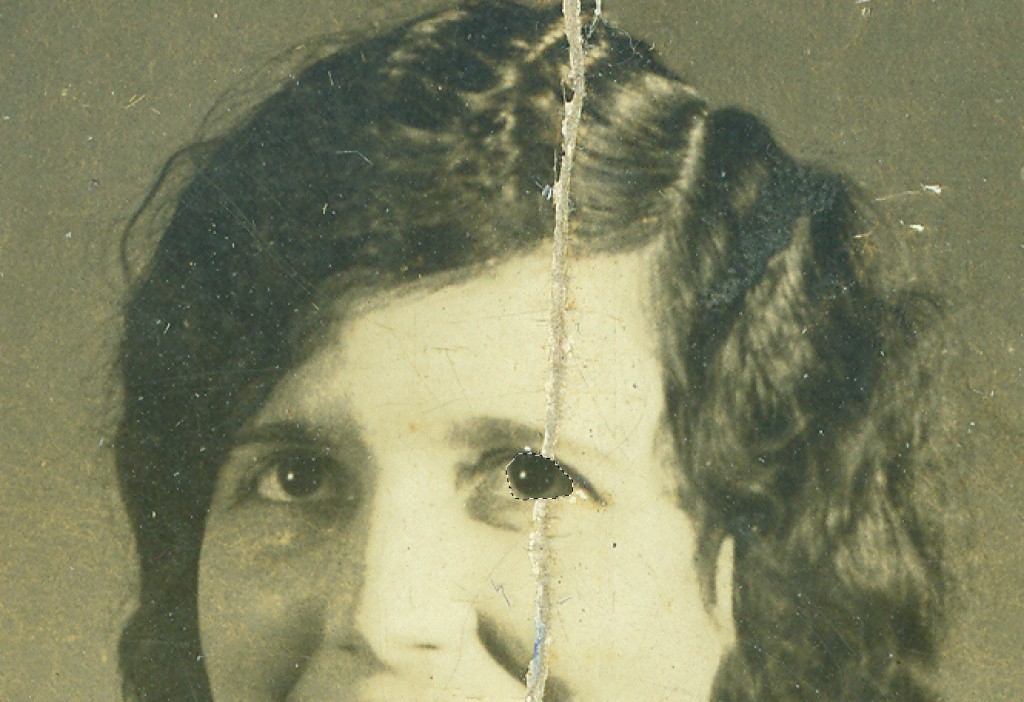
When the area is selected, duplicate (Cmd or Ctrl + J) the selection onto its own layer. Select that layer and move the borrowed eye until it’s over the damaged eye. No flipping required. (Hint: In an instance such as this, use the light in the pupils as a general location setting. Place the light from the “new” eye over the light in the existing eye, then fine tune!)

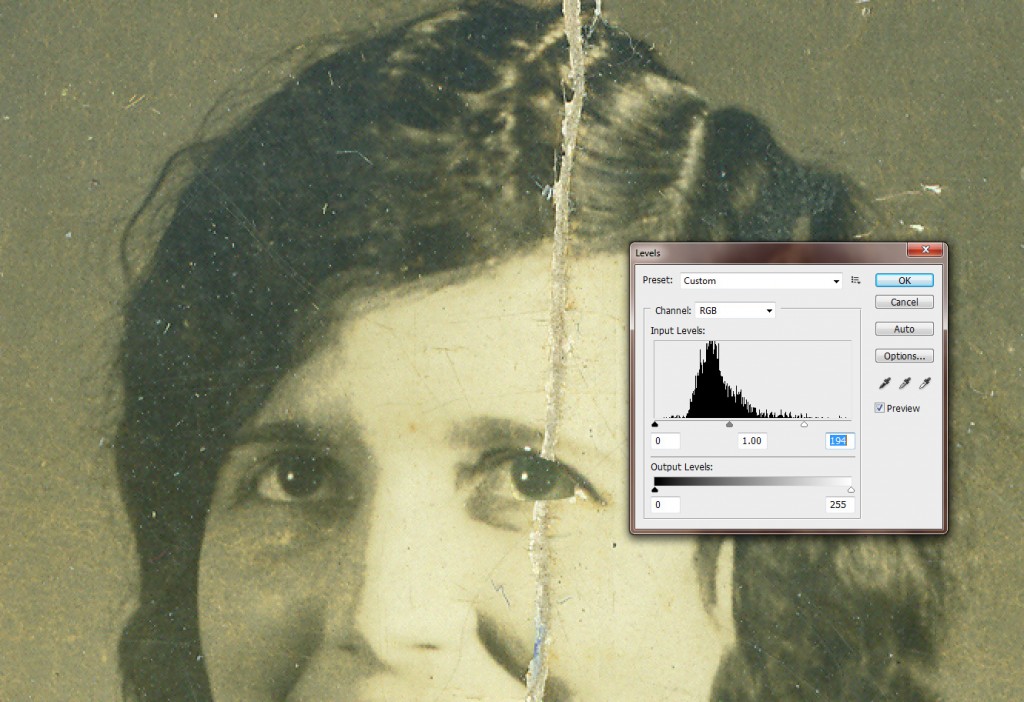
Now you’ll need to blend the composited piece to better match the existing area. There are a number of ways to do this: Curves and Color matching are just a couple of examples, but in this instance, I’m going to go with a simple levels adjustment. We’re borrowing an area that was in shadow and moving it to an area that was more brightly lit, so we’ll want to lighten the new area. A levels adjustment from the Image > Adjustments > Levels menu is easier, in this instance, than a Levels Adjustment Layer because it only lightens (or darkens) the layer beneath it, in this case the borrowed eye, and you’ll be able to see the adjustments you make compared to the existing photo. It is, however not editable – unless you make that layer a smart filter first, but we’ll cover that at another time.

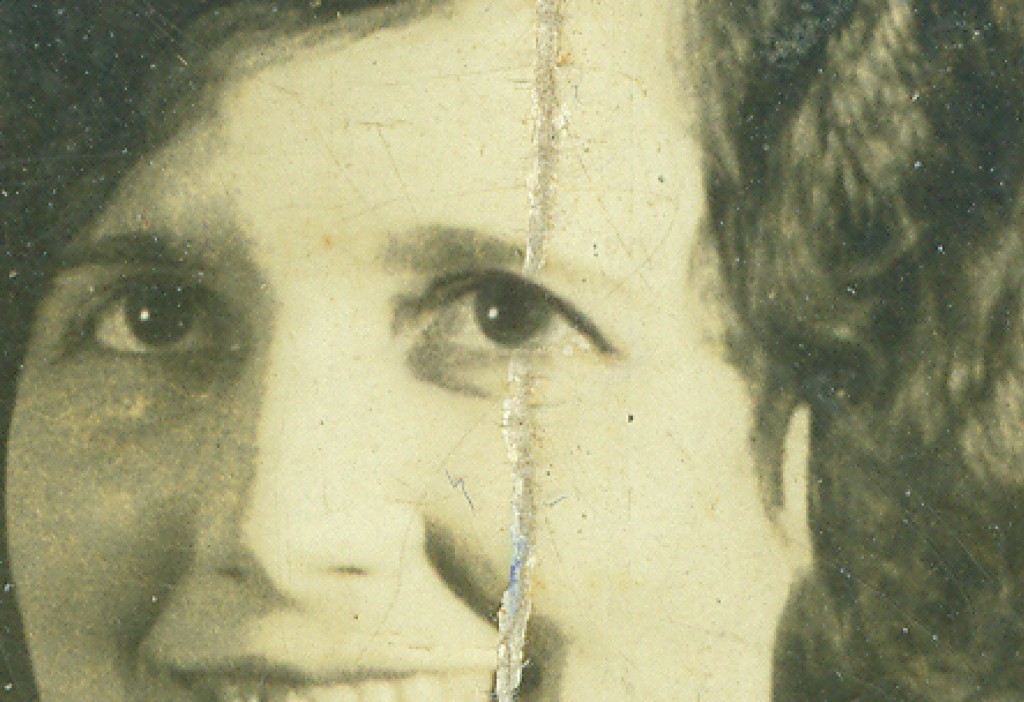
Clean up the areas surrounding the tear to blend. I used a low opacity (20%) eraser, but you might want to work in a more non-destructive environment. If so, add a layer mask and do your blending in the mask. Remember to slightly blur the edges, though, so no hard lines remain.

The next time you’re tempted to flip an eye (or a nose, or a mouth), take some time to really evaluate the damage. Maybe just borrowing a small part will do and a much better restoration will be the result!


Leave a comment