Nested Smart Objects – Part 1
We’ve been exploring the power of Smart Objects, and starting today we will test the limits of just how far you can go – by nesting Smart Objects, one inside the other. By building Smart Objects from other Smart Objects, we add levels of complexity, but open new doors to creative ideas that were never before possible.
We’ll use this image as an example. In this stylized desert scene, we will create the celestial orb from a Smart object:
In fact, as we’ll see, the orb will be composed of several smart objects, one inside the next. We’ll take two weeks to work through this example, as there is a lot of preparatory work required. Our plan will be to cover the following:
- Part 1 – Create the Smart Object base, and nest the Smart Object, adding layer effects as we go, ending with the final graphical element for our composite.
- Part 2 – We’ll explore the power and the pitfalls of editing and transforming nested Smart Objects, and Smart Objects with Smart filters applied. We’ll make some adjustments to our Smart Object and complete the scene.
OK, let’s get started! We’ll start with this ordinary gradient layer in a new document:
Let’s start right off by converting this layer to a Smart Object. In the Layers Panel, choose the flyout menu and click on Convert to Smart Object.
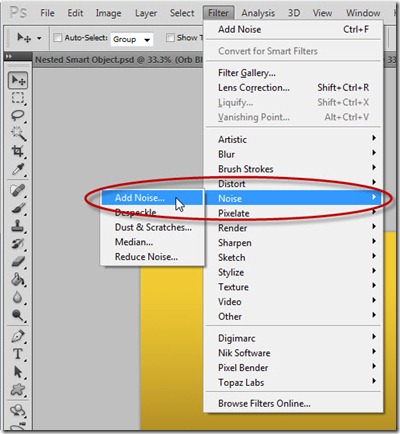
This will create the Smart Object, and the layer thumbnail will get its familiar “package” icon indicating it is now a Smart Object. Next, we’ll add some filters, which will become Smart Filters. Let’s start by adding some noise. Use Filter > Noise > Add Noise… and set the Amount to 19%, Distribution to Uniform, and make sure Monochromatic is checked.
Notice that the filter has indeed been added as a Smart Filter, and a Smart Filter group has been created with its mask, as we’ve seen before:
Let’s add another Smart Filter. Choose Filter > Artistic > Cutout…
In the dialog that appears, enter a value of 4 for Levels, 4 for Edge Simplicity, and 2 for Edge Fidelity:
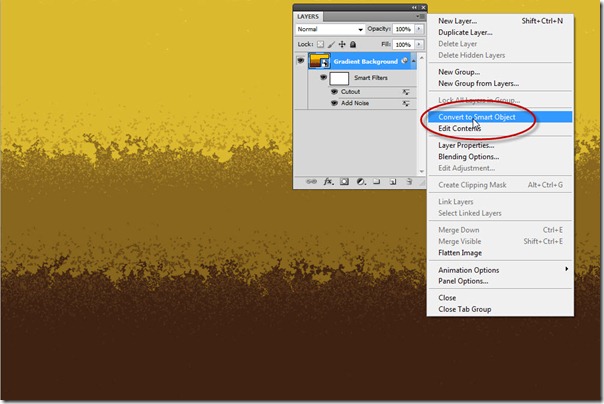
Now we’ve created a roughed up grungy, posterized gradient. Let’s convert THAT to a Smart object, just as before, using the Layers Panel flyout:
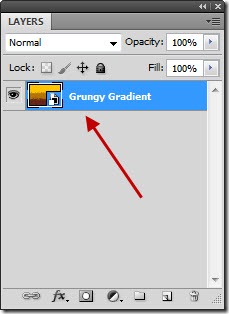
Next, we’ll want to rename the Smart Object. The default is for the SO to maintain the original name all the way through, but with nested Smart Objects, we’ll want to name them so that we know where we are in the edit stack. We’ll call this “Grungy Gradient:”
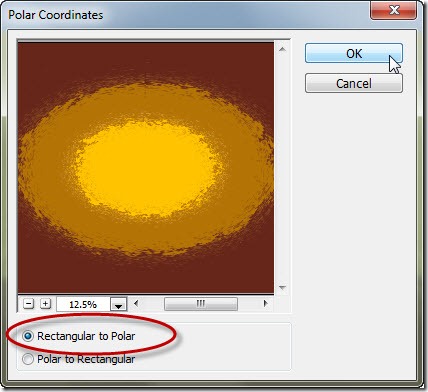
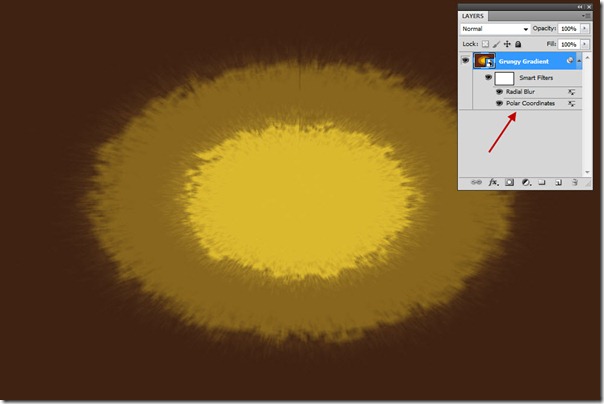
Ready for more? Now we’re going to add some additional Smart Filters at this level. We’ll start with Polar Coordinates, Filter > Distort > Polar Coordinates…
In the dialog that appears, select “Rectangular to Polar,” and click OK.
We still have room for more! This time, we’ll add a zoom blur. Use Filter > Blur > Radial Blur…
In the dialog for Radial Blur, set the Amount to 10, Blur Method to “Zoom,” and the Quality to “Good.” Click OK to accept:
Now, at this point, we have created our graphical element for use in our scene. We’ve created a Smart Object that contains a Smart Object, that contains a regular Photoshop layer. Each nested Smart Object has its own Smart Filters applied:
Next week, we’ll use this in our composition, and will see the power and the dangers of using nested Smart Objects. Do stick around!









Leave a comment