Mixed Masking in Photoshop
In our last installment, we looked at masking with the pen tool in Photoshop. The pen tool is a powerful way to create nice smooth paths – which can be used to create nice, smooth selections and masks. That may not be what you want: part of the masking power in Photoshop comes from the ability to create organic, finely detailed and soft masks for items that don’t have hard or well defined edges. For those applications, we have the quick select or select color range capabilities, along with the Refine Selection or Refine Mask tools.
But, what do you do if your object has both hard and soft edges? What’s the best tool in that case? Once again, the obvious may be a surprise: use all the tools and combine the masks together. It’s simple if you take it one step at a time, and that’s where we’ll explore today.
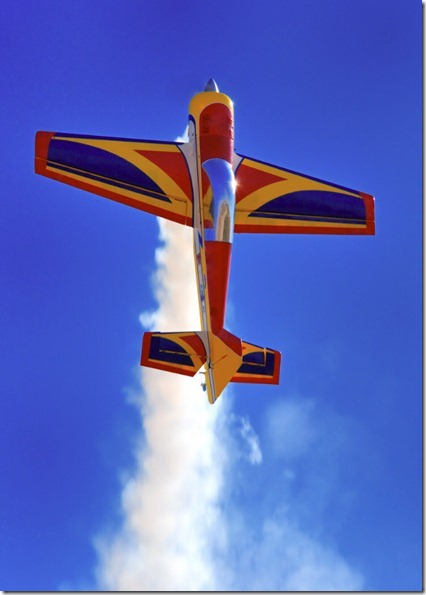
Consider this image – a stunt plane, smoke streaming, on a plain blue sky. But, we want to extract this daredevil and place him on another background. How do we go about it?
The first thing most people would do is to head right for the Quick Select tool, and see what can be done there. Drag over the blue sky, and use Ctrl-Shift-I (Windows) or Cmd-Shift-I (Mac) to invert the selection so that the plane and smoke are selected.
Of course, the Quick Select tool is rarely perfect the first time through, and you’ll need to go around shift-painting to add to the selection, and Option/Alt-painting to subtract from the selection, until all the loose ends are fixed (the wings and nose in particular):
At this point, a really savvy Photoshop user would click the Refine Edge… button at the top of the toolbar. Painting with the Refine Radius brush along the edges of the smoke will really soften the details and make for a nice semi-transparent edge:
If you’d like to learn more about how to use Refine Edge, See my tutorial on Capturing Details with Refine Mask. Once we’re done, we have a pretty good looking mask… until we look closely. Let’s examine the tail:
The area at the top edge isn’t fully enclosed (1). We could go in at a higher zoom level, and shift-paint the Quick Select tool a little more. But, look at the bottom edge (2). This edge is more in line, but it look a little bit jagged. In fact, let’s look at the actual mask created by this selection:
Instead of a nice sharp edge along the plane wings, we see a fairly blurry, soft edge. This is typical of what you get with the Quick Select tool and Refine Edge. It’s a nice organic edge, but NOT what we want for our airplane’s fuselage. This is a job for the Pen Tool!
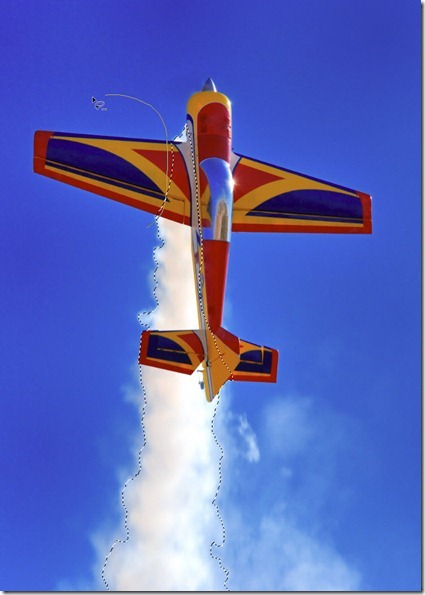
But… the Refine Edge tools have done a fantastic job with the smoke. If only there were some way to get the best of both worlds – and there is! First, we start with our selection created by the Quick Select and Refine Edge tools, and then we just use the Lasso tool (holding down Alt/Option to subtract) and lop off the part of the selection that was the plane:
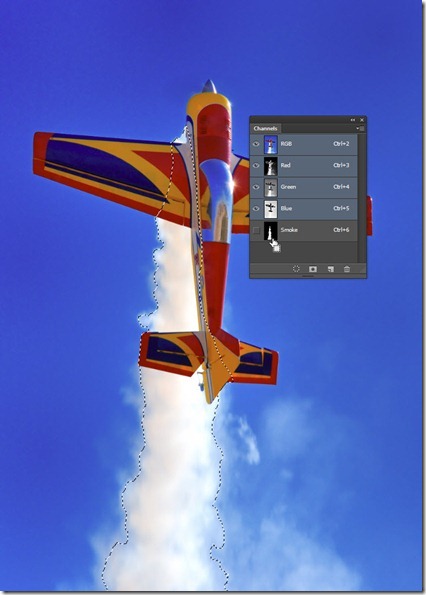
Then, Save the selection (Select > Save Selection) and call it “Smoke.” it appears in the Channels Panel, and if you click on it you can see the mask:
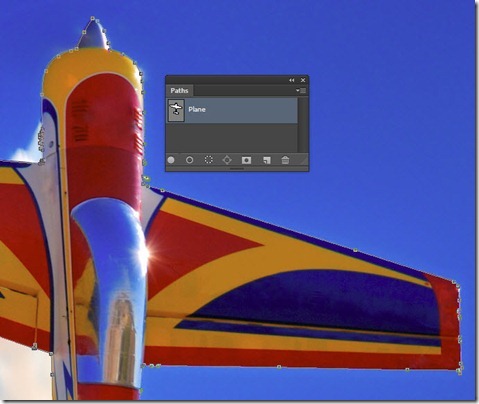
Click back on the RGB composite channel, and go back to your image. Now, use the Pen Tool (see the previous tutorial mentioned above) to create a mask of just the plane. You can be sloppy in the areas where there is smoke, or you can be a perfectionist and trace the entire plane. When you finish, open the Paths Panel, and rename your Work Path “Plane.”
Now, we have a channel (selection) defining the smoke, with nice transparency, and a path defining the plane, with a nice, smooth, well-defined edge. Combining them is easy:
Step 1. Control-Click (Windows) or Command-Click (Mac) on the “Smoke” channel thumbnail to load it as a selection (you could also use Select > Load Selection, but you need to get comfortable with the Channels Panel).
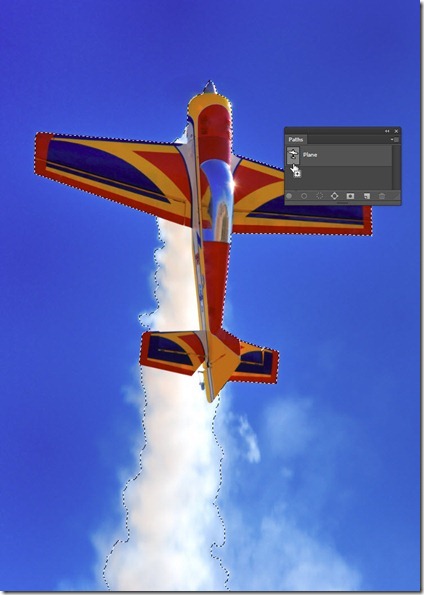
Step 2. Control-Shift-Click (Windows) or Command-Shift-Click (Mac) on the “Plane” path thumbnail in the Paths panel.
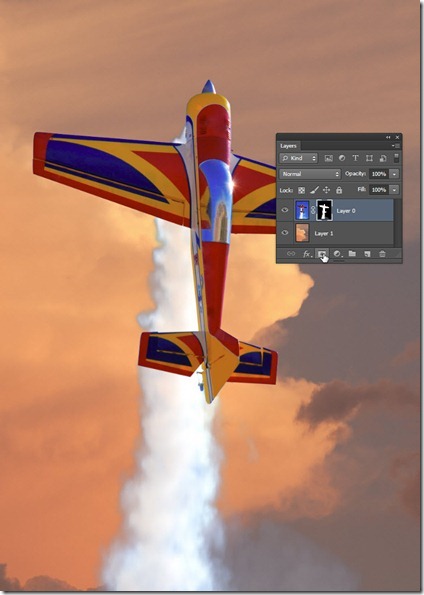
Step 3. There is no step 3, because we’re done! That’s all there is to it. The selection is created, and we can click on the “Add Layer Mask” icon to mask our layer, revealing a different background:
For comparison, let’s take a close-up look at the tail’s mask now:
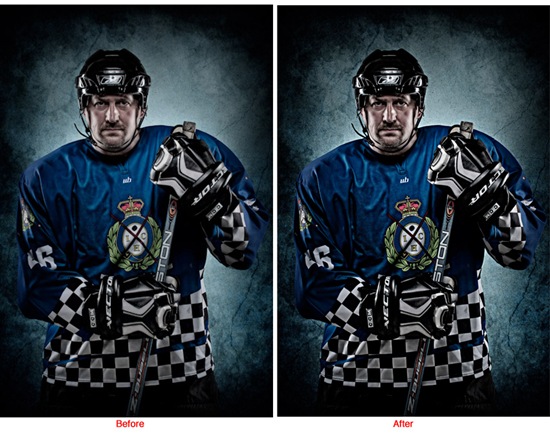
And the resulting before and after of the masked tail (click to enlarge):
So there you have it! The key points to remember from this exercise are:
- You can mix and match saved selections and paths to create a versatile selection that includes both soft and hard edges.
- You can Control-click (Windows) or Command-Click (Mac) on both channels and paths to create a selection based on either one.
- You can add the Shift key (just as with the Quick Select or Lasso tools) to add to a selection created from a path or channel, by Control-Shift-Clicking or Command-Shift-Clicking.
The key to this technique is to construct your selections, save them, and then use them more powerfully and effectively by accessing them through the panels.







some very cool designs. Thanks a lot for compiling and sharing this list.
Very good tutorial for Image Masking. I will use this technic.
verry important masking tutorial…thanks for sharing…
Good tutorial with detailed description…..thanks for sharing…
Absolutely it was an amazing tutorial. I will surely share this with my friends.