Keeping the details, Skin smoothing the smart way
How many times have you seen beauty retouching that has gone too far? you know the kind where the model is left with skin like Barbie? Well this technique allows you to retouch and soften the skin without losing the fine details and texture.
First of all I would like the say, this is a technique I have stumbled upon from Lee Veris over in Hollywood. I’ve added my own little twist to the technique to make it a little more useable.
This technique does take a few twists and turns along the way, so hold on and enjoy the ride.
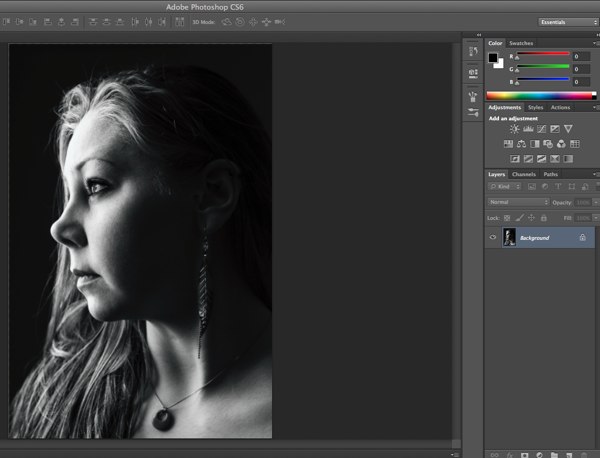
The girl in today’s tutorial has great skin, but the details revealed with today’s cameras means that skin can look over detailed and distracting.
 As we can see in the image above, there is quite a lot of texture in the skin and also a little too much detail for beauty retouching. So lets get started…
 The first step is to create a duplicate layer using Cmd J (Ctrl J for Windows)
 Now we need to invert the new layer using either Cmd (Ctrl) I or from the menu as shown above.
 This creates a rather funky version of our portrait but things are about to get stranger
 Next, we apply the Vivid Light Blend mode within the Layers Palette.. and everything turns.. Grey
 What we have done now is effectively created a second layer that cancels out the first layer.
This is the layer we will work on to remove any unwanted blemishes while retaining the underlying skin texture.
 At this stage, we convert the layer for Smart Filters.. This allows us to be able to go back and adjust our smoothing settings rather than rework each stage. Another benefit of using the Smart filters is that you can easily create an action to achieve this technique and adjust the settings for individual images.
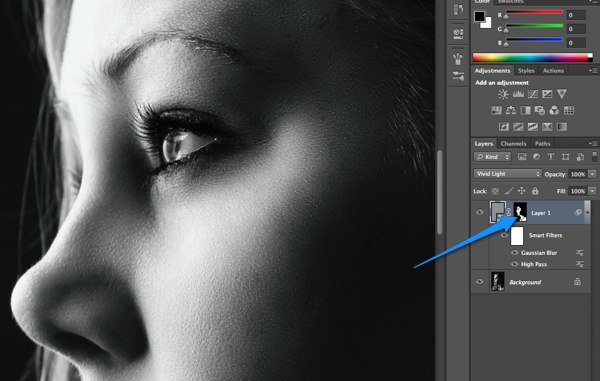
 The screenshot above shows an icon in the bottom right of the layer preview, showing that this layer is now ready for Smart Filters.
 And now for the fun stuff.. As strange as it sounds, we are going to Sharpen the layer using the High Pass Filter. This will have the unusual effect for blurring the overall image. If this confuses you, just think that we are working of the opposite of the original image, so sharpening to blur makes a weird kind of sense.
 Change your pixel radius in the High Pass pop up box so that the skin no longer shows any blemishes. Be careful not to go too high, although as this is a smart filter we can fine tune it later if required.
NB! You may notice that the image blurs while the High Pass preview box sharpens.. this is due to this layer being an opposite of the layer beneath.
Also, only be concerned how the blurring looks on the skin as we will not be applying this to the hair etc.
So if we sharpened to blur the image, now we need to blur to sharpen the image.. talk about head twisty! We now apply a Gaussian Blur to restore the skin texture.
Change the pixel radius of the Gaussian Blur to reveal the underlying skin texture while hiding any blemishes. A good starting point for the pixel radius is less than half of the value used in the High Pass Filter.
As you can see in the screenshot above, both the High Pass and Gaussian Blur fliters have been applied to Layer 1. This allows us to double click on either of these filters and fine tune the values used if needed.
As things stand, this skin smoothing has been applied to the entire image. What we need is to apply it to only the skin.
This is simply a case of creating a black layer mask for layer 1. To do this, Alt Click on the mask layer to fill the mask layer with Black.
As always with layer masks, Black conceals, White Reveals.. so now all that skin smoothing has vanished.
Now it is just a case of painting the smoothing back into the image.. Choose the Brush from either the Toolbar or by pressing B, make sure that you have selected White as your foreground colour. Choose a nice soft brush and paint on the selected layer mask.
As you paint in white on the layer mask you should see the skin being smoothed while retaining all the lovely skin texture. If you find the smoothing is too much you can either adjust the settings of previous filters or you can lower the opacity of the layer.
Above you can see the starting image on the left and the skin smoothed image on the right..
NB! this technique works just as well for colour images as it does for B&W
I hope you have found this tutorial useful and as always, please feel free to ask questions or comment below.


Nice tutorial Scot. Will have to give this technique a go. I’ve tried a few methods, this one seems fairly speedy & you have the option to tweak the look after, which is great if you first apply as an action.
Thanks for this
JT
Cheers Jonathan,
Please let me know how you get on with it
Scot
Thanks a lot Scot – this seems to be a real timesaver when put into an action. The inverted filters do make this feel a little strange, but on the couple of colour images I tried this on it worked very well, with a result similar (but better) to how I remember Portraiture to work.
Will have to play around a little more with inverted filters when I get the chance!
Thanks again!
Dave
My pleasure Dave,
Really pleased you found the technique useful, please be sure to upload examples to the TipSquirrel Flickr group
http://www.flickr.com/groups/1611670@N21/
Cheers
Scot
Hi Scott, i was wondering if you would have a technique for removing the “marbled” effect one gets when using the high pass filter sometimes, in colour pictures. I’ve learned to use High pass quite effectively on skin, yet sometimes i get a strong “marbled” like effect, usually red patches, which im not sure how to tackle.. any ideas? thanks! Tinko
very nice tutorial
I usually use SkinFiner to do fast skin smoothing, but your tech does a better job on B&W pictures. Thanks very much!!
really pleased with the article. thanks!
Thank you! It’s the first time I understand how to do it without any readymade actions.