Jack-O-Lantern in 3D (Part 1)
Almost exactly one year ago, I posted my first tutorial on TipSquirrel – carving a Jack-O-Lantern using layer styles. And, since it is that time of the year once again, I thought it would be a good idea to revisit that theme – this time, using Photoshop CS5’s new 3D features, building on the techniques I’ve been exploring over the past several weeks.
To make this project more accessible, all design elements used in this tutorial are available freely on the web – I’ve provided the download links at each step, so if you want to follow along with me, you’ll be able to use the exact images and models I’ve used.
We’ll begin with a background texture. I’ve downloaded this texture from stock.xchg, “the leading free stock photography site.” The image can be found here. I’ve stretched the image to fit my canvas size of 1600 x 1200:
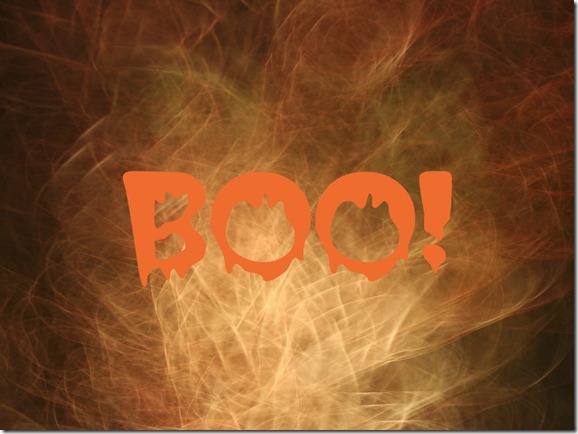
Next, we’ll add some text. The color is set to a deep orange (R:176, G:105, B:45) and the font size is 300 pixels. The font is called “Creeper,” and you can download it for free from Fonts101.com (or several other free font sites on the net).
Now, we’ll use Repousse to convert the text to 3D. If you’re note sure how Repousse works, or need a refresher, see my tip on Photoshop in the 3rd Dimension. We choose the menu item 3D > Repousse > Text Layer, and answer “Yes” when Photoshop asks if the text can be rasterized. This brings us to the Repousse dialog box. We will want to change the following parameters:
- Extrude: Depth = 3
- Bevel: Height = 15
- Bevel: Width = 40
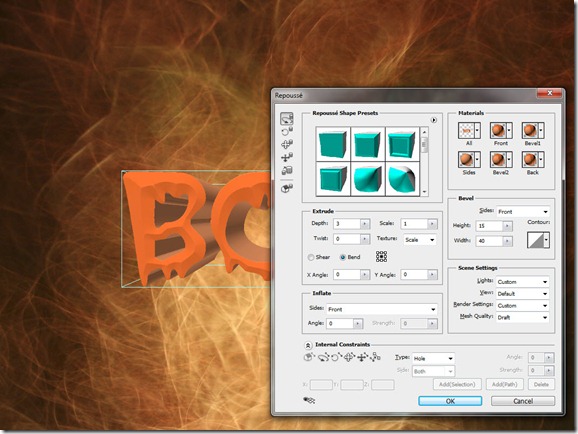
After you’ve made these adjustments, click “OK” to finish the Repousse object:
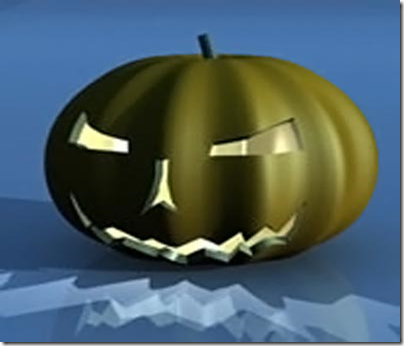
Next, we’re ready to add our Jack-O-Lantern. This free 3D model can be downloaded from Quality 3D Models, and is licensed for use under the Creative Commons license. Here is the link, or click the image:
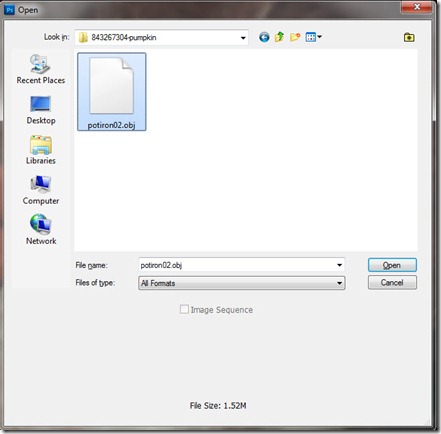
Download the zip file, and extract it to a folder, and you’ll have five files: The model itself, which is the “.OBJ” file, as well as the Materials definition “.MTL” and three texture images “.PNG.” Remember where you’ve stored these, and go back to Photoshop. Choose 3D > New Layer From 3D File… and select the .OBJ file:
The 3D Model will be imported into Photoshop. Notice that the new object comes in on a new layer, and notice that it is facing the wrong way. Notice also that the default colors that come with the model don’t look all that attractive. We’ll fix that all shortly:
Before we work any further, it is important to note that each 3D Layer in Photoshop is a separate world. The lights, shadows and reflections on one layer do not interact at all with objects on any other layer. Yet, we want our 3D scene to be a single unit – with shadows from the text falling on the Jack-O-Lantern, and light from the Jack-O-Lantern falling on the text. In order to accomplish this, we need to combine our 3D Layers.
This is the reason I recommend not bothering moving and resizing the objects at this point. The process of combining 3D layers can often result in objects being repositioned or shuffled, so wait until after the layers are combined before making positional adjustments.
For this project, select the Jack-O-Lantern layer, then shift-click to select the BOO! layer as well. With both layers selected, choose 3D > Merge 3D Layers:
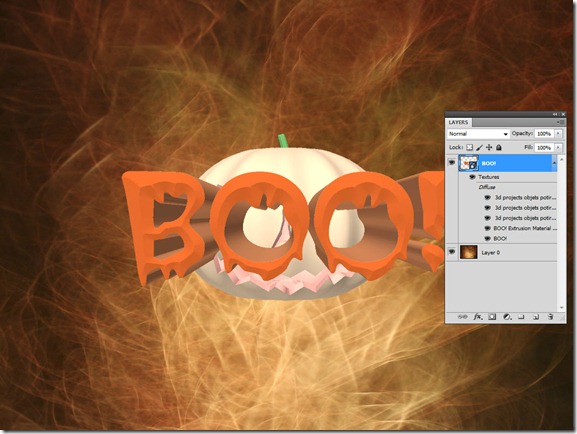
Notice that the two 3D Layers are now one, and notice also that the 3D objects have shifted somewhat with respect to each other. However, the 3D objects are now in the same “world,” and we can start shifting them into place:
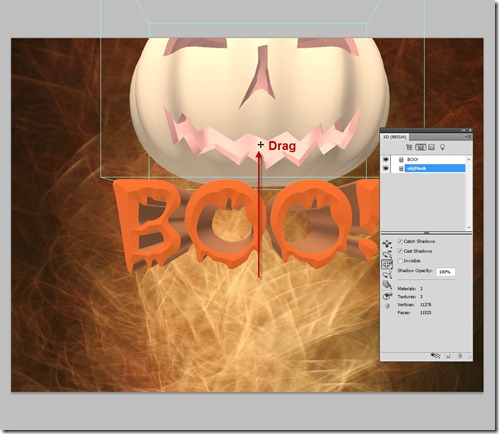
In order to move our objects around, we’ll need to switch to the 3D Panel (Window > 3D). Select the second icon at the top to Filter By: Meshes, make sure the Jack-O-Lantern object is selected (you can toggle visibility with the eyeball icon if you’re not sure) and then choose the 3D Mesh Slide tool from the flyout icon as shown (thrid one down). The 3D Mesh movement tools allow moving a single 3D item within the model. “Slide” allows you to move an object towards or away from you, or left to right. Notice that the target mesh is highlighted with a wireframe box when you are moving it. We want to drag the Jack-O-Lantern towards us, by dragging downward. Try to get the Jack-O-Lantern more or less centered so it surrounds the text. You may see the text “breaking through” the pumpkin, this will help you get a sense of the proper position:
Next, we want to pan the Jack-O-Lantern upward, and to do this we need to select the 3D Mesh Pan Tool from the 3D Panel:
Drag upwards to move the Jack-O-Lantern vertically and position it above the text:
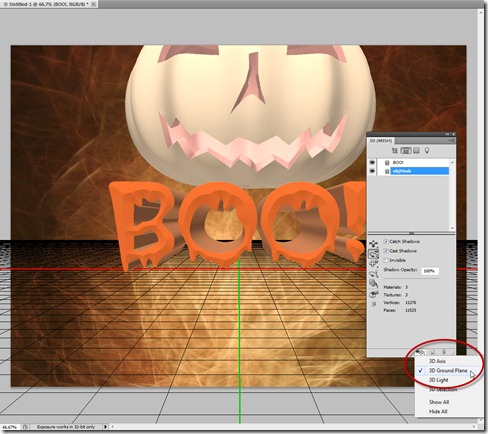
Now our objects are in the right position relative to each other, but they aren’t fully in view. We need to adjust the view so that we see our objects, which are now partially off screen. However, we can’t simply move the 3D Objects downward. To see why, let’s select the icon at the bottom of the 3D panel and toggle visibility of the ground plane:
Recall from last week’s tip on lighting, that we will use the Ground Plane Shadow Catcher to show shadows falling on an imaginary surface. If we move the objects downward, they’ll be underground! No shadows will be visible.
The solution – we move our “camera” upward. We can shift our view, just like walking around with a video camera, and leave the objects where they are. Choose the 3D Pan Camera Tool from the flyout menu and shift the view downward. Note that moving the camera is the opposite of moving the object, so the direction of movement will seem backwards:
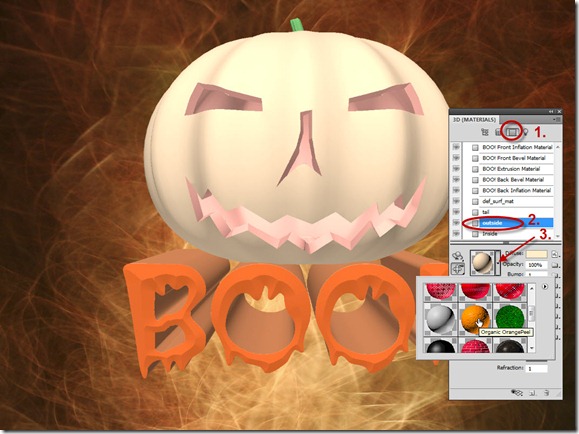
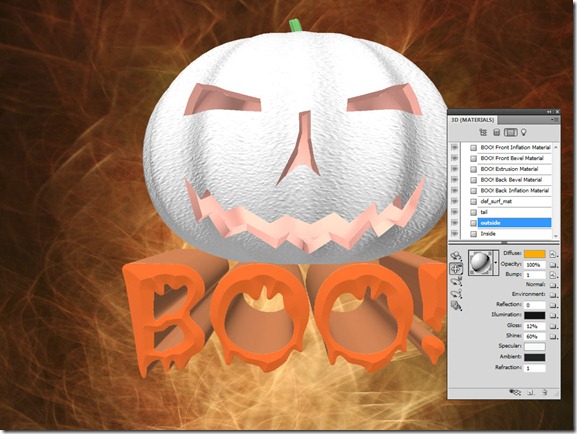
At this point, we can turn the ground plane off. Next, we’ll work on improving the appearance of the Jack-O-Lantern. In the 3D Panel, (1) click the third icon at the top to Filter By: Materials, and then (2) select the material for “outside” that was imported with the Jack-O-Lantern model. Finally, (3) click the fly-out to choose a materials preset, and select the texture called “Organic OrangePeel.”
Once you select the material, the texture and color are applied. However, due to some inconsistencies with color spaces in Adobe’s default textures, you may see something like the below. Hardly orange! No matter, we will deal with that too. We do have a good bumpy texture for our pumpkin, though:
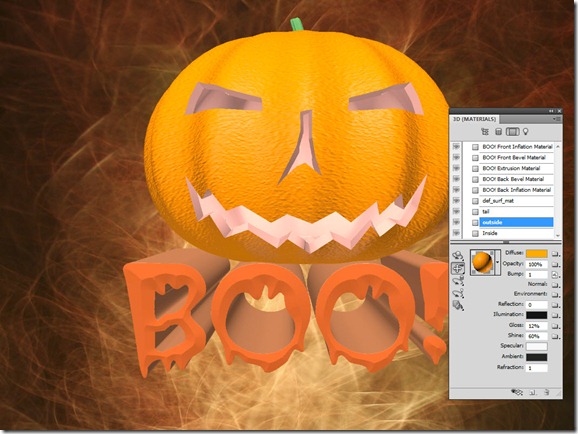
Simply click the small icon next to the Diffuse color swatch, and then select Remove Texture. This eliminates the incorrect color texture, but leaves the bump texture intact. With the Diffuse texture removed, the Diffuse color shows through:
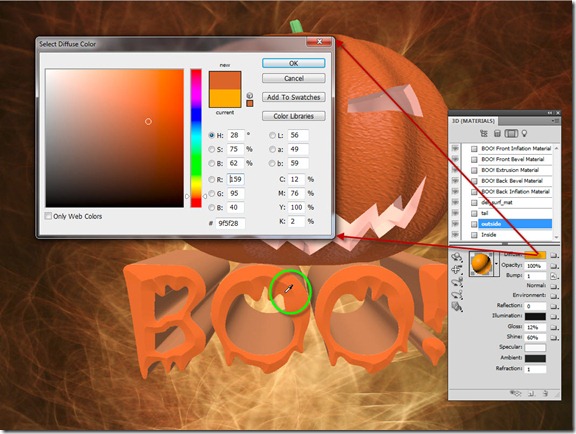
Not bad, but to get an even closer match we can click on the texture, then sample a color from our text. I’ve chosen a darker orange from the shadow area of the bevel:
Now, we’re ready to improve the color inside the Jack-O-Lantern. Click the material labeled “inside” and then click the Diffuse color swatch. Choose a light yellow-orange color (R:254, G:229, B:141):
And here’s our composite image, ready for the final touches of lighting and rendering. We’ll save that for next week, so do check back!












hehehe nice one. eager to see the final result.