
Glamor In Restoration
Does beauty retouching have any place in photo restoration? Well, up to a certain point, yes! We can smooth out the skin, sometimes, as far as removing texture and pixelation, but must be very careful to leave those things that create the character, such as wrinkles. Of course, we should never manipulate a photo to make the subject “prettier”, or thinner. However, there is a retouching technique that is perfectly fine to use in restoration, provided it’s done with a very light hand, and that’s eye enhancement.
In most old photos the eyes of the subject look fairly dead. Even in close up portraits, the lights might be on, but there’s still no one home. Whether from fading, original lighting or the photographers… um … technique, the eyes, which are arguable the most important part of a portrait, just aren’t alive! So, especially when I restore a portrait with nice clear eyes, I try to put a little life back into it. The keyword here, is subtlety!

Do whatever basic restoration work that needs to be done on the eyes prior to taking the following steps. Make a duplicate of the layers you’ve been working on up until now, either Cmd (Mac) or Ctrl (PC) + J if you have a complete layer, or Cmd + Opt + Shift + J (Ctrl +Alt + Shift + J) if you’ve got separate working layers. You’ll need to do this step for two reasons: The Dodge / Burn tools only work on layers already containing information (no blank layers!) and this layers is going have the opacity turned way down, so it needs to have that complete layer behind it in the stack.
Now, zoom nice and close up to the eyes to give yourself a good work area. Using the Dodge Tool, I used 50% opacity and highlight settings, work in the iris, lightening between the outside edge of the eyeball and the pupil. Leave a small ring of the original color around the outside edge. Be careful not to go from eyelid to eyelid with the lightened ring! Eyes naturally have shadows made by the lids! It helps, here, to have a little knowledge of anatomy as well as the play of light and shadow, but if you don’t have these skills, recruit a victim to sit for you, set a light at the approximate location as the portrait you’re working on and study the lights and shadows of the eyes.
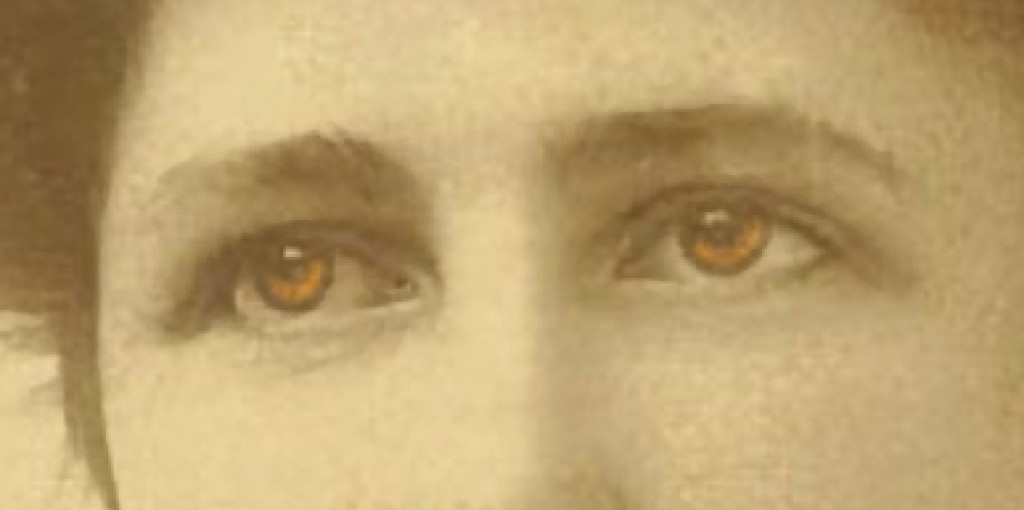
Next, take the Burn Tool, I had it set to midtones and at about 25% opacity, and darken the pupil and the outside rim of the eyeball. I also lined the upper lid – a little digital eyeliner – to give the eye a little more subtle “pop”.

Now we’re going to go back to the Dodge Tool, same settings as before. Adjusting the brush size as needed, lighten the catch lights. Also, and with a very light hand, lighten the whites of the eyes, paying particular attention to the area closest to the eyeball, not as much in the shadows.

All that’s left to do now is to bring it down! Lower the opacity to around 40%. Try a little more and a little less. See what works for you. Just remember, in this case, less is more! You want to recapture some life in the eyes, not have the subject look like they were in a glamor ad campaign! Continue with your regular restoration.

Putting a little glamor into your old photo restoration can really bring your photos back to life!

Where to find more from Janine


Hi! I was surfing and found your blog post… nice! I love your blog. 🙂 Cheers! Sandra. R.