Filtering a Video Clip with Photoshop Extended
Photoshop’s filters are pretty powerful (and certainly diverse). Knowing this, you may find yourself wanting to apply a filter to a video clip. This is very possible, but there’s a specific workflow you must follow.
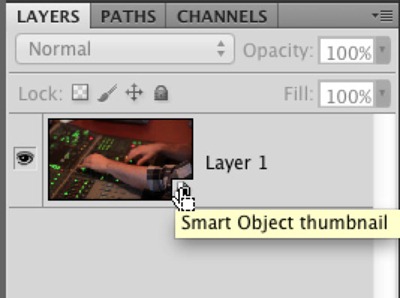
First, you must use Photoshop Extended to open a video clip. Other versions of Photoshop can’t do this task. If you run a filter on a video clip on its own, the filter will only apply to the current frame. This is why you must convert the video layer into a Smart Object. You can create Smart Objects by choosing File > Place or by choosing Filter > Convert for Smart Filters. Remember, a Smart Object embeds the original content of the layer inside the Smart Object.
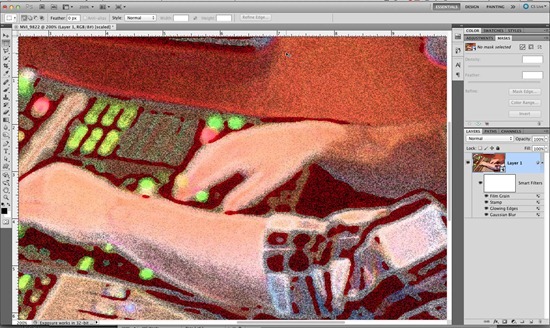
Any filter applied to a Smart Object is applied as a Smart Filter. The names of the Smart Filters appear in the Layers panel directly below the Smart Object they have been applied to. Smart Filters can be adjusted, masked, or removed at any time (even after a document has been closed and reopened). This makes the use of Smart Filters essentially nondestructive but can slow down your system if you’re working on high-resolution images.
Let’s practice with Smart Filters, you’ll need a video clip:
1. You must use Photoshop Extended which has the ability to open video clips.
2. Choose File>Open and navigate to a .mov file (or other format supported by Apple QuickTime). Click OK to dismiss the non-square pixel warning if it displays.
3. Choose Filter>Convert for Smart Filters and click OK to dismiss a dialog box (if it opens).
4. Apply any filters that you desire. The video clip is treated as a Smart Object (however the video file inside is linked, as opposed to embedded). For best results, store your Photoshop file and source video clip in the same folder and transport them together. Be sure to take advantage of blending modes for filters by clicking the double arrow next to the filter’s name in the Layers panel.
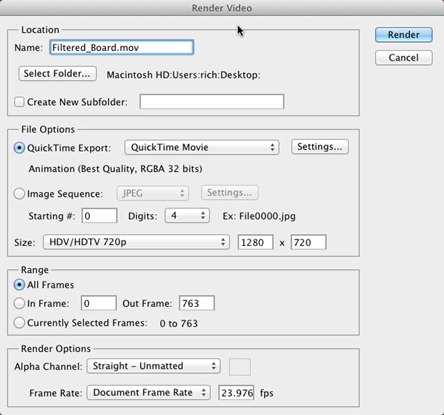
5. When finished, choose File > Export > Render Video to generate a new QuickTime movie. You’ll have to manually set export settings to write the correct file.
• Enter a name for the video in the Render Video dialog box.
• Use the Select Folder button to specify a location to save your video.
• Under File Options, specify QuickTime Movie and click the Settings button and specify the export settings. You can use any codec on your system and match your video editing tool of choice.
• Specify a Range to render. You can choose All Frames, specify a range, or use the Work Area.
• Specify a Frame Rate for your footage. Be sure to match the original settings.
6. Click Render. Photoshop writes the file to disk and it is ready to use by another video application.


Leave a comment