
Exposure Blending with Smart Objects
Last week, we looked at creating copies of Smart Objects in Photoshop, and we saw that regular copies are linked together in a special way such that when you update one Smart Object, you update ALL the copies of Smart Objects. We put this principle to work in creating a Picture Package template that was completely reusable.
This week, we’ll ask the question once again: When is a copy not a copy? When it is a copy of a Smart Object! We are going to create Smart Object copies in a such a way that they are completely unlinked, independent and separate, and each of these copies will be able to be changed without impacting the other.
Let’s start with this image of a Royal Tern fishing. In this case, we want to have our subject be as sharp and well-defined as possible, while we try to completely avoid sharpening the sky – as that will emphasize the noise inherent in the blue channel:

Please note that these images are resized to fit within this page’s width – but you can and should click to enlarge to see the details we are discussing.
We’ll go ahead and open this from Bridge CS5 by highlighting the file and pressing Ctrl-R/Cmd-R to open the image in Adobe Camera Raw. In the ACR dialog box, I’m faced with a dilemma: I want the bird to be sharp, but sharpening creates very visible noise in the sky:

The new luminance noise reduction features in CS5 work wonders on the sky, but even with detail protection active, the bird’s body is turned into a blotchy mess when we crank up the noise reduction:

Within ACR is a great feature, the Adjustment Brush, that provides great control over many parameters and lets you paint in the effect where you please. However, the Adjustment Brush (at least in the latest version) can’t control the noise reduction setting. We need a way to develop this RAW image twice – once for the sky, and once for the detail – and Smart Objects will provide the means.
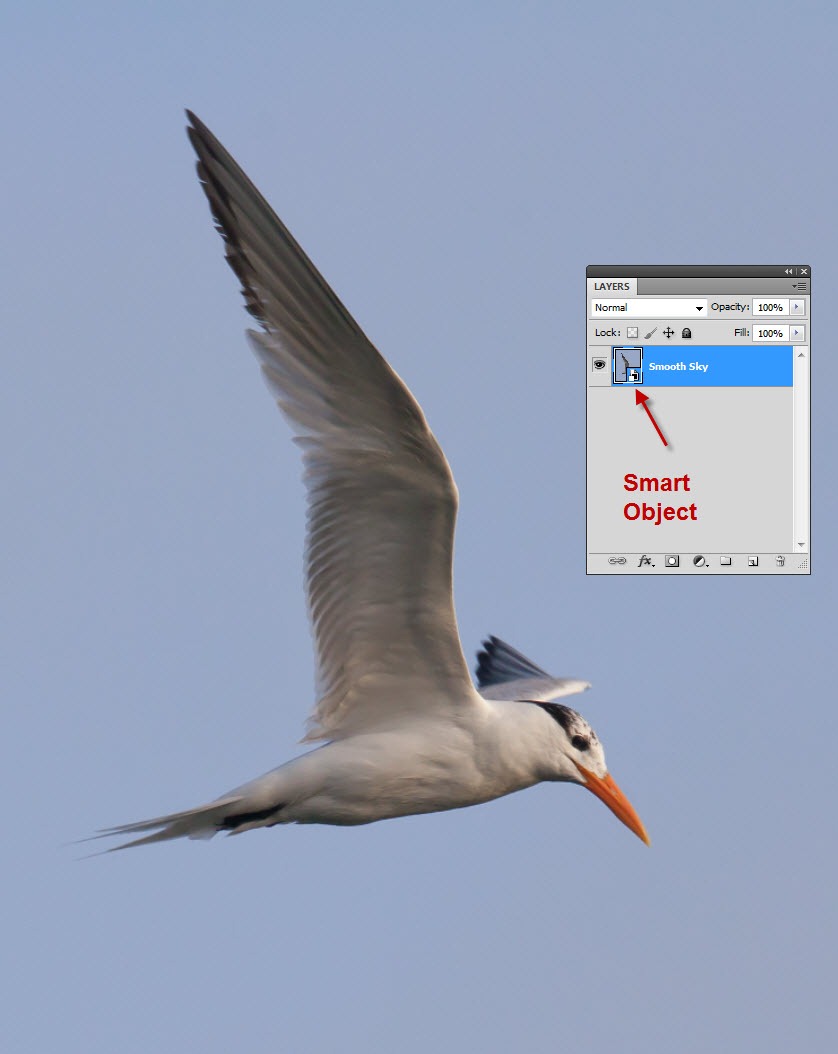
Let’s leave the noise reduction up, and open this as a Smart Object in Photoshop by holding the Shift Key, and clicking “Open Object” in the ACR dialog window. The Smart Object is prepared and appears in the Layers panel, identified with the Smart Object “package” icon. I’ve renamed this layer “Smooth Sky:”

Now, we need to make a copy of this Smart Object and change the develop settings to sharpen for the subject, the bird. However, as we saw last week, copying a Smart Object creates a “live link” between the two layers, so any changes made to one are seen in the other. Unless…
The answer is to copy using a different command. Select the following command:
Layer > Smart Objects > New Smart Object via Copy

This will create a brand new, unlinked, completely independent Smart Object. I changed the name of this one to “Sharp Bird:”

Now, we choose the Sharp Bird layer, double click the icon to re-open the image in ACR, and change the settings to sharpen the detail of the subject, ignoring the sky:

Now, add a black layer mask to hide this entire layer, by holding Alt and clicking the “Add Layer Mask” icon, or by choosing Layer > Layer Mask > Hide All. Then, using a white brush, paint back in the sharp areas of the bird, focusing especially on the eyes, beak and feather detail:

You can, of course, get as ambitious as you want in creating the mask for the sharpened layer, even going as far as to create an edge mask to reveal sharpening only in the areas where there are well-defined edges (but that’s a topic for another Tip). Be careful to avoid letting any of the sharpened area of the sly show, you may need to go back in and touch up any areas that spill over. Here are the final results:
Smooth sky, blurry subject:

Sharp subject, noisy sky:

Combination using two Smart Objects and a layer mask:

Now you’ve seen two ways to create Smart Object copies – one, maintaining the link between the copies, and today, this technique, which severs the link and allows complete independence. Give it a try and see what you can do!


Leave a comment