Exporting Multiple Images from Lightroom
Over the past two weeks, I’ve presented some tips on exporting multiple images from Adobe Bridge using Image Processor and the Bridge Export Panel. However, some photographers among you might be thinking to yourselves, “but Mike! I’ve spent the past few years migrating my photography workflow over to Lightroom! Are you telling me that I have to go back to Bridge in order to mass export files?” Not to worry! As we’ll see today, not only is Lightroom capable of exporting batches of files, it can do so elegantly and powerfully, with a great deal of flexibility in output.
Note that in a previous tip I covered the Lightroom Publish Services. While you can export files to a hard drive using the Publish Services, the intent is different. Publishing implies an ongoing management of the published files (maintaining status, adding and deleting), while exporting images is an open ended affair: you can export at will, and need not concern Lightroom with what happens to the images after export.
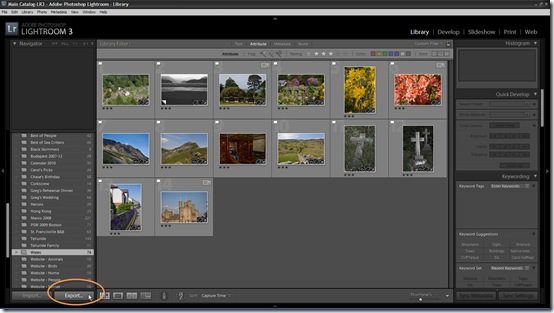
We can start by selecting a group of images to export, then choosing from the menu File > Export… or clicking the Export… button in the left pane of the Library module:
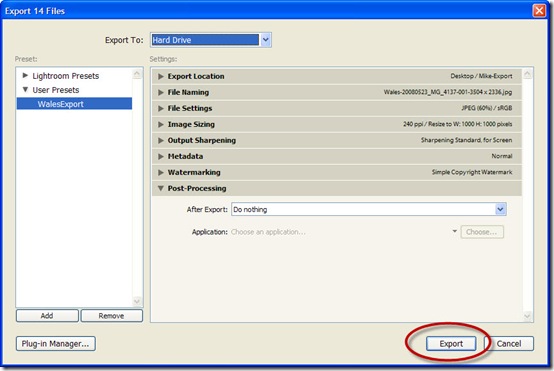
This brings us immediately to the Export dialog box. As you look at the export dialog, it is important to note that the options in this dialog extend below the visible area – you will need to use the scroll bar to see all the content. Note also that each section of the dialog may be open or closed using the triangle icons next to each section.
For those of you who have followed my earlier tips on exporting from Bridge, the sections of this dialog box may be familiar. However, let’s step through them one at a time, to see just how much flexibility is contained within this Lightroom utility. We’ll take each section separately.
Export Location:
In this part of the dialog, we can specify where the files will be placed on export. In addition to several standard system locations (such as desktop or pictures, you can also specify the original folder, or opt to choose folder later (which is a flexible way of working if you choose to save the settings as a preset).
In addition to specifying the output folder, you can optionally specify a sub-folder in which to place the output files.
Not that there is an option to Add to This Catalog. I recommend using this with caution. Adding your exported files to LR’s catalog implies that you’ll be managing the resulting files in Lightroom, something which you might not intend. For example, if you check this option and then move or delete the files later outside of Lightroom, you’ll end up with a lot of broken links in your catalog.
Finally, notice that there is an option for graceful handling of existing files. You can simply overwrite the existing files (no warning is given!, you can create a new unique filename on the fly, skip any existing files, or you can have LR ask you when it encounters existing files. Very flexible!
File Renaming:
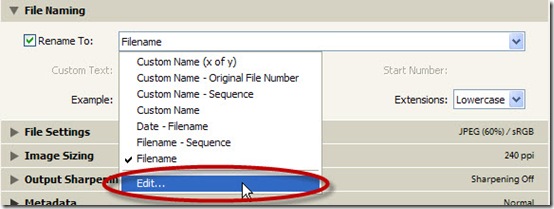
The next section relates to assigning file names on export. As you can see, there are quite a few pre-formatted options available, but the real power comes in when you choose Edit…, which brings up a custom name formatting dialog box:
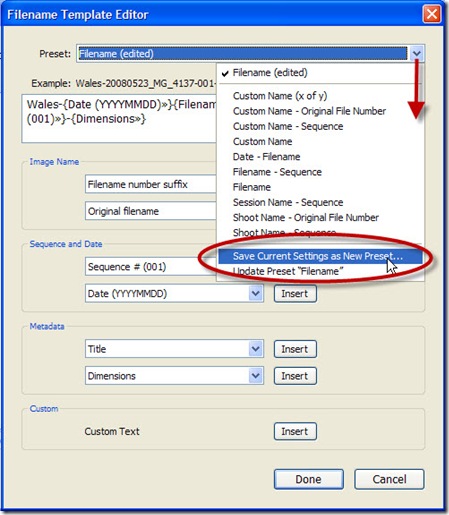
In the Edit dialog box, you can use the expression builder to create almost any conceivable combination of custom text and file attributes. Simply pick the attribute you want and click Insert and the expression is added. You can type directly into the expression box as well (as long as you don’t change the items within the curly brackets { }. Note that such parameters as :dimensions” refer to the original file dimension, not the exported size:
Once you’ve created a filename format, you can save this as a preset for future use:
Besides the options for renaming of the files, you can also specify a starting number for the sequence (if you don’t want it to start at 1) and can specify upper or lower case extensions for the file:
File Settings:
Here is where the real power starts to come in. We can specify file format, and for each format there are individual options related to that file format. For example:
Save as PSD:
In this case, we can specify the color space as sRGB, AdobeRGB, or ProPhotoRGB. We can also specify the bit depth as 16 bit or 8 bit files on export.
Save as JPEG:
With JPEG, as you might expect, you have settings for quality (how much will the JPEG be compressed). This setting ranges from 0 to 100. As with PSD, you can specify the color space, but be careful – anything other than sRGB may result in odd color shifts if you’re viewing these images in applications that don’t honor color profiles.
With JPEG< you also have the ability to limit file size to a maximum. This overrides the quality setting.
Save as TIFF:
With TIFF, you can set the compression to None or to use ZIP compression. As with PSD, you have a choice of color space for output, and can set the bit depth to 8 or 16 bit.
Save as DNG:
When exporting, you can save in Adobe’s Digital Negative (DNG) format, an open standard for camera raw data. With DNG, you must specify the camera raw compatibility version, and can specify the quality of the JPEG preview that is embedded in the DNG. You can also opt to embed a copy of the original proprietary camera raw file (Canon CR2, Nikon NEF, etc) within the DNG file.
Save as Original:
Saving as original exports an exact copy of the original file. There are no options for this format.
Image Sizing:
Choosing any of PSD, TIFF or JPEG will allow you to specify the dimensions for the exported files. Checking the Resize to Fit dialog box will allow you to specify several very flexible options for determining the size of the resulting files:
- Width & Height: This will resize the file to fit within the specified width and height, while keeping the aspect ratio intact. Specifying 600 x 800, for example, results in a portrait orientation image of 600 x 800 or a landscape image of 600 x 450.
- Dimensions: Applies the higher value to the longer edge of the photo and the lower value to the shorter edge regardless of the photo’s original aspect ratio. Specifying 400 x 600, for example, produces a 400 x 600 portrait photo or a 600 x 400 landscape photo.
- Long Edge and Short Edge: Applies the value to the long or short edge of the photo and uses the original aspect ratio of the photo to calculate the other edge.
- Note: The long edge of an exported photo cannot exceed 65,000 pixels.
- Megapixels: Sets the number of megapixels and resolution (in dots per inch) of the exported photo.
If you check Don’t Enlarge, images may be resized smaller but will not be resized larger.
Output Sharpening:
Enable this option to take advantage of Lightroom’s excellent sharpening engine. Note that this option is only available for TIFF, JPEG or PSD.
You have the option to sharpen for viewing on screen, or for glossy or matte photo paper. You can also specify the amount of sharpening as Low, Standard, or High.
Metadata:
In this section, you can control the metadata that is exported with the images. Minimizing the metadata will remove all metadata except for the copyright fields. Writing keywords as a Lightroom Hierarchy will create a list of parent/child keywords separated by a vertical bar (i.e. Countries | China | Beijing).
Watermarking:
With Lightroom 3.3, the watermarking capability is greatly improved, and the Export dialog allows access to the new watermark functions. You can choose from a Simple Copyright Watermark, or a custom watermark that you’ve created (but, that’s a separate tutorial!)
Post-Processing:
After exporting the files, you can instruct Lightroom to perform any of several actions. You can have LR open an Explorer window (Mac: Finder window) in the folder, you can have the exported files automatically opened in Photoshop or any additional editor you’ve configured within LR, or you can choose Do nothing.
Saving the Export Settings as a Preset:
Once you’ve made all your choices in the various sections described above, you have the ability to save the settings as a preset. Using the preset in the future will save time in setting up all these parameters – you only have to do it once.
Click Add to create the preset, give it a descriptive name, and decide in which folder to place it. You can choose the generic User Presets or create new folders of your own.
Exporting the images:
Once you’ve set all the settings, with your images selected, you’re ready to export. The process itself is quite simple – just click the Export button:
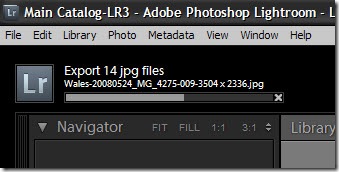
Lightroom will run the export job in the background, leaving you free to move on to other more interesting tasks:
Once the export job is complete, the files are deposited in the folder as specified, resized, renamed, and in the desired file format.
So, there you have it – all of you Lightroom users can now export files with great ease and capability right from within the center of your workflow – the Lightroom Library. As with so many other Lightroom tasks, there’s no need to leave the program to do what you need. I hope you enjoyed this tip!








Leave a comment