Export multiple JPEG files with the Bridge CS5 Export Panel
Last week, we examined Bridge CS5’s capability to export multiple files with the Image Processor script. We found a powerful utility, but one that had a few shortcomings. In today’s tip, we’ll take a look at Bridge CS5’s Export Panel, and we’ll find some new capabilities, including the ability to perform the following tasks while exporting files en masse:
- Files can be resized with a variety of resampling algorithms;
- Metadata can be added or deleted on export, including adding keywords or applying metadata templates;
- Multiple jobs can be queued for running in the background without tying up Bridge or Photoshop;
- Existing files can be handled gracefully.
We’ll see all this and more as we step through Bridge’s Export Panel.
Prerequisite: Adobe Bridge CS5 version 4.0.2 or later
To start with, check your Adobe Bridge CS5 version (click on Help > About Bridge…) and make sure you are using at least version 4.0.2.x (better yet, the current version of 4.0.4.2, as of this writing) – the earlier version that originally shipped with CS5 had an error in which the Export Panel was disabled. If you need to update, you can choose Help > Updates… from Bridge’s menu.
Using the Export Panel
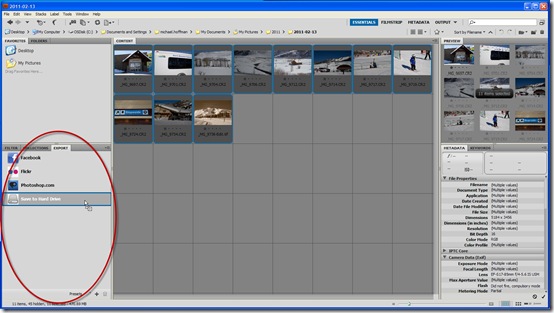
Once you have verified you are running 4.0.2.x or later, go ahead and open the Export Panel. You can find this panel in the lower left of the Essentials workspace, or if it isn’t visible, choose Window > Export.
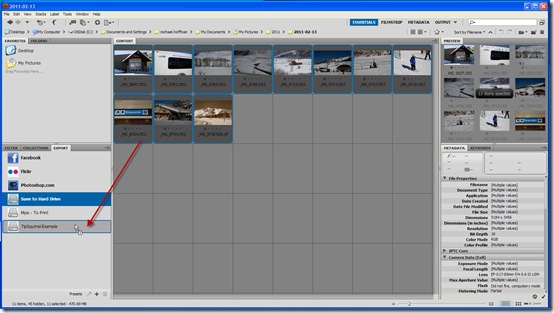
In a past tutorial here on TipSquirrel, I covered exporting to social media sites (such as Facebook) with the Bridge export panel, and this is similar. But today, we will focus on the Save to Hard Drive export feature. To start, simply select a bunch of images, and drag and drop them on the preset as shown:
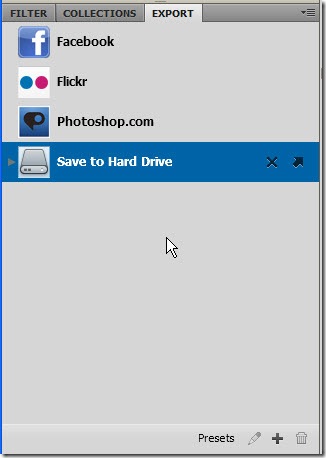
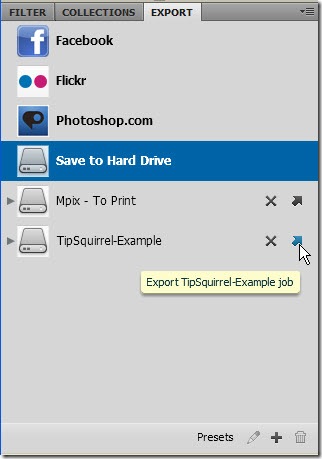
Once you have dragged at least on image onto the export preset, the panel changes – some new icons are added, indicating that an export job is in the queue:
Once files are queued, simply click the black arrow pointing up and away, and the export job will begin:
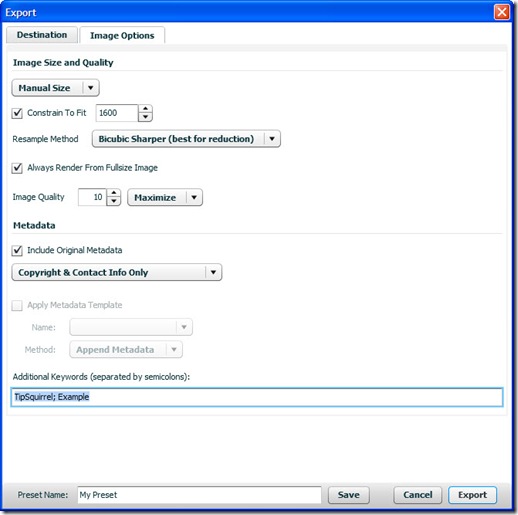
However, the generic Save to Hard Drive export preset has no parameters of its own, so we get the Export dialog box. We set our parameters here:
Some of these options should be quite familiar – we saw some of this last week in the Image processor script. But, there are some new ones as well. The options in the Destination tab include:
- Export either to the original location, or to a specific folder (and optionally to a subfolder)
- Specify how to resolve naming conflicts for existing files. You can rename the files, overwrite existing files with the same name, or skip the file when you export.
In this case, I’ve directed the files to a folder on my desktop called, “TipSquirrelExample” and I’ve asked Bridge to rename to a unique name if there is already a file in existence with the same name.
Notice the second tab, for Image Options:
Again, there is some similarity to Image Processor, but some new features here as well:
- Choose Don’t Resize, or Manual Size if you want to change the size
If you choose manual size, you have additional options:
- Constrain to Fit: Enter the maximum dimension of the longest size of the image. Aspect ratio is maintained, but the image will be reduced to fit within this dimension.
- Resample Method: choose from three methods: Bilinear, Bicubic, and Bicubic Sharper. I tend to use Bicubic Sharper since I’m usually reducing the image size. You can consider Bilinear to be “medium” quality, and Bicubic to be “lower” quality.
- Always render from Fullsize image: I honestly don’t know why this is even an option. Please always select it!
- Image quality: Can range from 1 to 12; this controls JPEG compression quality.
With the export panel, you also get better control over metadata. If you include the original metadata, you have several choices:
- Include all image metadata
- Include Copyright data only
- Include Copyright and Contact Info data only
- Include all except Camera and Camera Raw info
You can also add keywords to be applied on export; I’ve specified a couple in the example above.
At this point, you can click Export and away you’ll go.
But – there has to be a better way, right? If you know me, you know I’m going to show it to you. We can save this setup as a preset and use it again later. Just type a name for the preset in the text box at the bottom of the dialog box, and click Save.
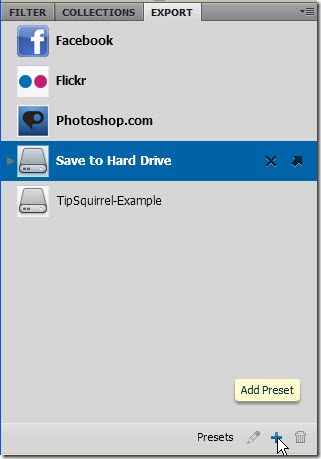
Here I’ve named my preset TipSquirrel-Example, and after saving you can see it in the Export Panel:
Of course, there is an easier way to create these presets as well – you can create them instantly by using the icons at the bottom of the panel. Click on the “+” icon to add a new preset:
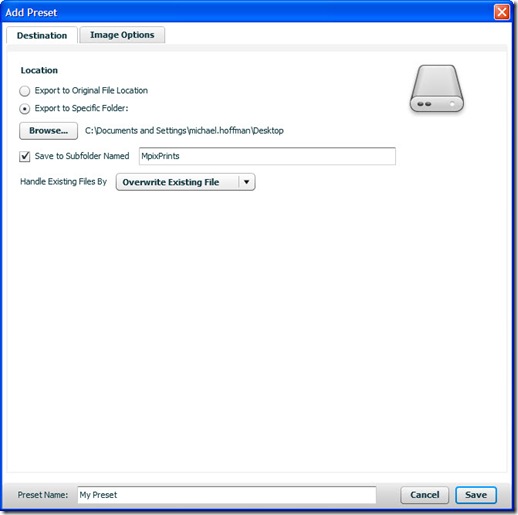
This time we get the same dialog box, but it is called the “Add Preset” dialog this time. We’ll create a preset this time for sending photos to Mpix for printing. We will again start by specifying a folder on the desktop where we want the images to go, and specifying that existing files should simply be overwritten:
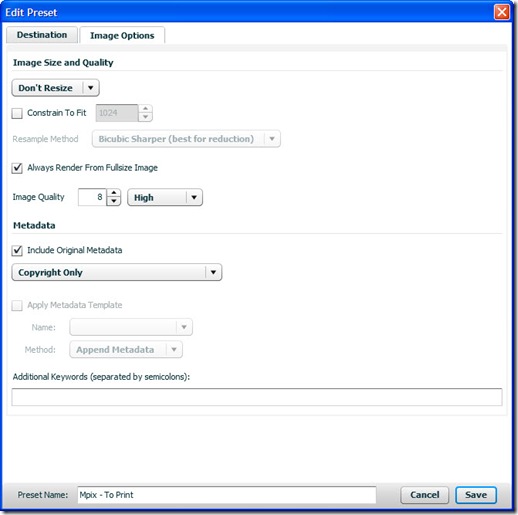
Switching to the Image Options tab, we tell Bridge NOT to resize our images, render from fullsize, maximum quality, and include copyright and contact info only in the metadata:
Giving this preset a name (Mpix – To Print) and clicking save, we see the new preset immediately in the Export panel:
Clearing a job from the queue
Notice our original job is still in the queue for the Save to Hard Drive preset, as evidenced by the export icon. Let’s get rid of it. Next to the export icon is the delete job icon, we can click this to remove the pending job from the queue:
Queuing and exporting multiple jobs
Now, let’s load up our presets with some jobs. First, we drag a bunch of files to the TipSquirrel-Example preset, then drag a couple more files to the Mpix – To Print preset:
Now, we can click one of the export icons, and the selected job will start running.
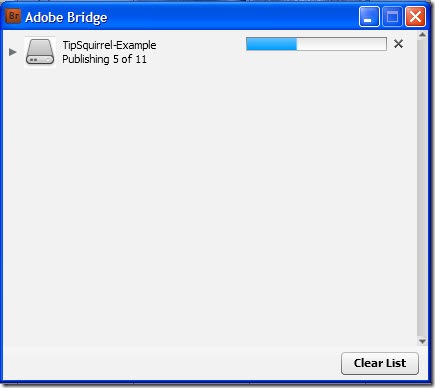
Notice that it runs in a completely separate Bridge window, and you can go back to the original Bridge window at any time:
Clicking on another export job icon launches that export job as well, and each is listed in the export Bridge window:
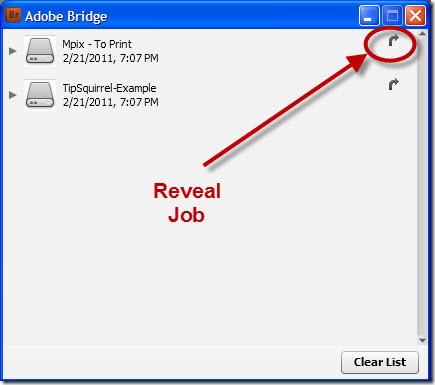
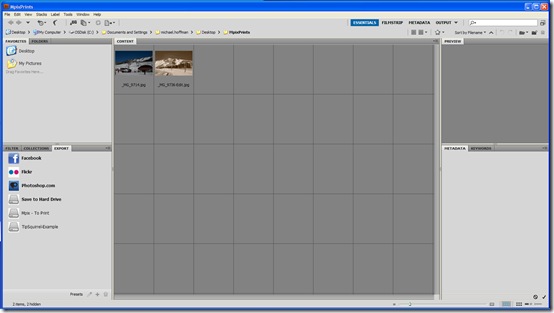
Once the jobs are complete, the progress bar is replaced with a curved arrow, for “Reveal Job.” Clicking this launches a new Bridge window displaying the output folder:
Deleting a Preset
You can delete a preset from the list if you no longer need it. Once again, just look to the bottom of the panel for the trash can icon. Highlight your preset and click the trash can:
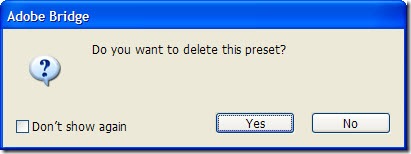
You’ll get a confirmation dialog; clicking Yes removes the preset:
Editing a Preset
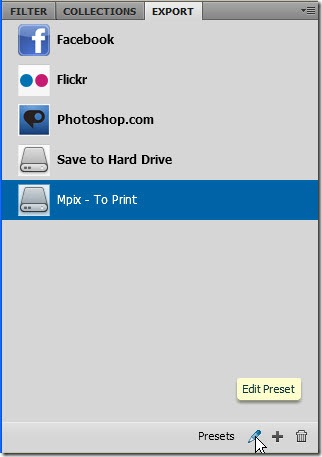
You can also make changes to an existing preset. Simply highlight the preset, and click the Pencil icon,which is the Edit Preset icon:
This brings us back to the same dialog we’ve seen all along, now called the Edit Preset dialog:
Make your changes and click Save. There is another prompt to confirm your changes:
And the changes are saved into the preset for future use.
Summary
Exporting images for various uses is a constant and important part of our workflow. It can be boring and time consuming, but with the tips from last week and this week, you now have some powerful automation tools to speed things up and let you focus more of your precious time on the fun part of your workflow – the creative part!
To recap – Image processor allows you to export multiple images to a variety of formats with plenty of options. The Export panel gives you the ability to export JPEG files only, but with greater control and with the ability to queue multiple jobs with easy-access presets for a variety of purposes.
Either way, the power is in your hands to automate your workflow and make you more productive. So, what are you waiting for? Get to it!













Thank you! It’s good to learn some good uses of Bridge. One question, though. In Elements, there is the option to specify a width, rather than just set a maximum value for the longest side. Is that possible with this method?
Amy, thanks for your comments. Unfortunately, Bridge’s export module only specifies a single dimension that corresponds to the longest side of the image.
If you’re looking for a way to control the width independently from the height, you’ll need to use the Image Processor. My turorial (linked) from last week covers this.
mh++
This tutorial was not only very helpful, it was fantastic!
Hi, when I export from Bridge CS5 all photos are 92dpi. I need 300dpi. How can I make this?
Nadia,
Files are exported with the DPI tag unchanged from the original – if your exported photos are tagged with 92dpi, that’s because your originals are also tagged with 92dpi.
Fortunately, the dpi setting means nothing to the file itself, the only time it is used is if you place it into a page layout program. Changing the dpi has no effect whatsoever on the image itself.
You’ll need to change your dpi to 300 on the source images, you could do that with an action. You can do this prior to exporting, or you can use Image Processor instead of Bridge’s Export – Image Processor can allow a script to run during export.
mh++