Editing Eyes in Lightroom
One of the things I love about Lightroom is the flexibility of the Adjustment brushes. Most people know how to dodge or burn an area of the photo with these adjustment brushes but are maybe unaware of the benefits such as clarity, contrast and saturation. Today I would like to demonstrate a subtle edit to improve the look of eyes in an image. Today’s model Mirja has amazing blue eyes that really catch the light, but in this photo, I think they could do with a little boost to show them off to their best.
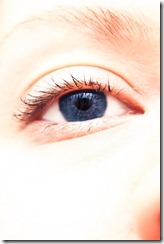
The first thing I notice in the image above is that Mirja’s eye is lacking the detail and vibrance that appears in real life. In the develop module I load up the adjustment brushes and I want to use an pre-set that I have created earlier.
NB! to create your own pre-set use the settings above and click the ‘Effect’ drop down box and save current settings as a new pre-set.
With the settings above I paint over the pupil & iris as below
This will brighten the pupil & iris, adding some contrast, clarity and saturation. Feel free to adjust each image according to your own tastes, but I try to keep the changes very subtle.
Next I want to add a little more definition to the eyelashes, so using the same technique I have created a pre-set called clarity. Choose a new brush and select the clarity pre-set.
Now I will paint over the eyelashes to give them a little more punch and sharpness.
I can now see that the whites of the eye are a little too pink due to the warm white balance of the image, also the whites are a touch too dark. To correct this I create another pre-set that lightens and slightly desaturates.
Painting this new brush onto the whites of the eyes as shown
The changes made in this image are meant to be very subtle yet make all the difference to the final image. One piece of advice I’d give is do not over edit the eyes as this can be very noticeable and quite unnatural.
The original image and final image are shown to highlight the difference these edits have made.
I hope you have enjoyed this tutorial and that it has helped you. Please feel free to comment or ask questions below and I shall be happy to answer them if I can.


Another very good trick, and very handy!
i did not know such corrections was possible in Lightroom.
i thought this kind of things was only for Photoshop or other sofisticate Photo editing software
many many thanks for this excellent & useful tutorial 🙂
Thank you both for the feedback, Lightroom is pretty good for a lot of local adjustments but is not quite as powerful as Photoshop.. where I feel it beats PS is in the speed of workflow
Cheers Scot
Thanks so much for this tutorial – excellent!